Image-based Backup for Unmanaged OS
One can manage Backup & Restore coverage for Virtual Machines and perform backup or restore actions.
Functionality
Change Backup Policy
The action Change Backup Policy of a Virtual Machine allows to read and change the currently defined backup policy for Imaged-based backups (IBB) of that particular Virtual Machine.
- To read the values, you just have to call the action Change Backup Policy without submitting it. The values shown do reflect the currently defined backup policy for upcoming IBB backups of that Virtual Machine.
- To change the values, you have to submit the action Change Backup Policy as follows:
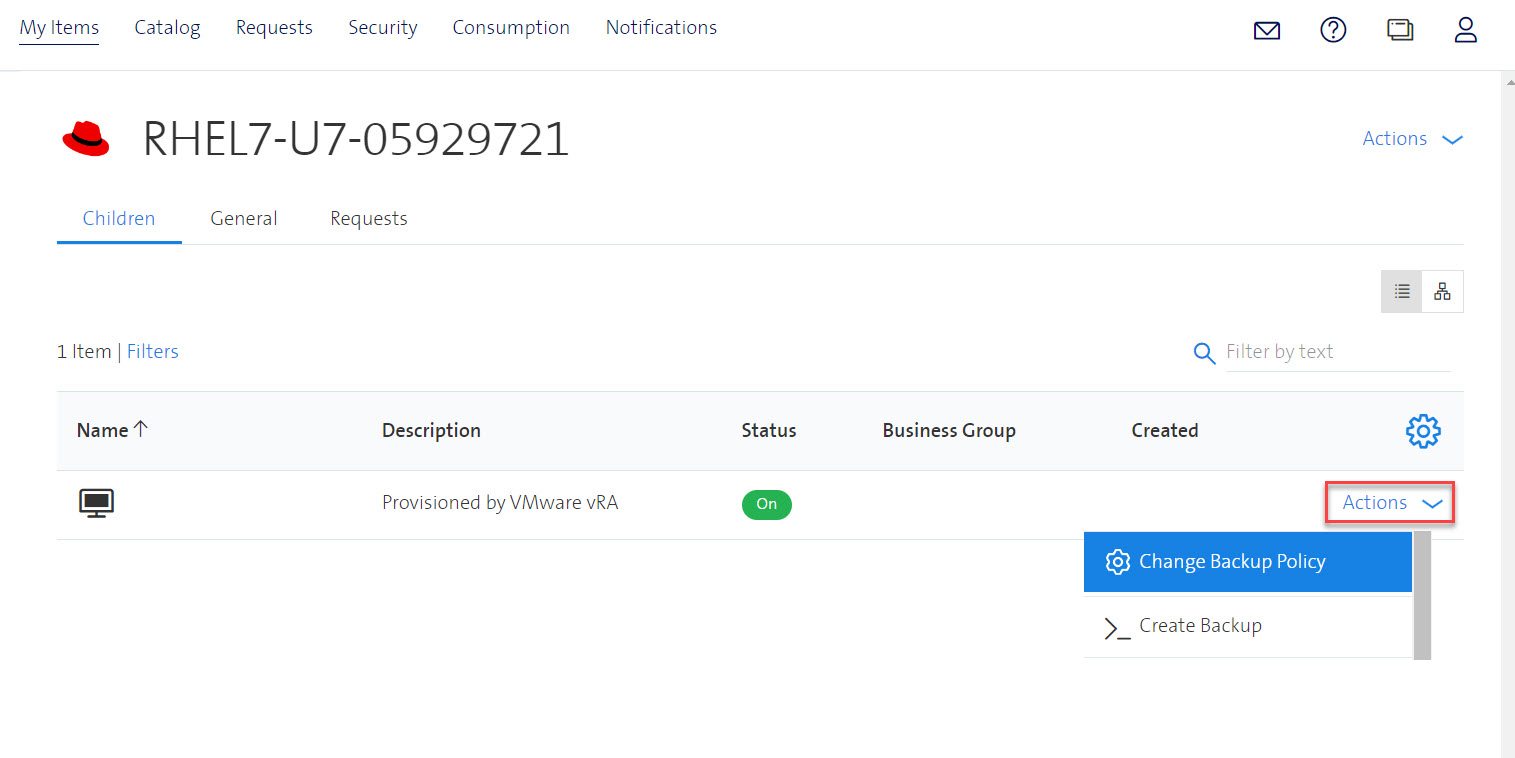
Go to the Portal
Click the Deployment
Click the Virtual Machine
In Actions select Change Backup Policy
Set the value of Backup Policy, Backup Retention, Replication and Backup Archive to S3
- The meaning of each selectable value is described below.
- Note that as long as the value of Backup Policy is set to Disable, Backup Retetion, Replication and Backup Archive to S3 do not make sense and are not shown. If you change the value of Backup Policy to a value different from Disable, the Backup Retention dropdown field will show up. If the Service Level of the VM is Basic or Standard the Replication checkbox will show. (Note: The Replication option is not available to all tenants.) Backup Archive to S3 is available for all tenants and VM Service Levels.

- Click on the button Change Backup Policy to submit the request.
Backup Policy
Backup Policy defines the following basic settings for IBB backups of the given Virtual Machine:
| Backup Policy | Description |
|---|---|
| Disable | No additional backups will be created (neither manually with Create Backup, nor automatically). |
| Enable | Standard IBB backups will automatically be created and it will be allowed to manually create on-demand backups with action Create Backup. |
| Enable-Quiesced | Same as Enable but the backups are more consistent IBB backups. For more details see here. |
Backup Retention
Backup Retention defines additional settings, namely the
- retention time which will be assigned to upcoming, newly created IBB backups of that Virtual Machine
- backup schedule which defines how often automatically new IBB backups will be created in case the Backup Policy is not Disable.
Backup Retention is an optional setting. If you do not set it, its default value of 30 Days is applied.
| Backup Retention | Retention time | Backup Schedule |
|---|---|---|
| 7 Days | 7 days | Every day |
| 14 Days | 14 days | Every day |
| 30 Days (default) | 30 days | Every day |
| 90 Days | 90 days | Every day |
| 365 Days | 365 days | Once per week |
The following examples should help to understand these settings better.
If a particular IBB backup has a retention time of 7 days, the backup can be used in the actions Restore Data, Restore to New, Restore File or Folder for 7 days after the creation of the backup. The precise end of the retention time of a given backup is shown by the action View Backup Status for the last ten backups. After these 7 days, the backup will automatically be deleted and can not be used anymore.
Assume you change with the action Change Backup Policy for a given Virtual Machine the Backup Retention at the same day three times in a row, say to 7 Days (at 1 p.m.), 14 Days (at 4 p.m.) and to 90 Days (at 11 p.m.) and assume that the automatic backup at this day is taken at 8 p.m., then
- a manual backup created by the action Create Backup at 2 p.m. will have a retention time of 7 days,
- the automatic backup (created in this case at 8 p.m. the same day) will have a retention time of 14 days,
- and if you do not do other changes, automatic backups will be created every following day with a retention time of 90 days.
Replication
The users can control if they want the VM to be protected in a remote or localremote Protection group. If the Replication option is selected the VM will be protected in a localremote Protection group (backups will be kept on both cluster locations - local and remote). If the Replication option is not selected (default) the VM will be protected on the oposite cluster location only in a remote Protection group. Replication option is available for VMs with Service level Basic and Standard. VMs with Service level Advanced are always protected in localremote Protection groups.
Backup Archive to S3
Cohesity CloudArchive first backs up your data onto a Cohesity cluster and then copies your backups to an S3-compatible object storage. This options is available for all VMs regardless of their Service Level.
Notes
Immediately after you change the Backup Retention from, say 30 Days to 365 Days, you will get no additional automatic daily backups any more. However, from when on you will get the automatically created weekly backups depends on the exact date at which the weekly backups are scheduled for this Virtual Machine. In an extreme case when you change right after the check for the weekly backups happens you might get no automatic backups in the first week until the next check for automatic backups with a weekly backup schedule occurs. Of course, with action Create Backup you could create an initial backup with Backup Retention set to 365 Days if you want to be sure to have an initial backup in the first week. Also, you always can check with action View Backup Status whether or not the weekly backups (with a retention time of 365 days) have been created.
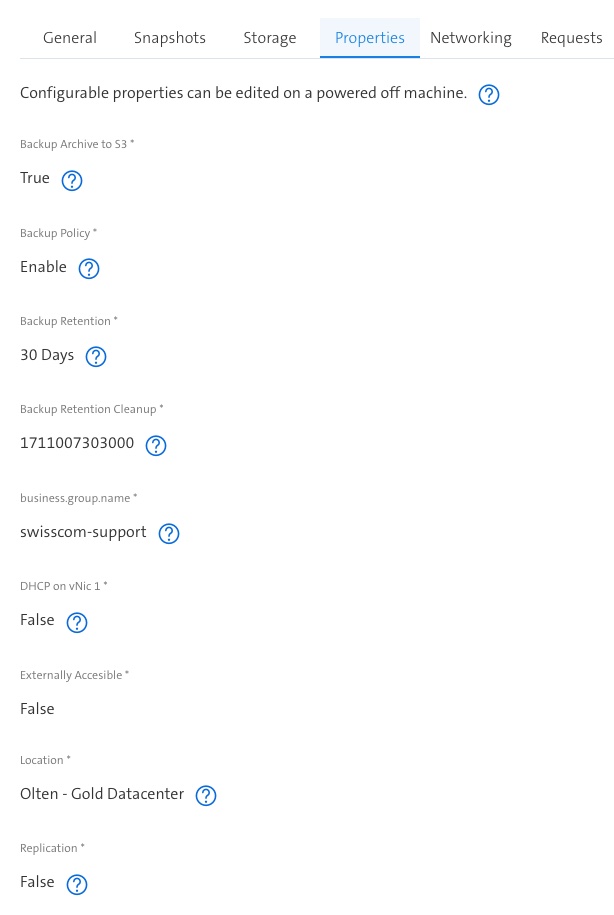
Apart from by using Change Backup Policy, the current values of Backup Policy and Backup Retention can also be seen by looking at the corresponding Virtual Machine Properties. Note however, that the custom properties which reflect the value of Backup Policy and Backup Retention are not configurable which means that they cannot be changed via the action Reconfigure.
To see the Virtual Machine Properties do:
- Go in the Portal
- Click on the Deployment
- Click on the Virtual Machine
- Go into the tab "Properties"
- If you delete a Virtual Machine, the state of the Virtual Machine will change to Deleted and its Backup Policy will be set to Disable. The Virtual Machine can still be activated again with the action Restore Data as long as there are Image-Based Backups (IBB). After the last backup is deleted the Virtual Machine will be permanently destroyed and a restore is not possible anymore. Note that this implies for a value of Backup Retention of 365 Days that a deleted Virtual Machine will not automatically be fully destroyed for roughly 1 year until the 365 days retention time of the last backup will have expired.
Create Backup
Use Cases
With each submit of this action, a user requests to create immediately an additional Imaged-based backup (IBB). With such an IBB backup, for example,
- a deleted Virtual Machine can be restored (see action Restore Data)
- hard disks can be restored to the Virtual Machine (see action Restore Data)
- single files or folders can be restored to the Virtual Machine (see action Restore File or Folder)
- a new, additional Virtual Machine can be created (see action Restore to New)
More Details
Additional Imaged-based backups (IBB) can be created ad hoc by submitting the action Create Backup subject to the following conditions:
Policy
The newly created backup will have the same policy as you can see when you click on the action Change Backup Policy.
For example, if Change Backup Policy shows as current Backup Policy the value Enable or Enable-Quiesced then the VM is protected and a backup can be created.
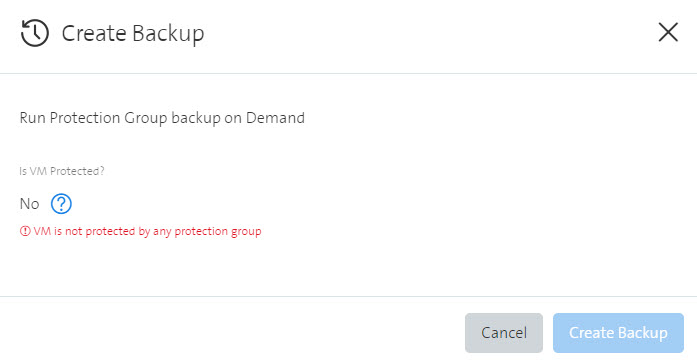
Contrarily, if Change Backup Policy shows as current Backup Policy the value Disable then the VM is not protected and the action Create Backup cannot be submitted in the Portal as no backup can be created with the Backup Policy set to Disable.
In this case, however, you easily can first submit the action Change Backup Policy and request to set the Backup Policy to, say, Enable and thereafter you submit the action Create Backup.
Note that Change Backup Policy defines also the retention time of the backup which is by default 30 days. In this case, the backup can be used for 30 days and will be deleted thereafter.
Backup type
- The type of the created backup (full or incremental) cannot be defined by the customer. It will automatically be defined by the backend backup server. Typically, the very first backup of a VM will be of type full (independent whether or not it had been created automatically or by the action Create Backup). Typically, all other backups will be of type incremental. You can see the type of the backup with the action View Backup Status.
Usage
- Backups created by Create Backup can be used exactly as the automatically created backups in actions like Restore Data, Restore to New, Restore File or Folder and the last 10 backups (automatically created or created by Create Backup) are shown by the action View Backup Policy.
- Note however that the action Restore File or Folder will only find files and folders if the indexing of the backup has been completed. The indexing of a backup created by Create Backup starts after the request is shown in the Portal as successfully completed. Therefore, restoring files or folders of such a backup might not immediately be possible right after creation of the backup itself. In case this happens, please submit the action Restore File or Folder again at a later time.
- The VM can be Powered On or Powered Off when submitting the action Create Backup.
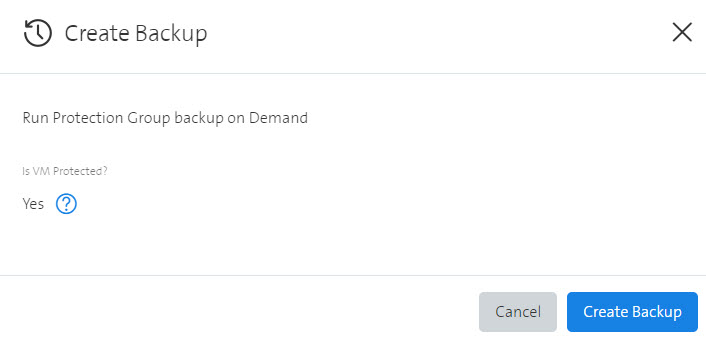
To submit the action Create Backup proceed as follows:
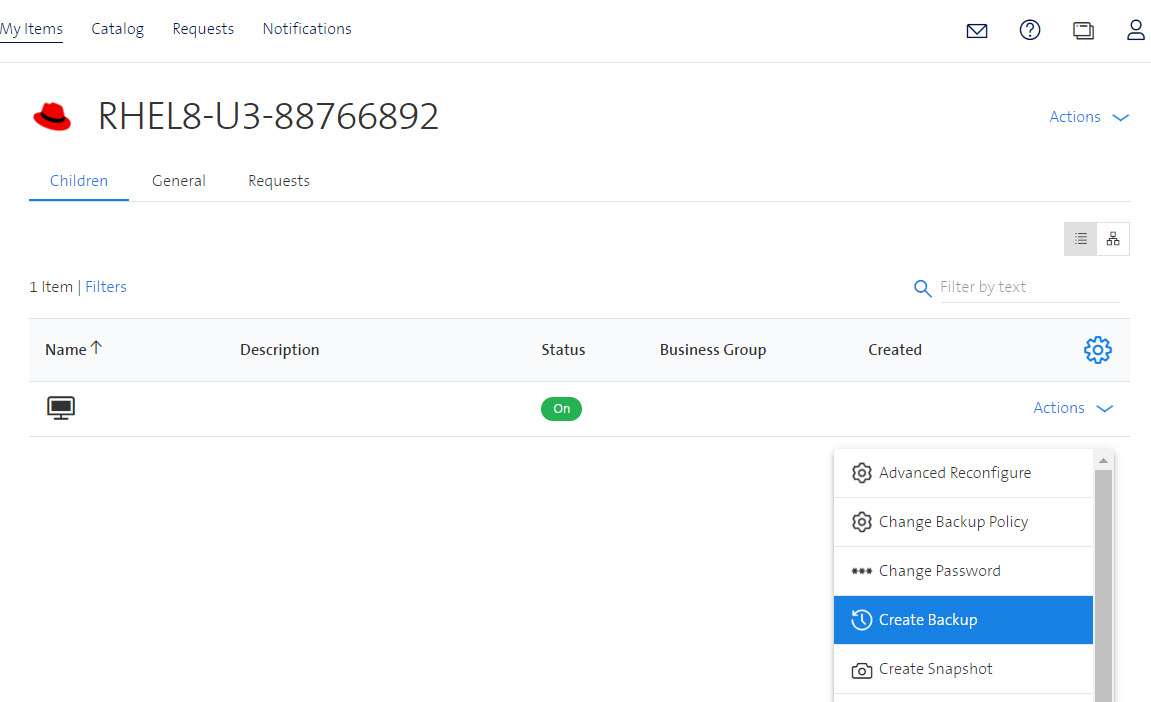
Go to the Portal and select a Virtual Machine in the tab My Items
Click on Actions of that Virtual Machine and select there Create Backup
Click on Create Backup to submit the request
Limitations:
Within the same tenant, all concurrent Create Backup requests might be executed sequentially by the backend backup server. In particular this happens in case
- the VMs have the same Service Level (Basic and Standard will be considered as the same Service Level in this case, but Advanced will be different from Basic) and
- the same settings which you see in the action Change Backup Policy (like when all VMs have the Backup Policy set to the value Enable).
Consequently, if for example a Create Backup request for a Virtual Machine which has a huge disk takes very long to complete other Create Backup requests (even of other users in the same tenant) might time out in the Portal. In this case, please repeat the Create Backup operation later on.
There is no action Delete Backup. Every backup has a limited retention time after which it is automatically deleted. If you need to delete a created backup earlier you have to open a service ticket.
Restore Data
This action allows to restore the hard disks' data of a selected Virtual Machine from an available Imaged-based backup (IBB).
If the Virtual Machine is in state Deleted, this action allows to restore the deleted Virtual Machine from such a backup. Of course, this is only possible if there is an available Imaged-based backup (IBB). Available, here, means that such a backup has been created before the Virtual Machine was deleted and that the retention time of this backup is not yet expired.
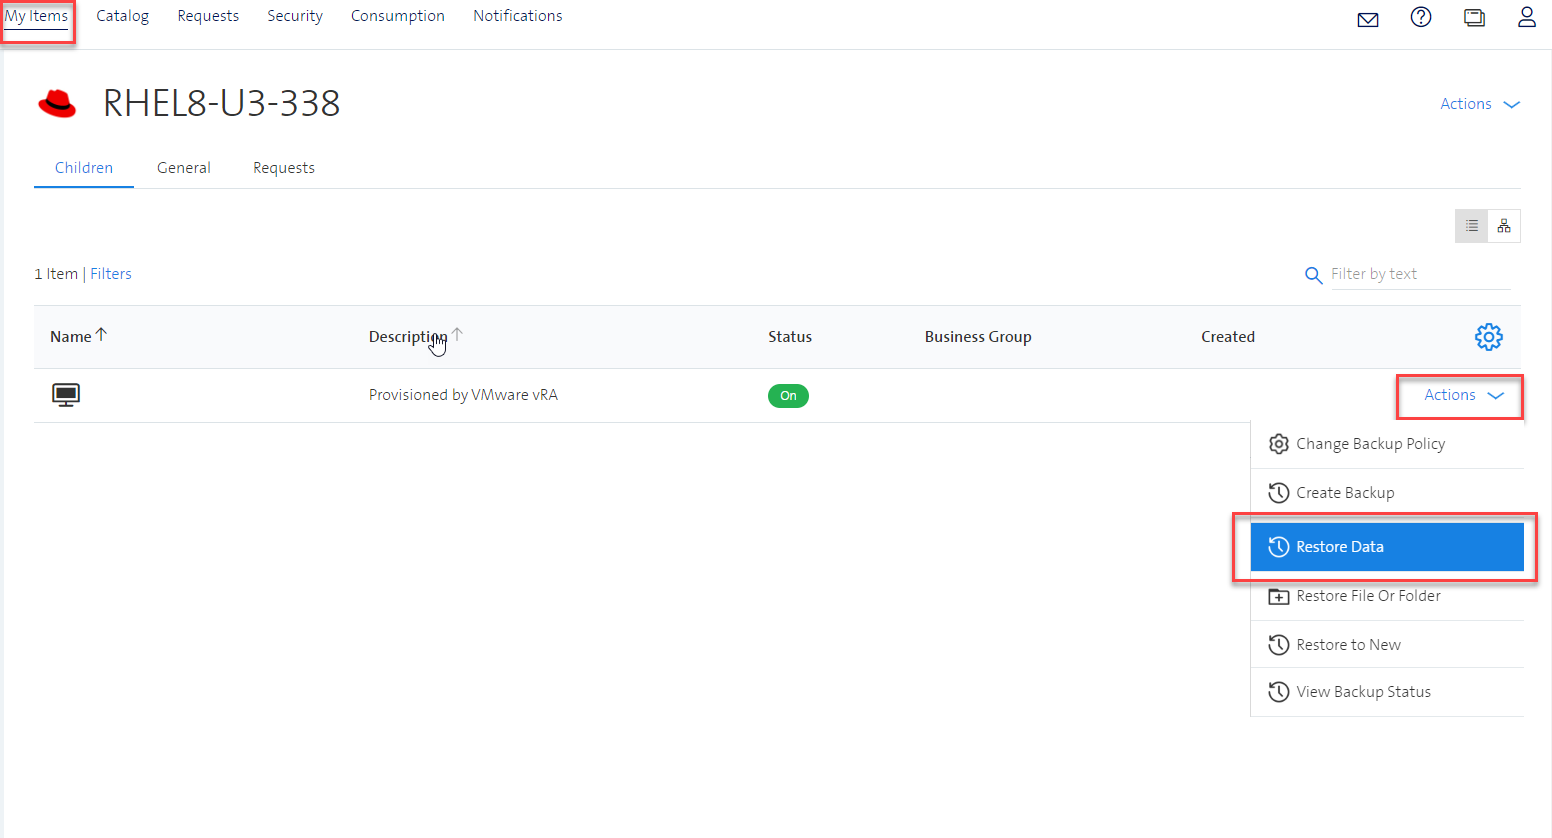
In the Portal navigate to the My Items tab
Select the desired Virtual Machine
Click on Actions and select Restore Data
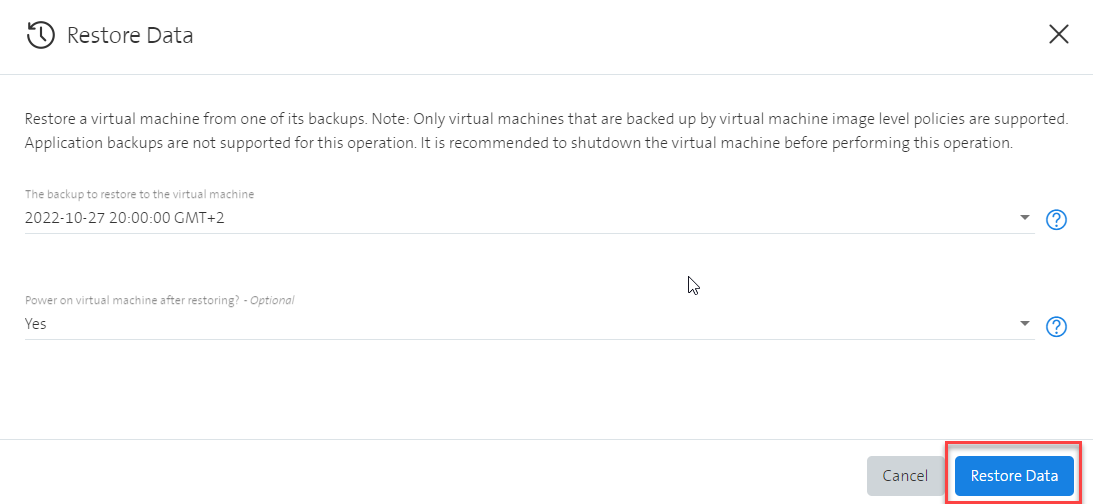
Select the desired backup to restore the machine from
Select whether or not to start the Virtual Machine after the restore operation
Click on Restore Data to submit this request
Restore File Or Folder
The action Restore File Or Folder allows a user to restore one file or one folder (with all its included files and subfolders). It is supposed for smaller file/folder recoveries (soft limit 10 GB). Note that the Virtual Machine must be powered on.
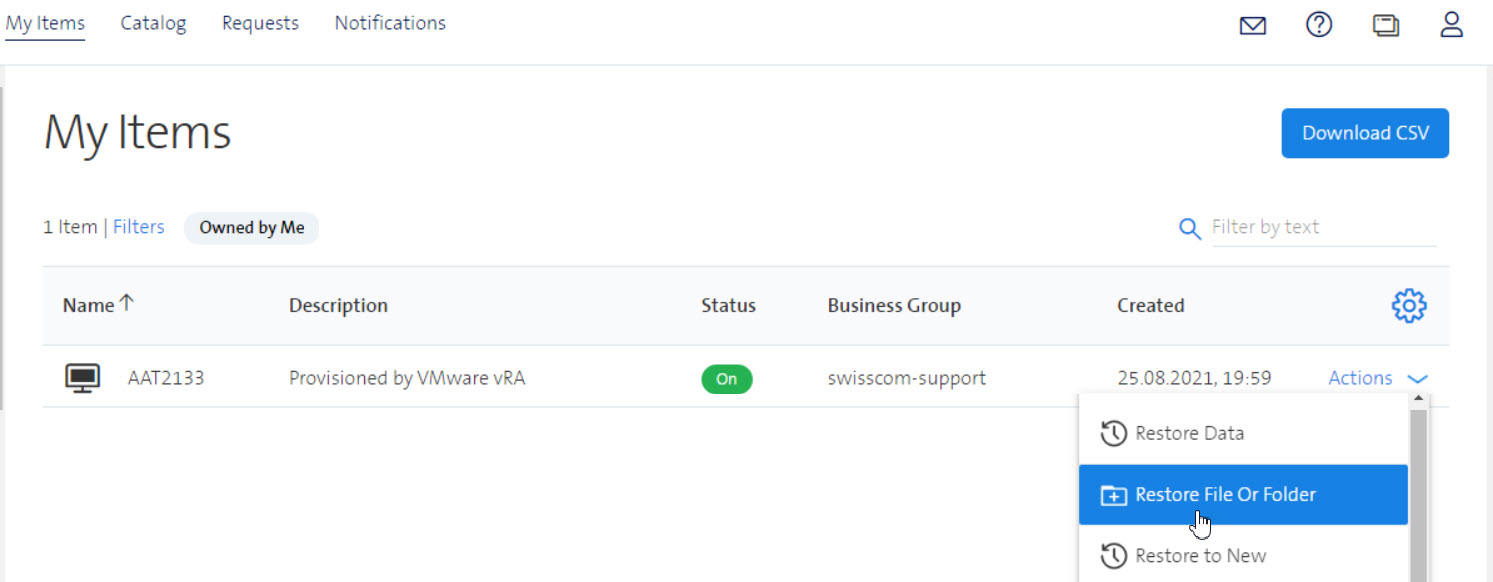
In the Portal navigate to My Items
Select the desired virtual machine
Click on Actions and select Restore File Or Folder
An input form will show up
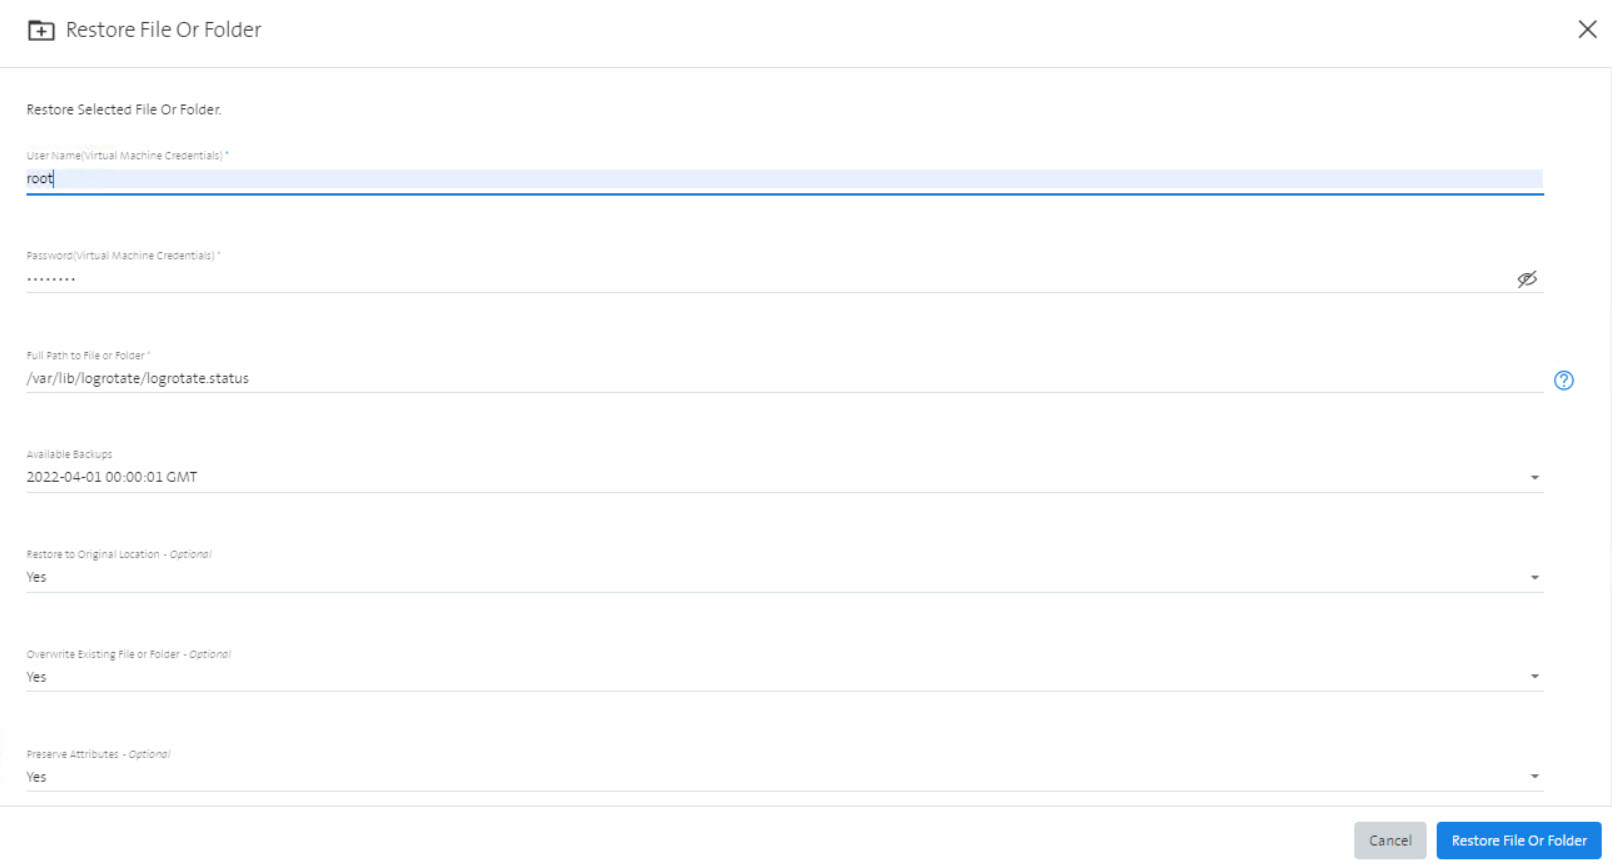
Enter User Name and Password of the virtual machine
User name and password are required in order to restore the file or folder onto the machine. The access rights of this user should be sufficiently high to save the file or folder on the desired location. If you are using domain credentials to access a target virtual machine then you should provide the user name in the format username@domain.com .
Enter the absolute path to the file or folder that you want to restore
Examples
- Unix file: /var/lib/logrotate/logrotate.status
- Unix folder: /var/lib/logrotate/ or /var/lib/logrotate
- Windows file: /C/Users/Administrator/Desktop/New folder/MyFile.txt
- Windows folder: /C/Users/Administrator/Desktop/New folder
Special notes
- The path must be absolute and the whole path is interpreted in a case sensitive way (including the drive letter in case of Windows).
- The Windows path has to be provided in a UNIX-like syntax as in the example above. In particular note that there is no colon after the drive letter and Windows folders must not be terminated with a '/'.
Click on Available Backups and select a backup
When you click on Available Backups you will see a list of all available backups for that virtual machine. Before submitting, it will not be validated whether or not the file or folder is actually contained in the selected backup. Select the backup from which the file or folder (that you want to restore) should be taken. If the requested file or folder is not found in that backup, the workflow will fail but you could retry with a different backup.
Select Restore to Original Location (default yes)
Select in Restore to Original Location whether the selected file/folder should be restored in the same folder as in the backup (option yes) or provide a different folder after selecting option no. In the later case, an additional input line will show up where you can enter the path.
Select Overwrite Existing File or Folder (default yes)
In Overwrite Existing File or Folder, select whether or not you want to overwrite existing files.
Select Preserve Attributes (default yes)
In Preserve Attributes, select whether you want to preserve the current settings of the file/folder which are on the virtual machine, or whether you want to take the settings of the file/folder which are in the backup.
Submit the request by pressing on Restore File Or Folder at the bottom of the form.
Limitations:
The Virtual Machine must be powered on for this action.
A VMwareTools service restart during a restore operation may disrupt the restore.
Encrypted folders that have been renamed or deleted cannot be restored.
Restore File Or Folder request will fail
if the provided username and password is not valid or, for reason of insufficient permissions, does not allow to restore the file/folder on the machine.
if the path of the file/folder is not found in the selected backup. Note that an absolute path has to be provided.
if the indexing of files and folder in a backup is not yet completed for the selected backup.
An index is needed in order to find the file/folder in the backup. Note that the creation of an index is typically only started after a whole group of backups has been created and that the creation of an index does take some time to complete. Therefore, if the file or folder is not found in the backup and you are sure it is in the backup, repeat the Restore File Or Folder action sometime later again. Alternatively, you could also try immediately again with another backup (for example an older backup where the index is already created).
Restore File Or Folder might fail with an error message "VMware Tools must be installed and running. Last known status: NotRunning"
In case you have VMware Tools installed and they are running, this might still occur when the virtual machine has been powered on only a short time before executing the Restore File Or Folder action and our backend system has not yet updated the status. Please retry in this case some time later.
Windows:
- Restoring files/folders with long names (names longer than 200 characters) may return an error. This limitation is due to Windows behavior when handling files/folders with long names.
- ACLs cannot be restored. Only the VM data will be restored.
- Recovery of reparse points (such as shared folders, mount points, or junction points) cannot be restored.
Linux:
- Restoring files to Linux VMs need a sudo access user.
- Only basic user, group, world permissions, and timestamps are restored - Advanced permissions are not restored.
- Permissions for guest files and folders are retained only when the user running the restore operation has permissions to change the group ownership on the restored files and folders. If the user does not have change group ownership permissions, the restore operation will fail.
- When run as a non-root user that does not have sudo access the recovery will fail.
- Recovery directory path length should not be greater than 4096 characters.
Restore to New
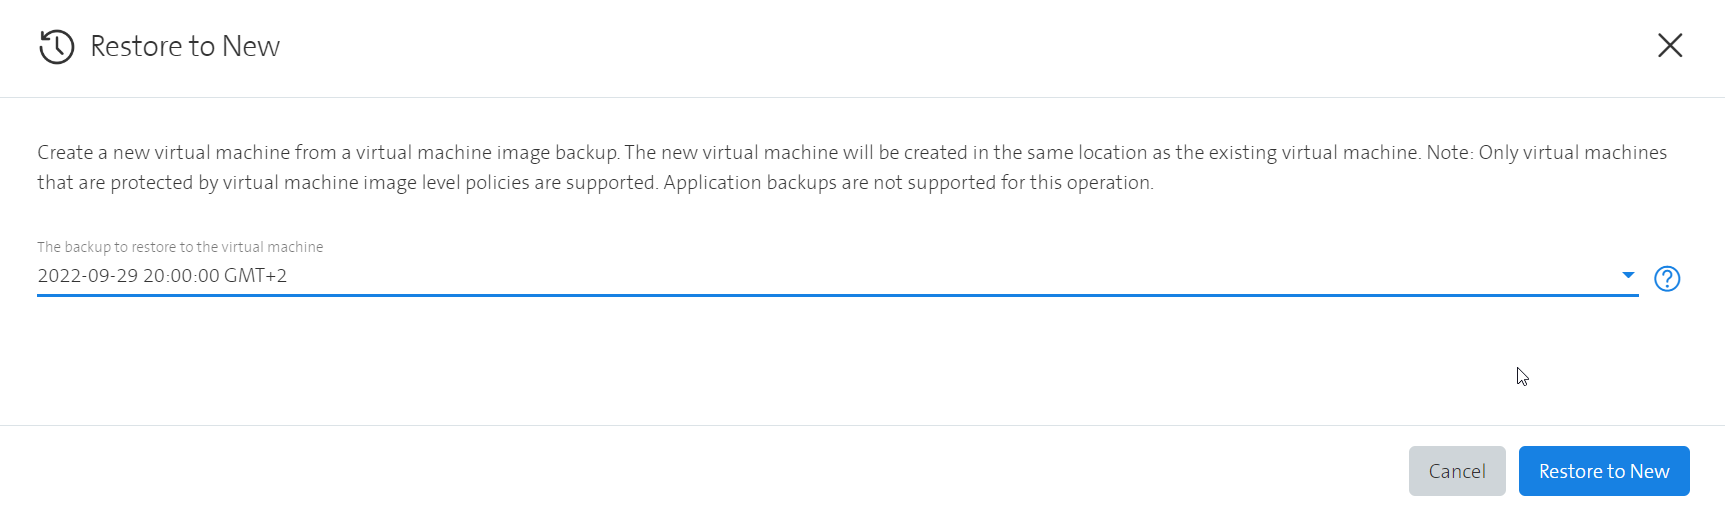
The action Restore to New allows a user to restore a VM (Virtual Machine) from an available backup to a new VM. The result is a newly created machine which will leave the original VM unchanged. The newly created VM will be powered-off, not attached to a network, and the Backup Policy of this new VM will be set to Disable.
This action is useful if a user wants to retrieve information from previous point in time without disrupting the machine. The new machine will have the same name as the original machine but with an additional suffix "-RESTORED- and a number". The number is added in order to make the name unique in case you call this action several times.
Limitations
- This action is only supported for blueprints/deployments which consists of single Virtual Machines. Executed on a more complex deployment the restore will fail.
To submit the action Restore to New proceed as follows:
- In the Portal navigate to the My Items tab
- Select the desired Virtual Machine
- Click on Actions and select Restore to New
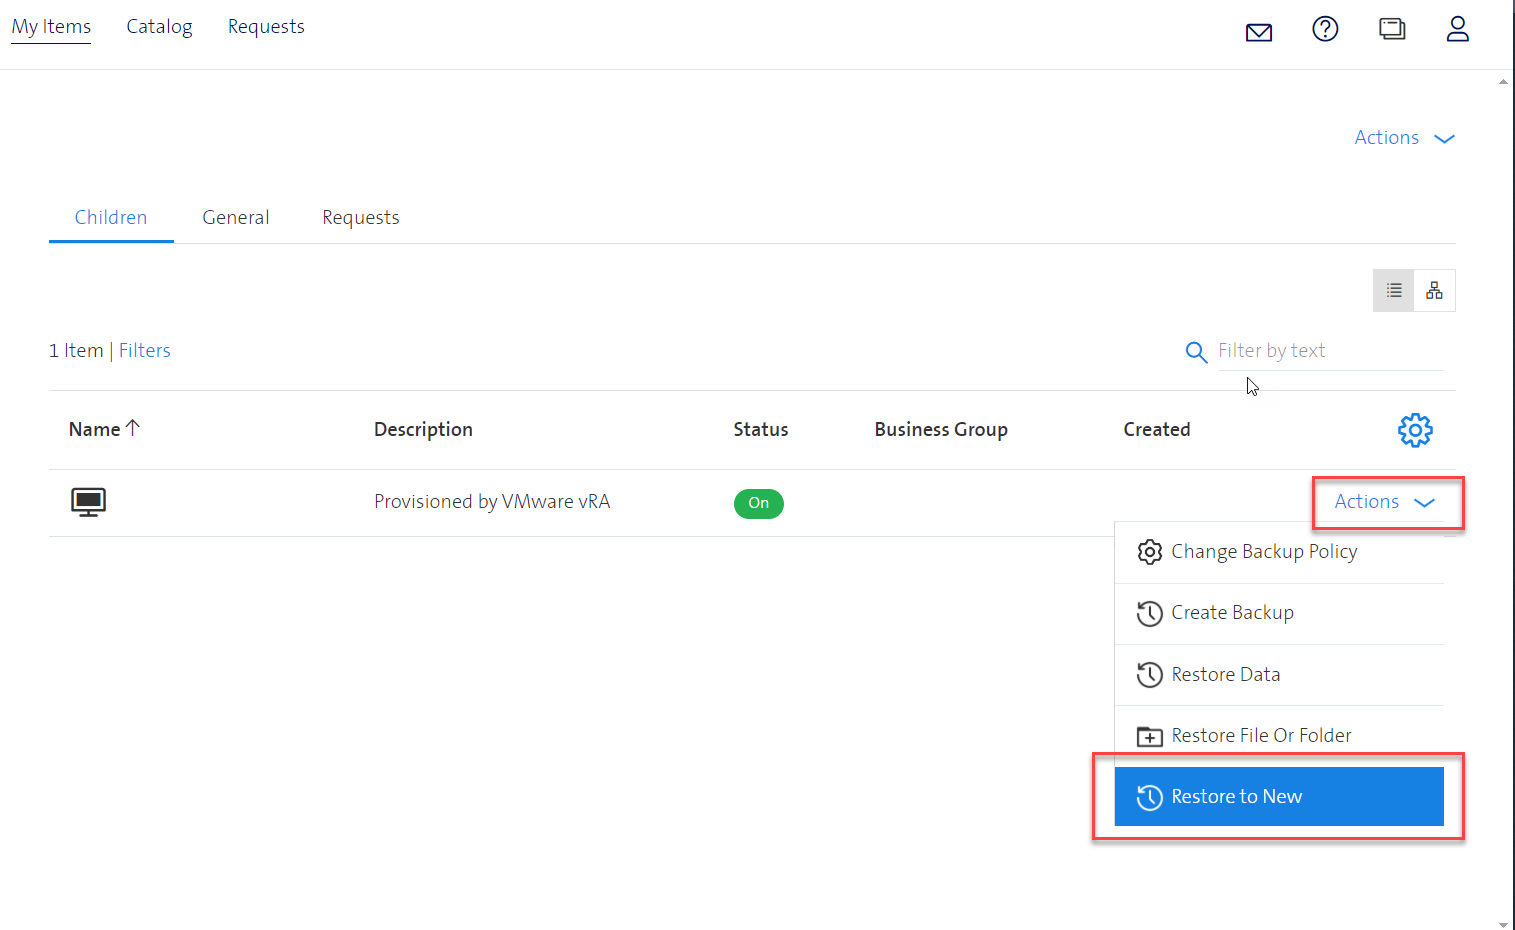
- Select the desired backup from which the new machine is to be restored
- Submit by clicking on Restore to New
Once created, use the option Reconfigure to add a network adapter. Start the virtual machine and log in with a local administrator account. In the network adapter properties type the IP address that was assigned in vRA (go to the restored VM -> Register "Network" -> column "Address"). If needed, make the necessary configuration in the NSX Distributed Firewall to enable connectivity between the two virtual machines. Copy data from the restored virtual machine.
View Backup Status
The action View Backup Status allows a user to view the currently enabled backup policy and the available backups on the selected machine.
- In the Portal navigate to the My Items tab
- Select the desired Virtual Machine
- Click on Actions and select View Backup Status
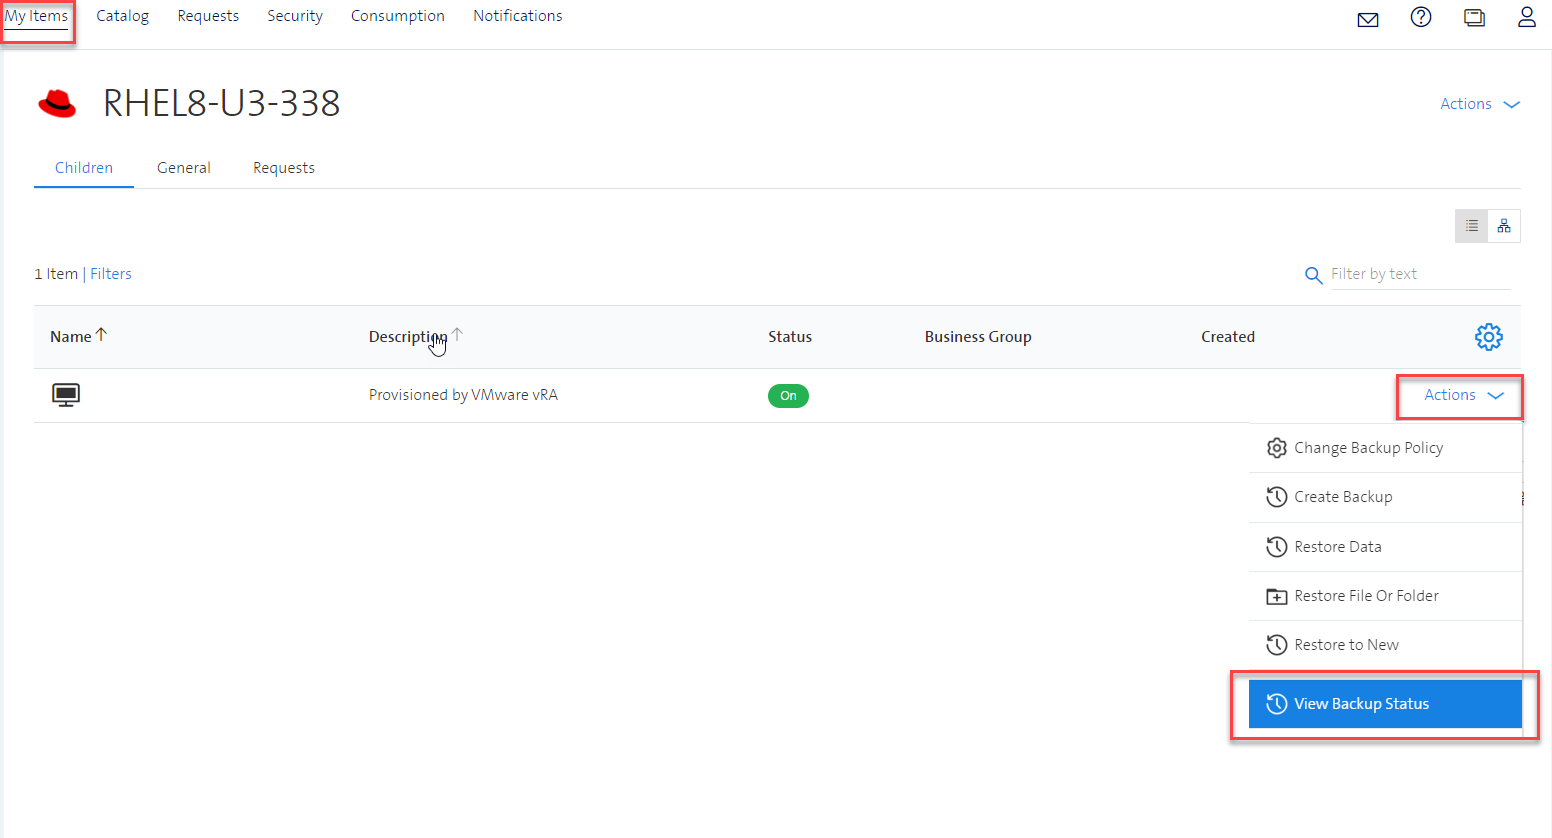
- Selecting this action will load the following page. (If you do this in the VRA Portal, you can draw in the lower right corner to resize the window.)
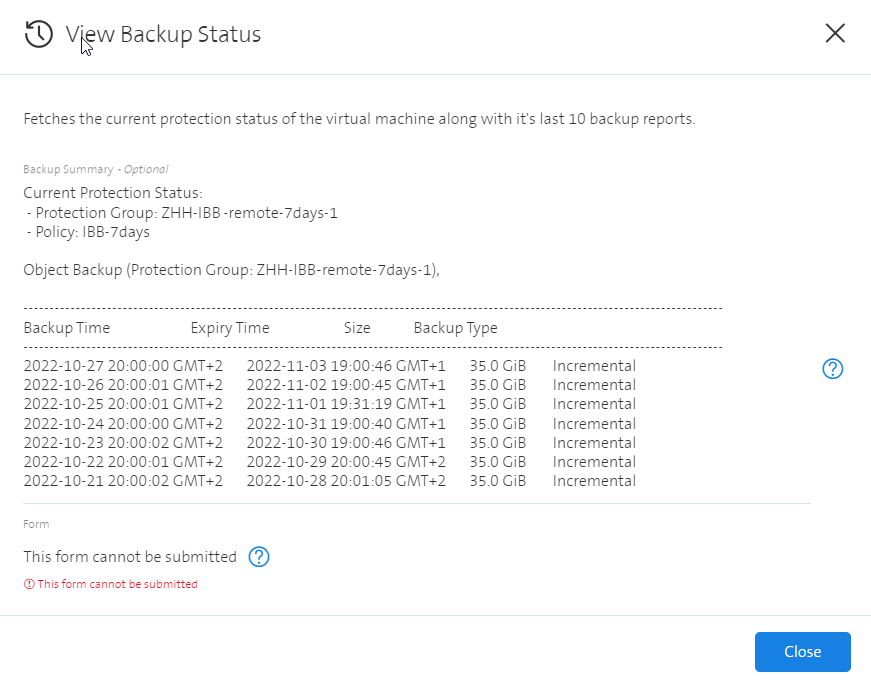
Note, that this action cannot be submitted. Press Close (in the VRA Portal Cancel) to leave this page.