Manage Routed Network
Routed Networks can be created, updated and deleted through the portal.
Create a routed network
Under Catalog click on Create Network and select Routed as Network Type.
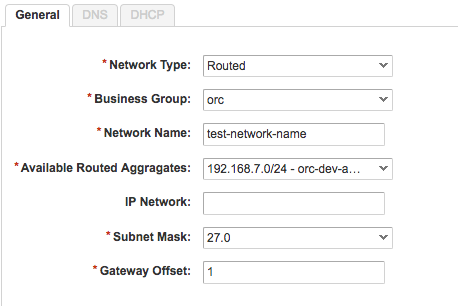
Fill in the field (described below) and click on Submit.
- Business Group: Select the Business Group where the routed network should be added to.
- Network Name: Specify the name of the routed network.
- Available Routed Aggregates: Select the IPAM Aggregates for the tenant
- IP Network: Optional field. Specify the subnet address.
- Subnet Mask: Select subnet mask for given aggregate. Displayed values are dynamically calculated based on availability. (max size: 22, min size: 28)
- Gateway: Specify the IP offset in the given range for Gateway. The offset range depends on the network size (see subnet mask)
- DNS: Optional DNS settings
- DHCP: Optional DHCP settings
Update a routed network
Under Catalog click on Update Network.
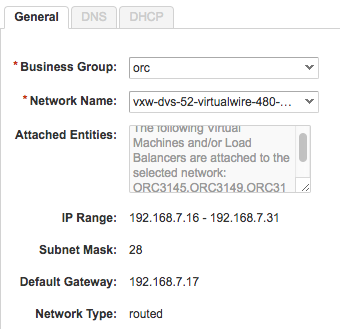
Select the fields (described below) and click on Next.
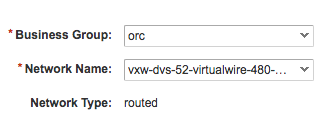
- Business Group: Select the Business Group where the routed network should be added to.
- Network Name: Specify the name of the routed network.
Update DNS Settings
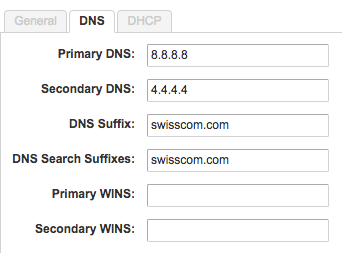
- Primary DNS: Modify primary DNS server[optional]
- Secondary DNS: Modify secondary DNS server[optional]
- DNS Suffix: Modify DNS suffix[optional]
- DNS Search Suffix: Modify DNS search suffix[optional]
- Primary WINS: Modify primary WINS[optional]
- Secondary WINS: Modify secondary WINS[optional]
Update DHCP Settings
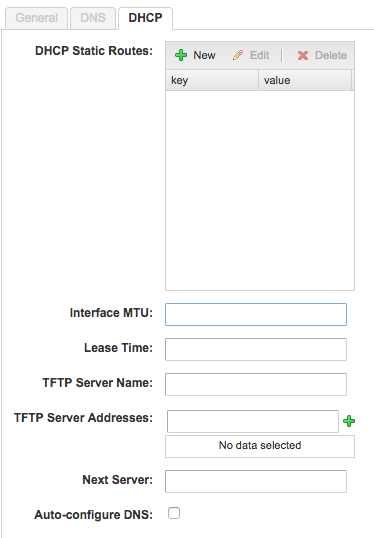
- DHCP Static Routes: Add/Remove DHCP static routes[optional]
- Interface MTU: Modify routed network interface maximum transfer unit[optional]
- Lease Time: Modify the lease time[optional]
- TFTP Server Name: Modify TFTP server name[optional]
- TFTP Server Addressess: Add/Remove TFTP server addresses[optional]
- Next Server: Modify next server FQDN/IP[optional]
- Auto-configure DNS: Modify auto-configure DNS value: YES/NO[optional]
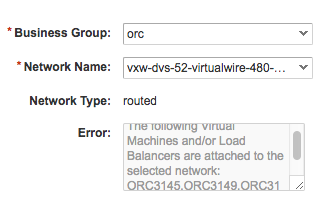
Delete a routed network
Under Catalog click on Delete Network.
Fill in the field (described below) and click on Submit.
- Business Group: Select the Business Group where the routed network belongs to.
- Network Name: Select the routed network that should be deleted. All available networks belonging to the selected Business Group are shown. The default networks are not populated in this list and not allowed to be deleted.
- Error: This is a "readonly" conditionally displayed text field, showing which objects (Virtual Machines or Load Balancers) are assigned to the selected routed network. You can only submit the request and delete the routed network if no objects are assigned to it. See the example below.
Delete routed network validation error.