S3 Browser (Windows)
Setup: S3 Browser can be downloaded here
This tool provides a simple GUI which allows to browse the files of S3 users and buckets.
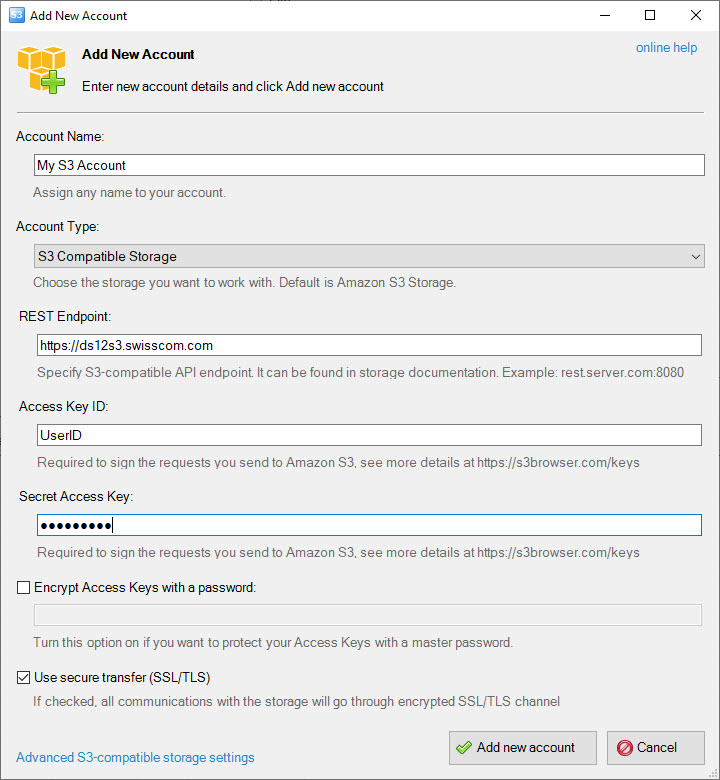
After installation, the setup of a S3 user can be done by clicking Accounts and Add New Account. Here you can fill the information of your order.
- Account Name: The display name in S3 Browser
- Account Type: Here, S3 Compatible Storage needs to be selected.
- Rest Endpoint: Please enter the endpoint in your S3 Instance in the ESC Portal. (For example https://ds12s3.swisscom.com)
- Access Key ID: Enter the User ID from your S3 Instance.
- Secret Access Key: Enter the secret access key which you see after the user creation of the S3 Instance.
- Encrypt Access Keys with a password: Check this if you want to protect the secret access key with a password of your choice.
- Use secure transfer (SSL/TLS): Please check this field.

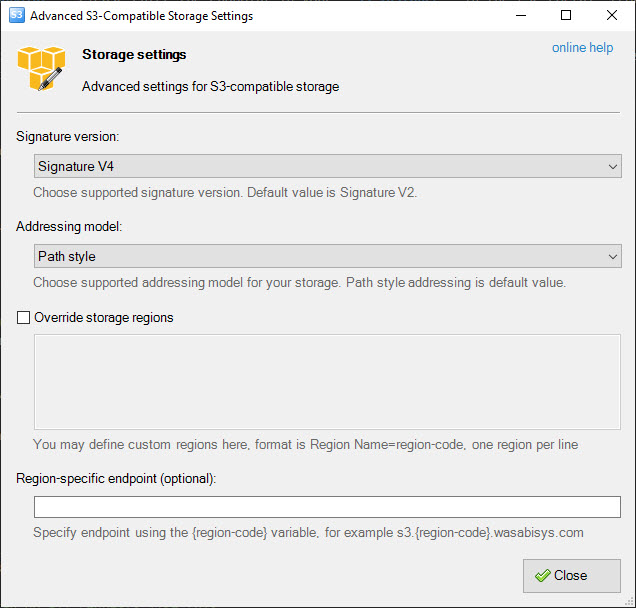
In the Advanced S3-compatible storage settings it is recommended to change the Signature version to Signature V4. The rest can be left as-is.

After adding the account, a new Bucket or files can be created or existing files can be browsed.
Share an Object with namespace-url
As described in the best-practices section, you will need the Namespace URL of the S3 Instance: You find the corresponding Namespace URL in the portal in the advanced tab of your Object Storage S3 Service:

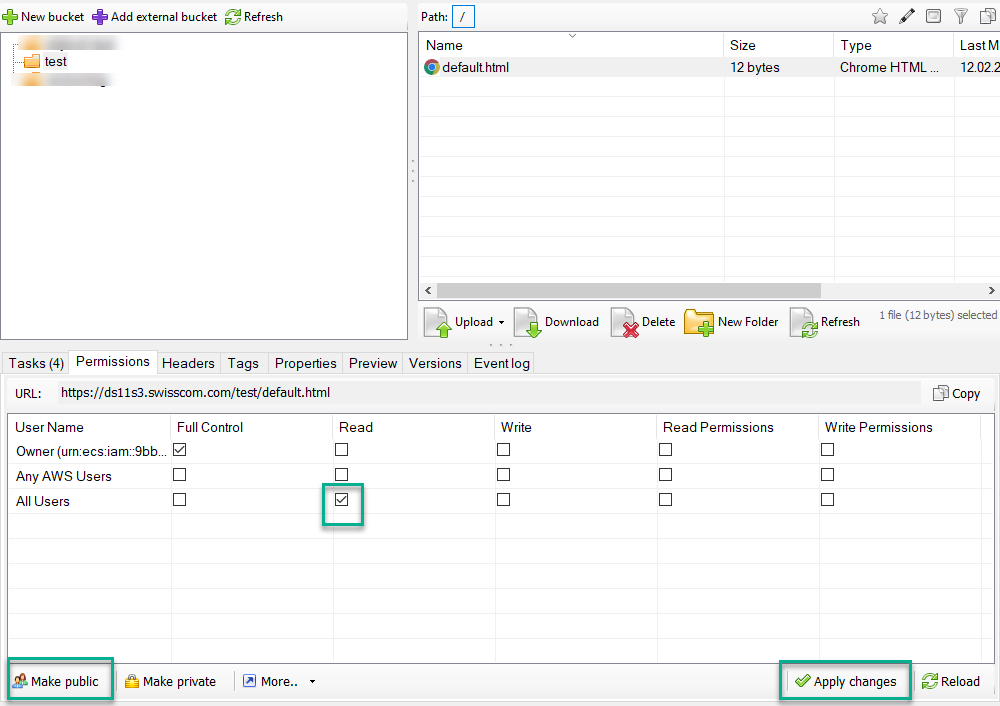
Additionally, your file(s) needs public read access. This can be done with few clicks in the S3 Browser:
- Select the file to share.
- Click on "Make public" or tick "Read" on the "All Users" Section.
- Click on "Apply Changes".

Now you can generate the web url.
ds12s3ns for public access within the tenant network
- https://PRIVATE NAMESPACE URL/MYBUCKET/MYOBJECT
ds11s3ns for public access across the whole internet
- https://PUBLIC NAMESPACE URL/MYBUCKET/MYOBJECT
The above example html url pointing to S3 is: https://9bbf25b86ebd9afcc6de41669d86ddf9.ds11s3ns.swisscom.com/test/default.html
