Install software on a VM
Install automated software
There is the possibility to run scripts just after the provisioning of a VM in order to create a script which installs the custom software (e.g. monitoring agents).
Prerequisites preparation
The following scenario is a demo which shows the possibilities. Of course, much more sophisticated scripts can be created.
Starting point is:
- A network share \your-share-server.com\share
- On that share there is the Powershell script named "psscript.ps1" which writes some "hello world" test into a file. The file content looks as follows:
New-Item C:\scripts\testfile.txt -ItemType File -Value "Hello, world!" - Make sure the folder C:\scripts\ exists on the target machine. You can also take C:\temp or any other existing folder for your tests.
- You are a business-group admin or you have already a blueprint with the needed Custom Properties.
Connectivity
Please make sure you have a network interface defined for your new created VM and that the VM can reach the fileshare. In some cases Firewall rules may be needed on that network.
Custom Properties Definition
The blueprint needs to have the following Custom Properties. Either you have a blueprint which already has them, or as a business group admin you can add them during the request.
| Custom Property | Description |
|---|---|
| Mount.Path | This is the path to our share, where the script to be executed is stored. |
| Mount.Username | This is the username you need for authentication on the share. If no authentication is required, just leave it blank. |
| Mount.Password | This is the password you need for authentication on the share. If no authentication is required, just leave it blank. |
| VirtualMachine.ScriptPath.Decrypt | Set this option to "true". This allows to pass an encrypted password as a secure string property and it is not shown in cleartext in any logs. |
| VirtualMachine.Admin.UseGuestAgent | Set this option to "true". This property is used to initialize the guest agent when the provisioned machine is started. |
| VirtualMachine.Customize.WaitComplete | Set to "true" to prevent the provisioning workflow from sending work items to the guest agent until all customizations have been completed. |
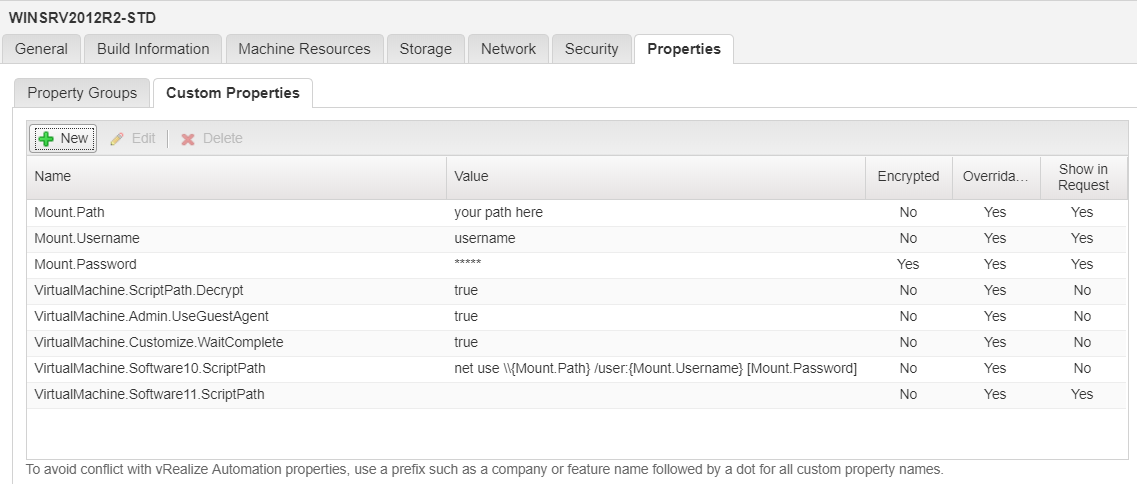
| VirtualMachine.Software10.ScriptPath | In this property we specify the command to mount the share. net use \{Mount.Path} /user:{Mount.Username} [Mount.Password] The values in curly brackets link to the properties above, which are dynamically replaced when sending the request. The [Mount.Password] brackets mean that the guest agent decrypts the entry to the value in the custom property Mount.Password and runs the script with that value. |
| VirtualMachine.Software11.ScriptPath | Here you can specify the actual script which you want to execute on the target VM. In our case we execute the following command: powershell.exe -executionpolicy bypass \your-share-server.com\share\psscript.ps1 The number "11" means that the script is executed after the script with the number "10" Usage of VirtualMachine.SoftwareN Property Please note: the N specifies the order in which the different scripts will be executed after the provisioning of the VM is done. Use only values starting from 10 as the values below may be used by the service provider in the future. |
Here a screenshot as an example for the configuration of the Custom Properties:
Requesting the Blueprint
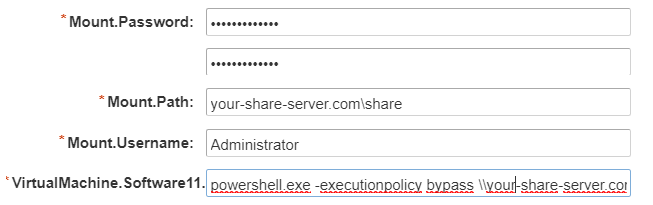
Fill in the Request Form
When requesting the blueprint you should now see some more input fields. You have to fill in the fields as described above and visualized in the screenshot below.
Verify the target VM after deployment
When the provisioning is done you can logon to your new VM and you should see the testfile.txt at the location you specified and it should have "Hello, world!" as a content.
Install software manually
Proxy Configuration
You can configure a proxy to reach the internet from your VM. The following example describes how to configure the proxy for sandbox environment with Internet Explorer.
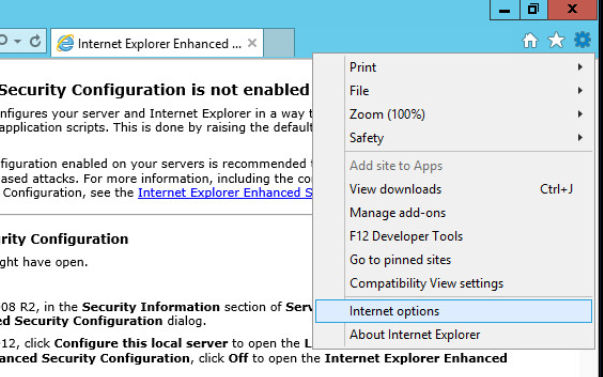
Step 1: Open Internet Explorer on your VM & go to Settings → Internet Options
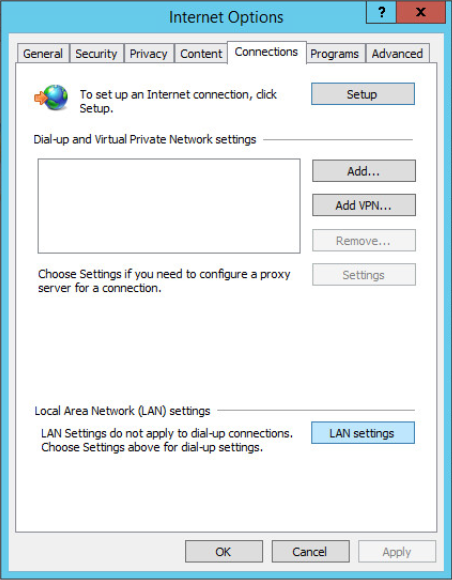
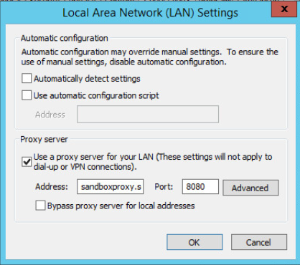
Step 2: Navigate to the tab Connections and click on LAN settings
Step 3: Click the option Use a proxy for your LAN... and enter the hostname and port of your proxy e.g. sandboxproxy.sccloudinfra.net with port 8080
Step 4: Close all Internet Explorer windows and open a new browser window. You should now be able to reach e.g. www.google.ch
Connectivity to the proxy
It may be possible that you need to open the firewall from your VM to the proxy. To do this you need to add the following rule:
Source: IP of your VM Destination: IP of the proxy Service: TCP, port of your proxy (in our example 8080)
Download via internet
In our example we will download a puppet agent to our VM directly via web browser.
Step 1: Open your Internet Explorer or any other browser & navigate to the webpage with the available puppet agents
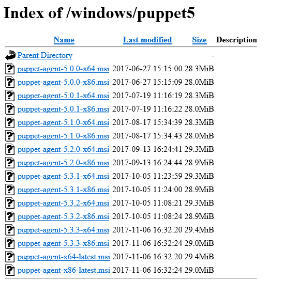
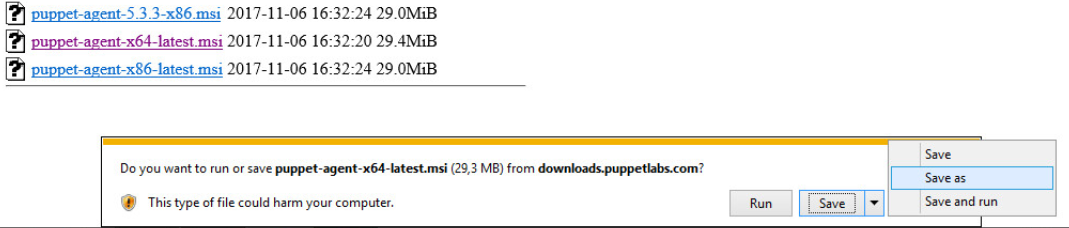
Step 2: Click on the package you want (e.g. puppet-agent-x64-latest.msi) and choose Save as in the pop-up dialog
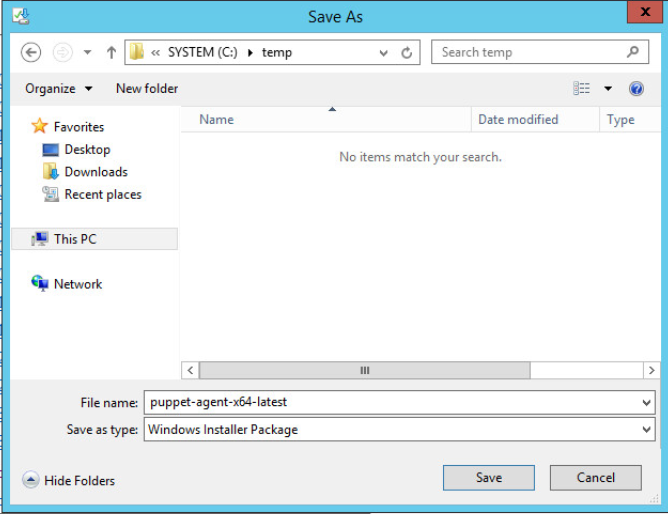
Step 3: Select a folder where you want to store the downloaded file, e.g. c:\temp
Proxy blocking specific content like .exe .zip etc.
Most of the "state of the art" proxies do not allow to download e.g. EXE files or even EXE files packed into ZIP files. Therefore you should try to find MSI packages wherever possible.
If you need to download an EXE file you have to contact your platform administrator.
Download from a network share
In this example we want to map a network share in our VM and download a file from there. We got from our administrator the following location of the share: \EIGER1124\myshare
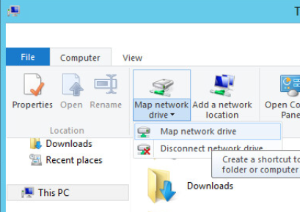
Step 1: Login to your VM and open the file explorer. In the tab Computer select Map network drive and then again Map network drive
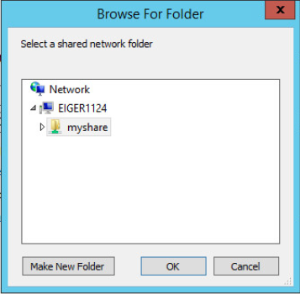
Step 2: Select a drive letter for the new share and specify the path to your share in the Folder field Optional: you can click on Browse to check if you can access the share or if you need to browse through the directories on the share Then click Finish

Step 3 (optional): Click Browse... to check if you can access the share, then click "OK".
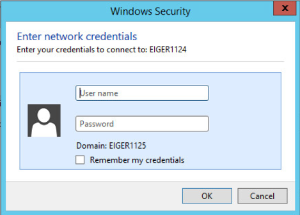
Step 4: You may be prompted to enter your credentials for this network share. Please ask your administrator of the share for these credentials. Enter the credentials and click OK.
Step 5: Now you should see the content on the share and you can execute any applications which are provided there

SLES - Install software using SMT
You can register a SLES VM to the Swisscom SMT (Suse Management Tools) and install an apache webserver on that machine.
Register client to the SMT infrastructure
In order to register a new client to the SMT infrastructure, the following steps are needed:
Step 1: Login to the client you wish to register to the SMT
Step 2: Make sure you can reach the SMT infrastructure on port TCP 80/443:
CLOUDTRANS0110:~ # telnet psrv00smt01.sccloudinfra.net 80
Trying 138.188.244.17...
Connected to psrv00smt01.sccloudinfra.net.
Escape character is '^]'.
^C
Connection closed by foreign host.
CLOUDTRANS0110:~ #
If you cannot connect to the SMT server, it may be needed to open the firewall. In that case create a FW rule with the following parameters:
Source: Your VM
Destination: the IP of the SMT server (138.188.244.17)
Service: TCP 80/443
If your VM does nor resolve the SMT hostname, you can manually add it to the hosts file
CLOUDTRANS0110:~ # echo "138.188.244.17 psrv00smt01.sccloudinfra.net" >>/etc/hosts
Step 3: Download the client registration script:
CLOUDTRANS0110:~ # wget http://psrv00smt01.sccloudinfra.net/repo/tools/clientSetup4SMT.sh --no-proxy
--2017-11-23 09:24:11--  http://psrv00smt01.sccloudinfra.net/repo/tools/clientSetup4SMT.sh
Resolving psrv00smt01.sccloudinfra.net (psrv00smt01.sccloudinfra.net)... 138.188.244.17
Connecting to psrv00smt01.sccloudinfra.net (psrv00smt01.sccloudinfra.net)|138.188.244.17|:80... connected.
HTTP request sent, awaiting response... 200 OK Length: 9281 (9.1K) [application/x-shellscript]
Saving to: ‘clientSetup4SMT.sh’
100%[======================================>] 9,281       --.-K/s   in 0s
2017-11-23 09:24:11 (62.8 MB/s) - ‘clientSetup4SMT.sh’ saved [9281/9281]
CLOUDTRANS0110:~ #
Step 4: Run the client registration script (confirm two times with 'y' if you are prompted)
CLOUDTRANS0110:~ # sh clientSetup4SMT.sh --host psrv00smt01.sccloudinfra.net --regcert http://psrv00smt01.sccloudinfra.net/smt.crt
.
.
.
Registered SLES 12.1 x86_64
To server: https://psrv00smt01.sccloudinfra.net/
CLOUDTRANS0110:~ #
Step 5: (Only for SLES11) add the repos manually
CLOUDTRANS0110:~ # zypper ar http://psrv00smt01.sccloudinfra.net/repo/\$RCE/SLES11-SP1-Pool/sle-11-x86_64 SLES11-SP1-Pool
.
.
Adding repository 'SLES11-SP1-Pool' [done]
.
CLOUDTRANS0110:~ #
CLOUDTRANS0110:~ # zypper ar http://psrv00smt01.sccloudinfra.net/repo/\$RCE/SLES11-SP1-Updates/sle-11-x86_64 SLES11-SP1-Updates
.
.
Adding repository 'SLES11-SP1-Updates' [done]
.
CLOUDTRANS0110:~ #
Step 6: Confirm that you have now access to all the required repositories:
CLOUDTRANS0110:~ # zypper lr
You should see the list with available repos.
Install Apache Webserver
Step 1: Run the client registration script (confirm two times with 'y' if you are prompted)
CLOUDTRANS0110:~ # zypper install httpd
.
.
.
(5/5) Installing: apache2-prefork-2.4.16-19.1 ..........................................................................[done]
Step 2: Check if Apache is running
CLOUDTRANS0110:~ # systemctl status apache2.service
apache2.service - The Apache Webserver
    Loaded: loaded (/usr/lib/systemd/system/apache2.service; disabled)
    Active: active (running) since Thu 2017-11-23 09:37:23 CET; 50min ago
RHEL - Install software using Red Hat Satellite
You can install packages from Swisscoms Red Hat Satellite infrastructure.
Register client to the Red Hat Satellite infrastructure
In order to download and install packages from Satellite repositories you need to follow the registration steps described here.
Install Apache Webserver
# yum install httpd