Create Instance
API Documentation
See API documentation for available instance resource actions.
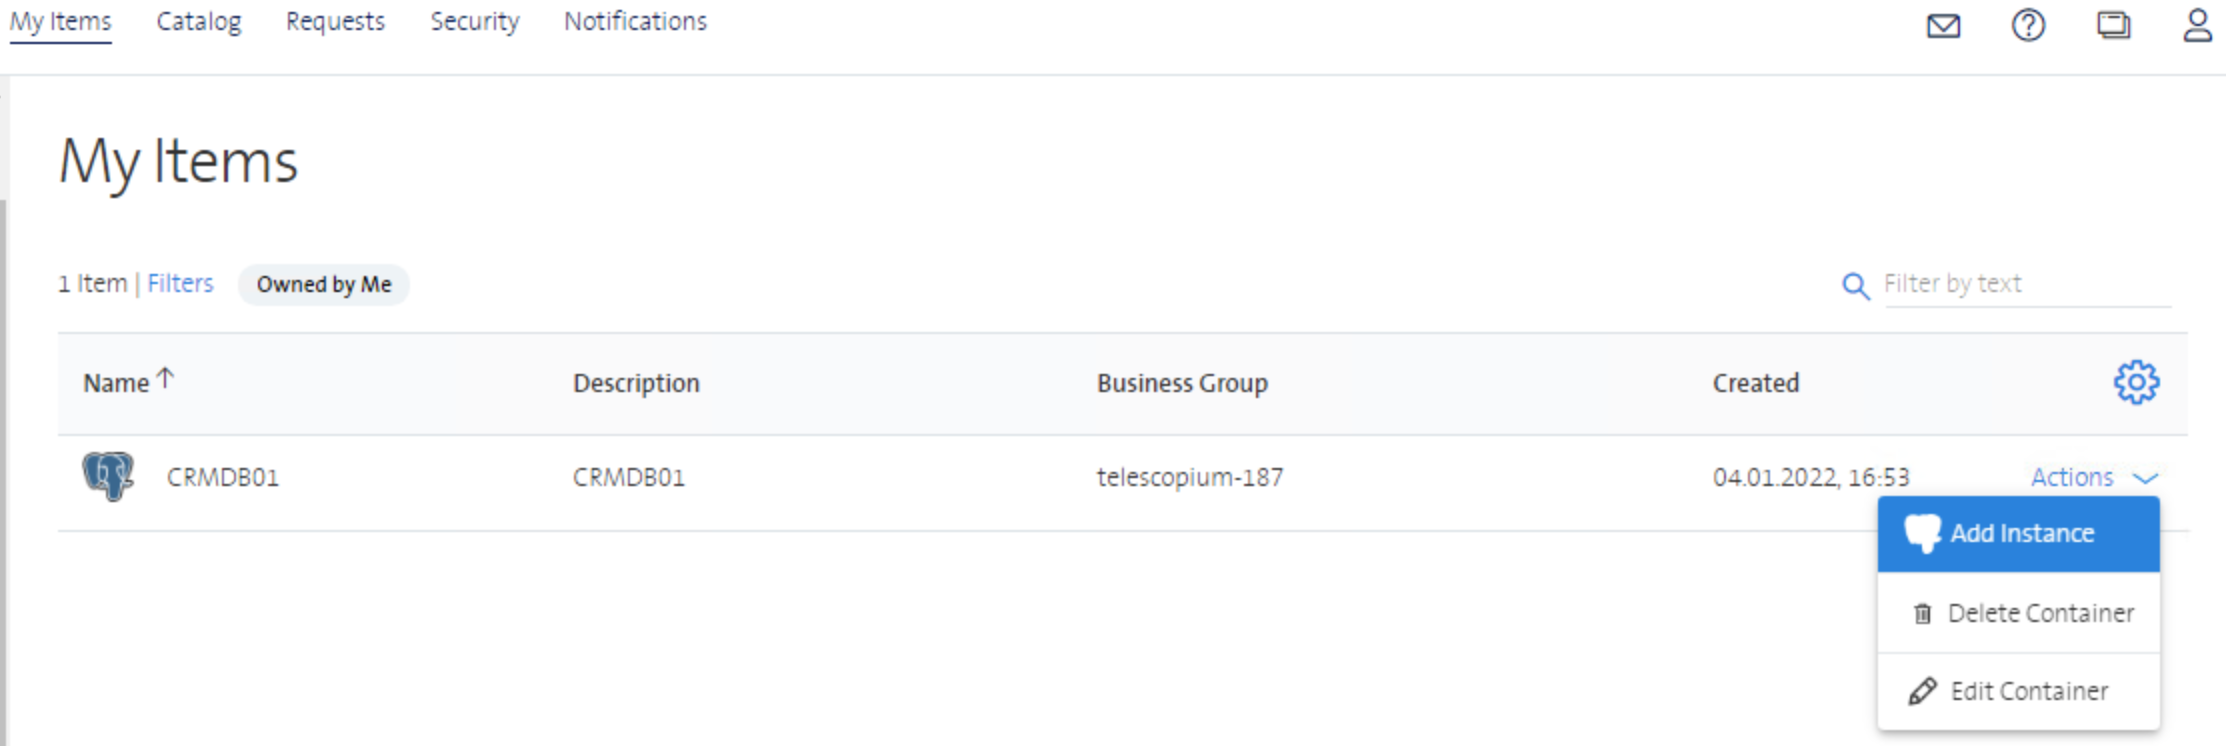
Step 1 - Add Instance
Select Add Instance from the container actions dropdown list to create a new instance.
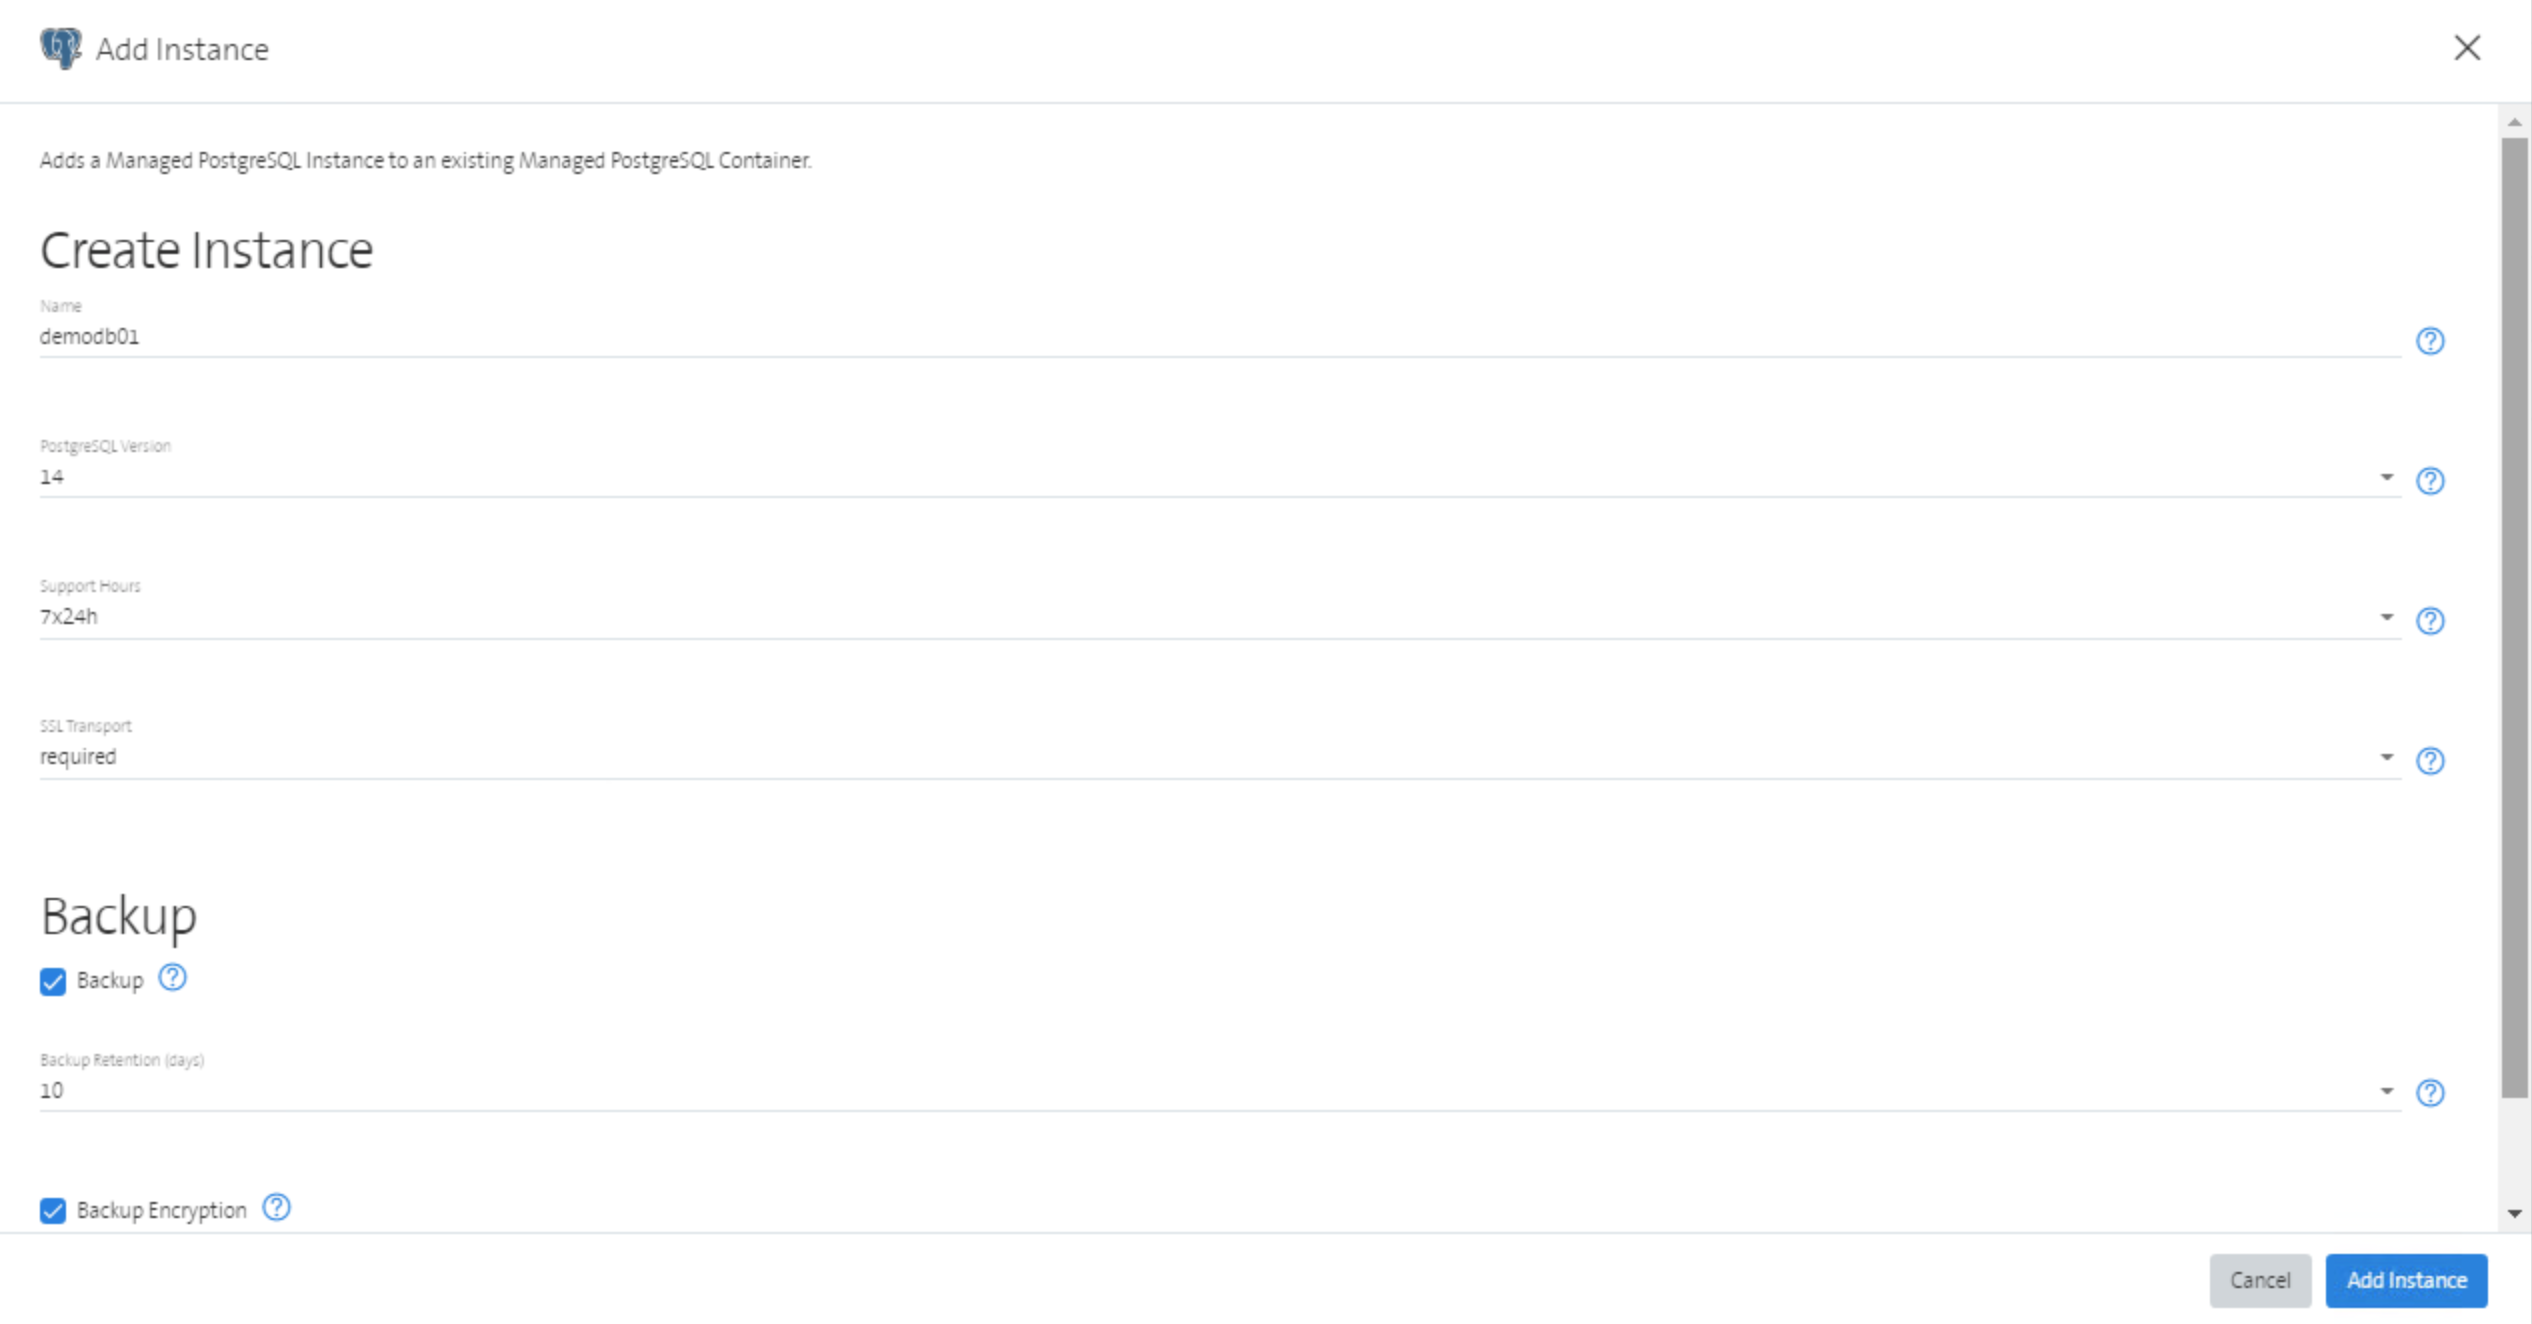
Step 2 - Create Instance
The Create Instance page displays the required instance parameters.
- Name: Friendly name of PostgreSQL instance. With the friendly name, the instance is identifiable on the bill and consumption report. Format: Characters, numbers, underscore "_" and dash "-")
- PostgreSQL Version: Specifies the major PostgreSQL version for the Instance
- Support Hours: Determines the period in which the instance is monitored and when incidents are worked on. This option is SLA related, and therefore cost relevant.
- SSL Transport: Defines if secure SSL connections from client to server are enforced (required) or not (optional)
- Backup: If the backup option is selected, an instance backup will be set up with point in time restore capabilities. Choosing this option causes additional costs. The amount of storage used on the backup system is charged in GB.
When the backup option has been selected, additional parameters need to be configured:
- Backup Retention (days): Define how long backups must be stored for this Instance.
- Backup Encryption: If this option is selected the backup files are encrypted. Choosing this option can cause higher CPU load during the backup operation. Disabling/Enabling this option at a later point (Edit Instance) will make existing backups unaccessible and the retention starts from zero. The operation deletes existing backups and creates a new full backup.
Notes:
- By default, the backup option is disabled. It needs to be enabled explicitly!
- The Backup option can also be enabled as day-2 action. See chapter Edit Instance for details.
Example screenshot with backup enabled and backup retention set to 10 days:
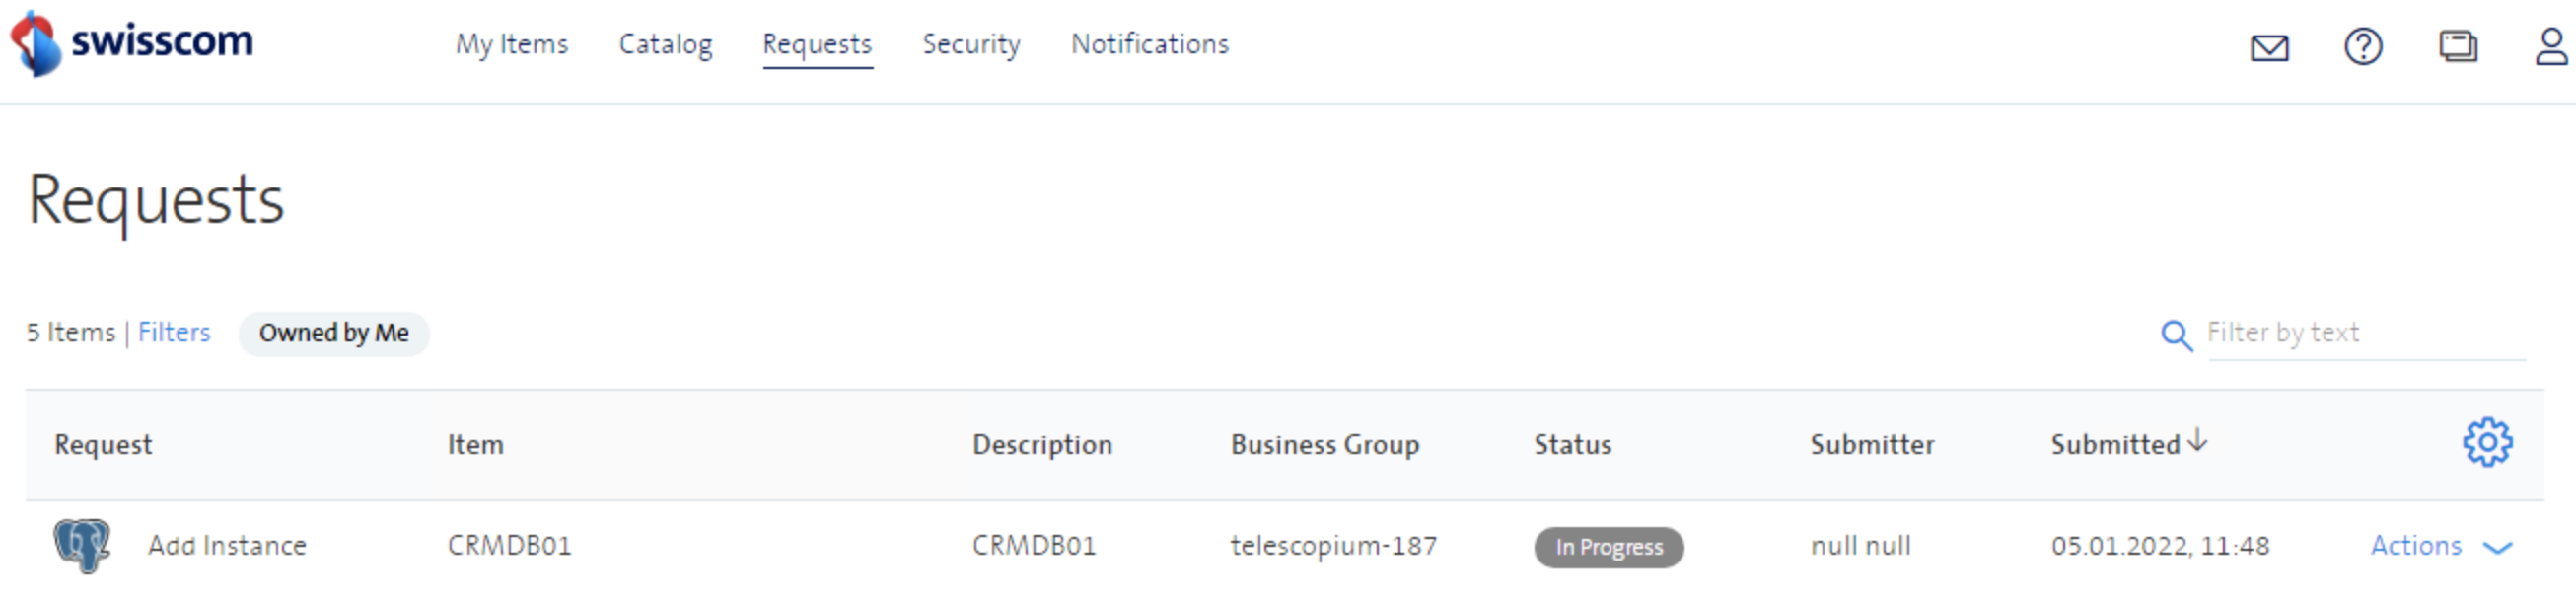
Step 3 - Show Progress of Deployment
After configuring all parameters the instance deployment workflow will be submitted after pressing the Add Instance button. The button will be enabled when all values are properly configured. Once the deployment is submitted, the progress can be monitored under tab Requests.
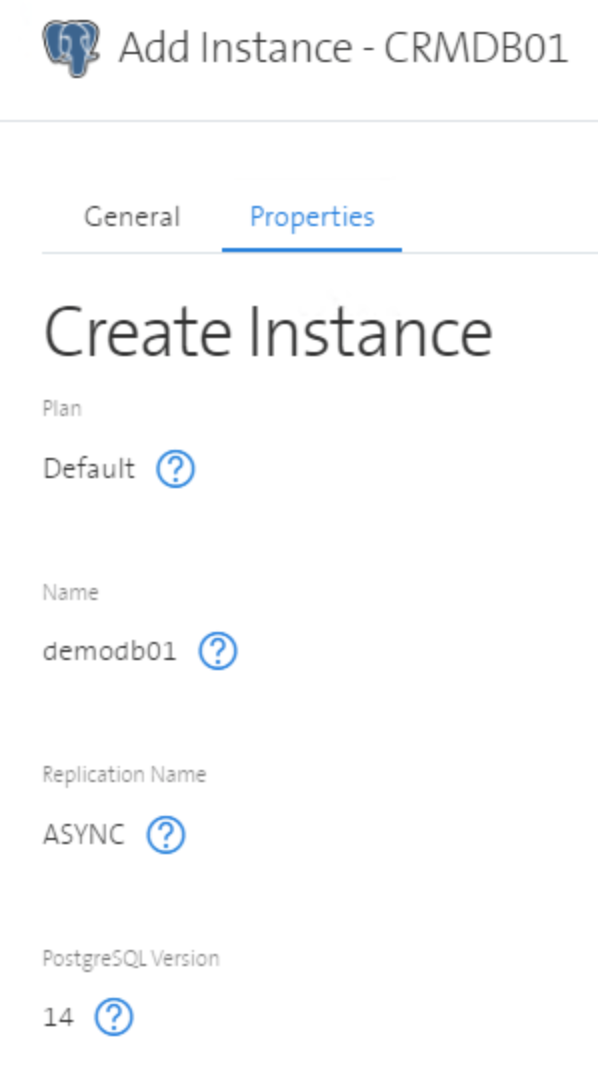
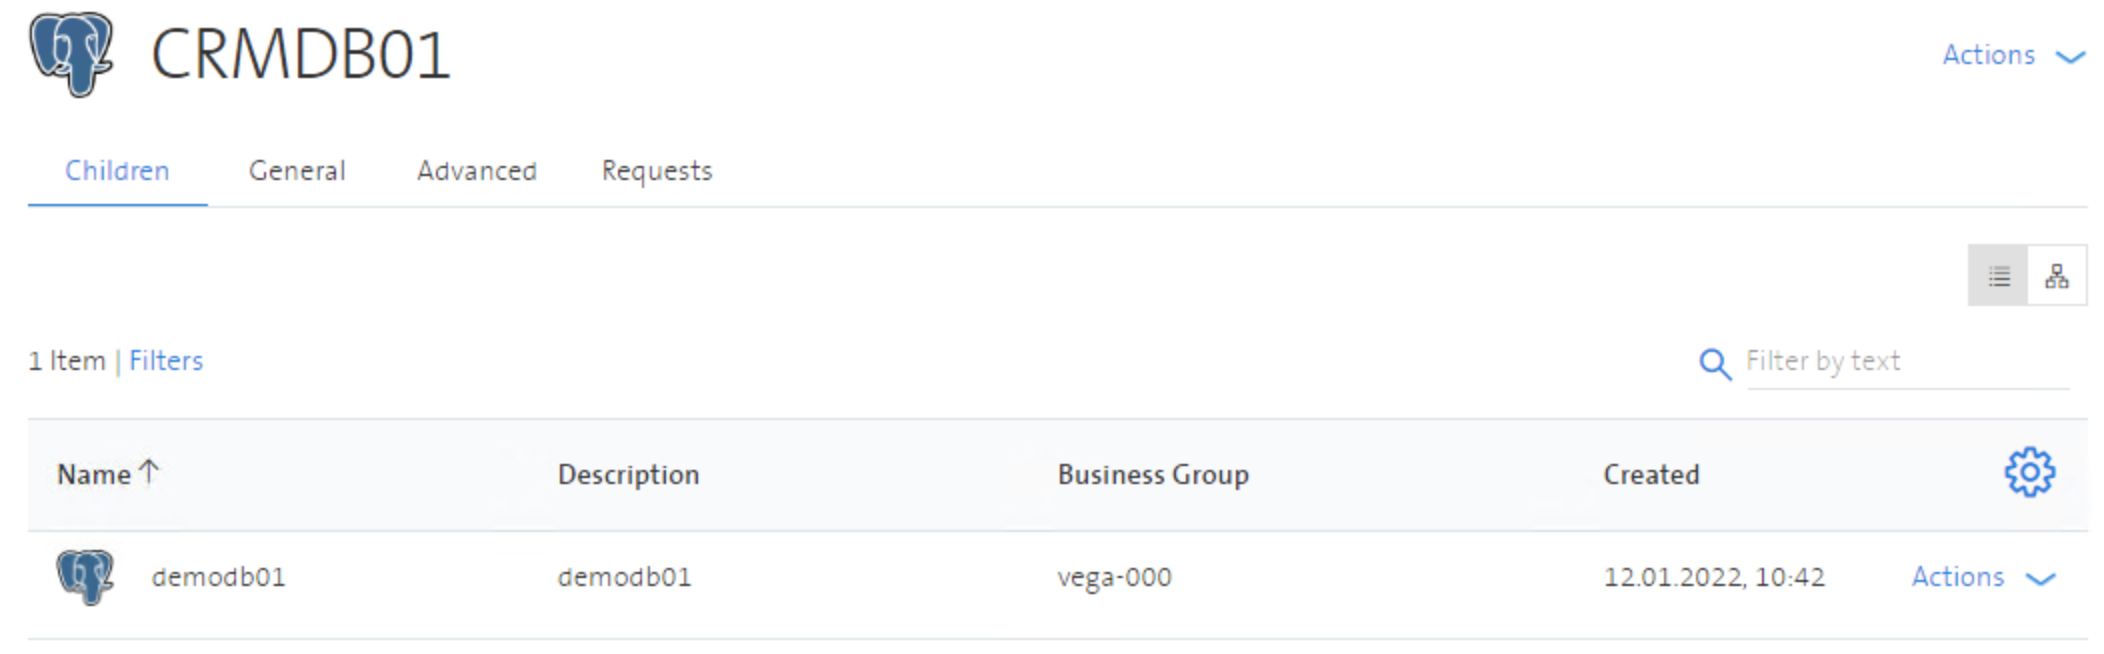
Step 4 - Review the Deployment
After the workflow has been executed (status Successful), you can retrieve the details about the instance by selecting the instance.
Example screenshot for new created instance demodb01.

Step 5 - Get Credentials
The necessary login and connection information needs to be requested by using the Get Credentials action.
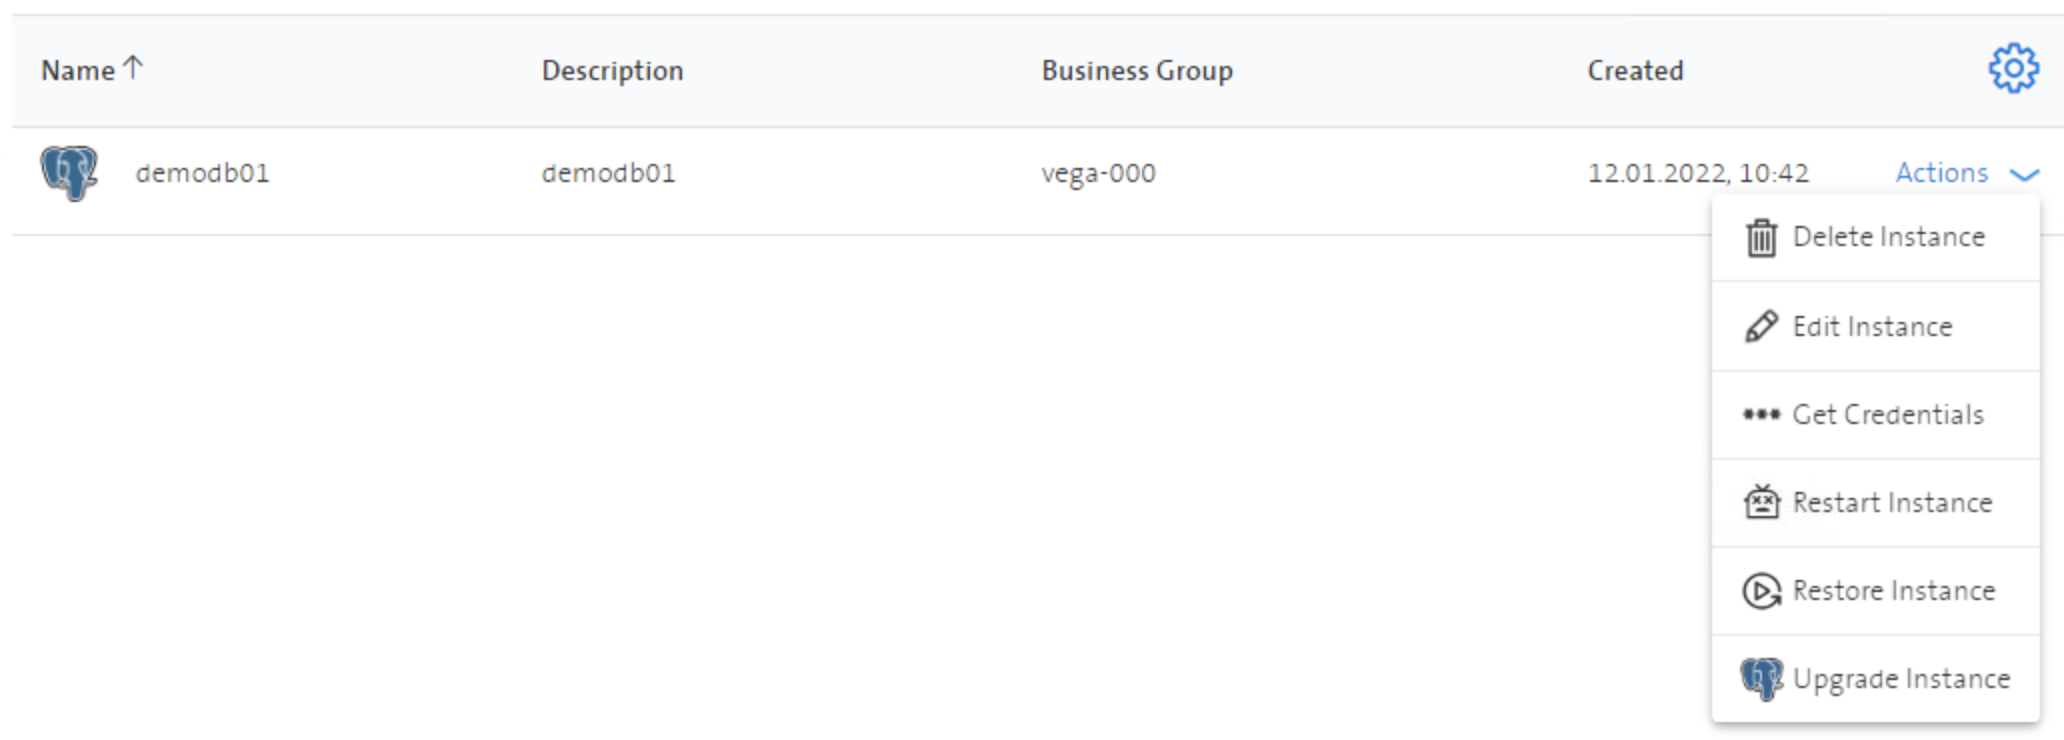
Press Get Credentials button to submit the job.
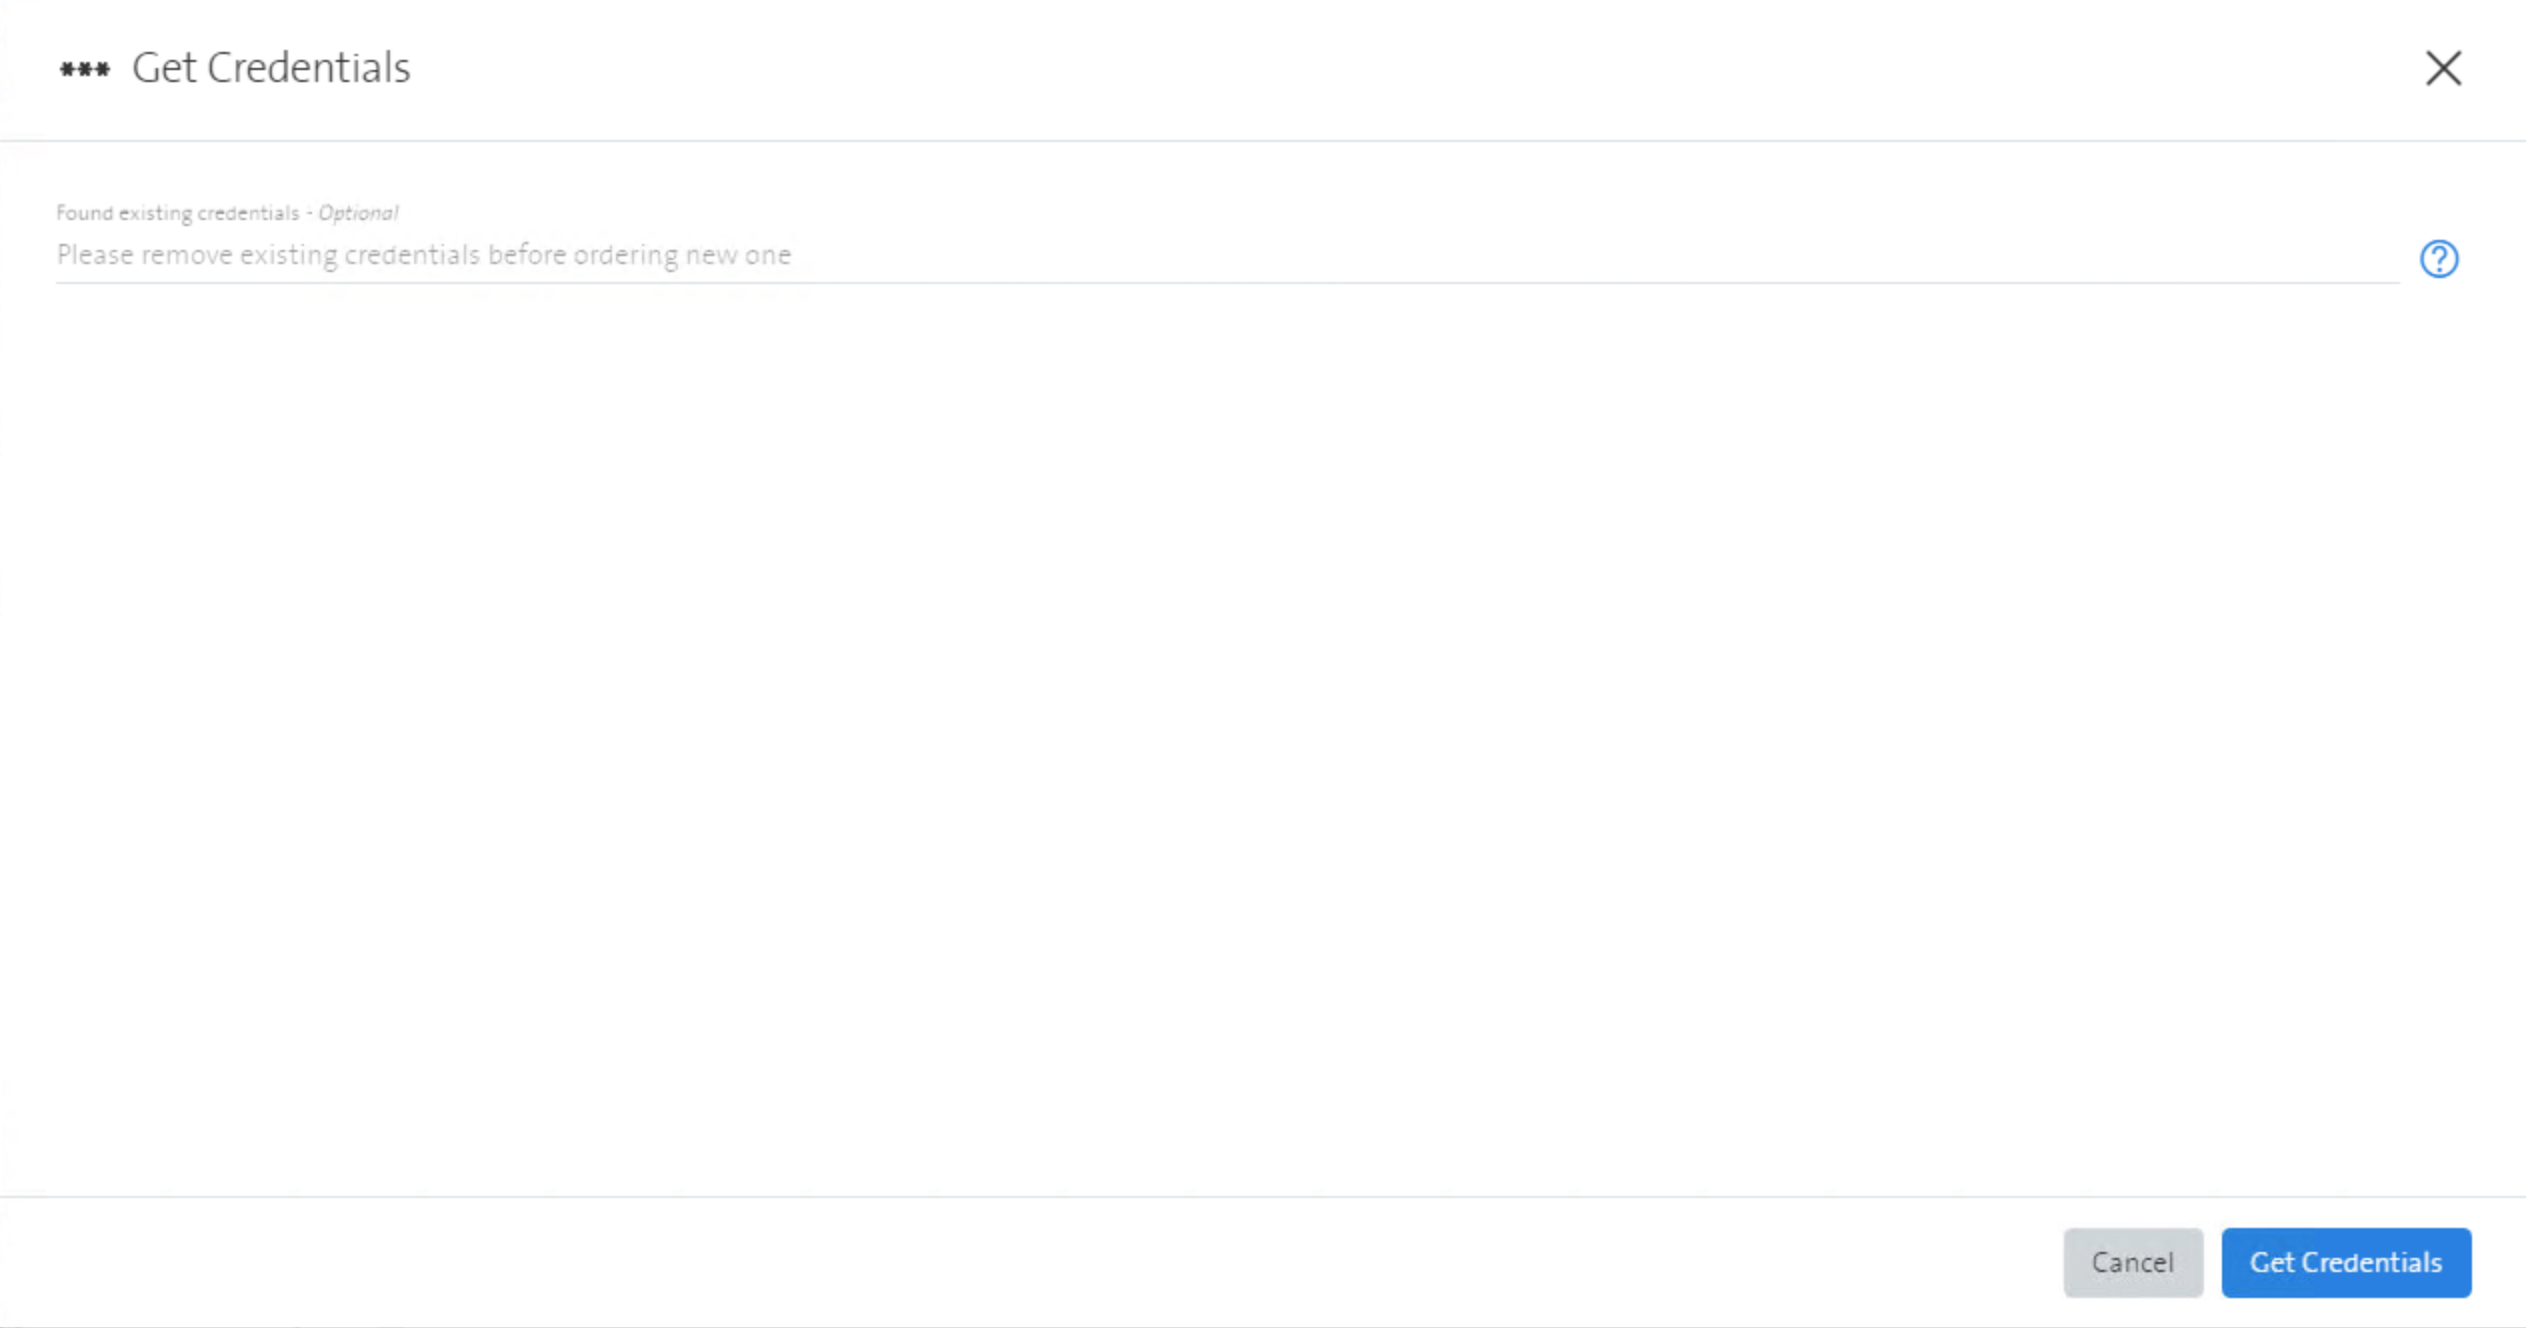
Only one request per deployment at the time can be submitted and processed. To submit a new request, you may wait for the Get Credentials task to be processed, or cancel it.
Display the Get Credentials request status.

Once the request is completed sucessfully, the initial instance login credentials like the initial password, and the JDBC connect string for database user mpds_admin can be displayed as shown below.
Note: The JDBC connect will only show one IP address. But if you are using ADVANCED Option then you need to keep in mind there exit 2 IPs.
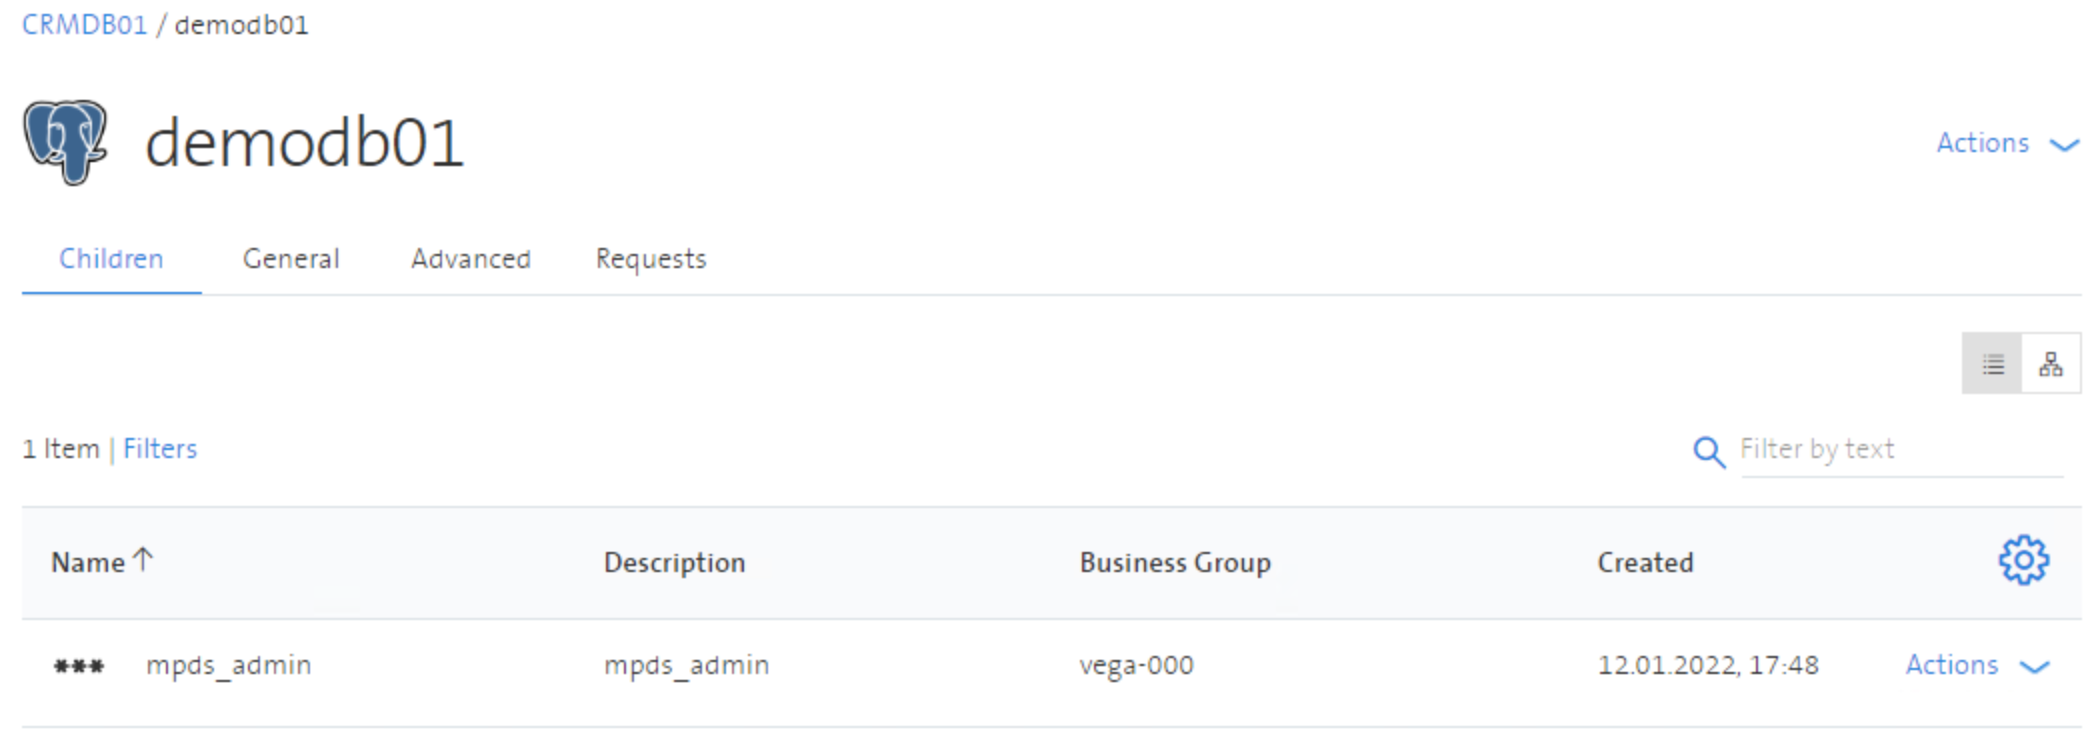
In order to display the credentials, you need to navigate to My Items, select the container, and the corresponding instance (child).
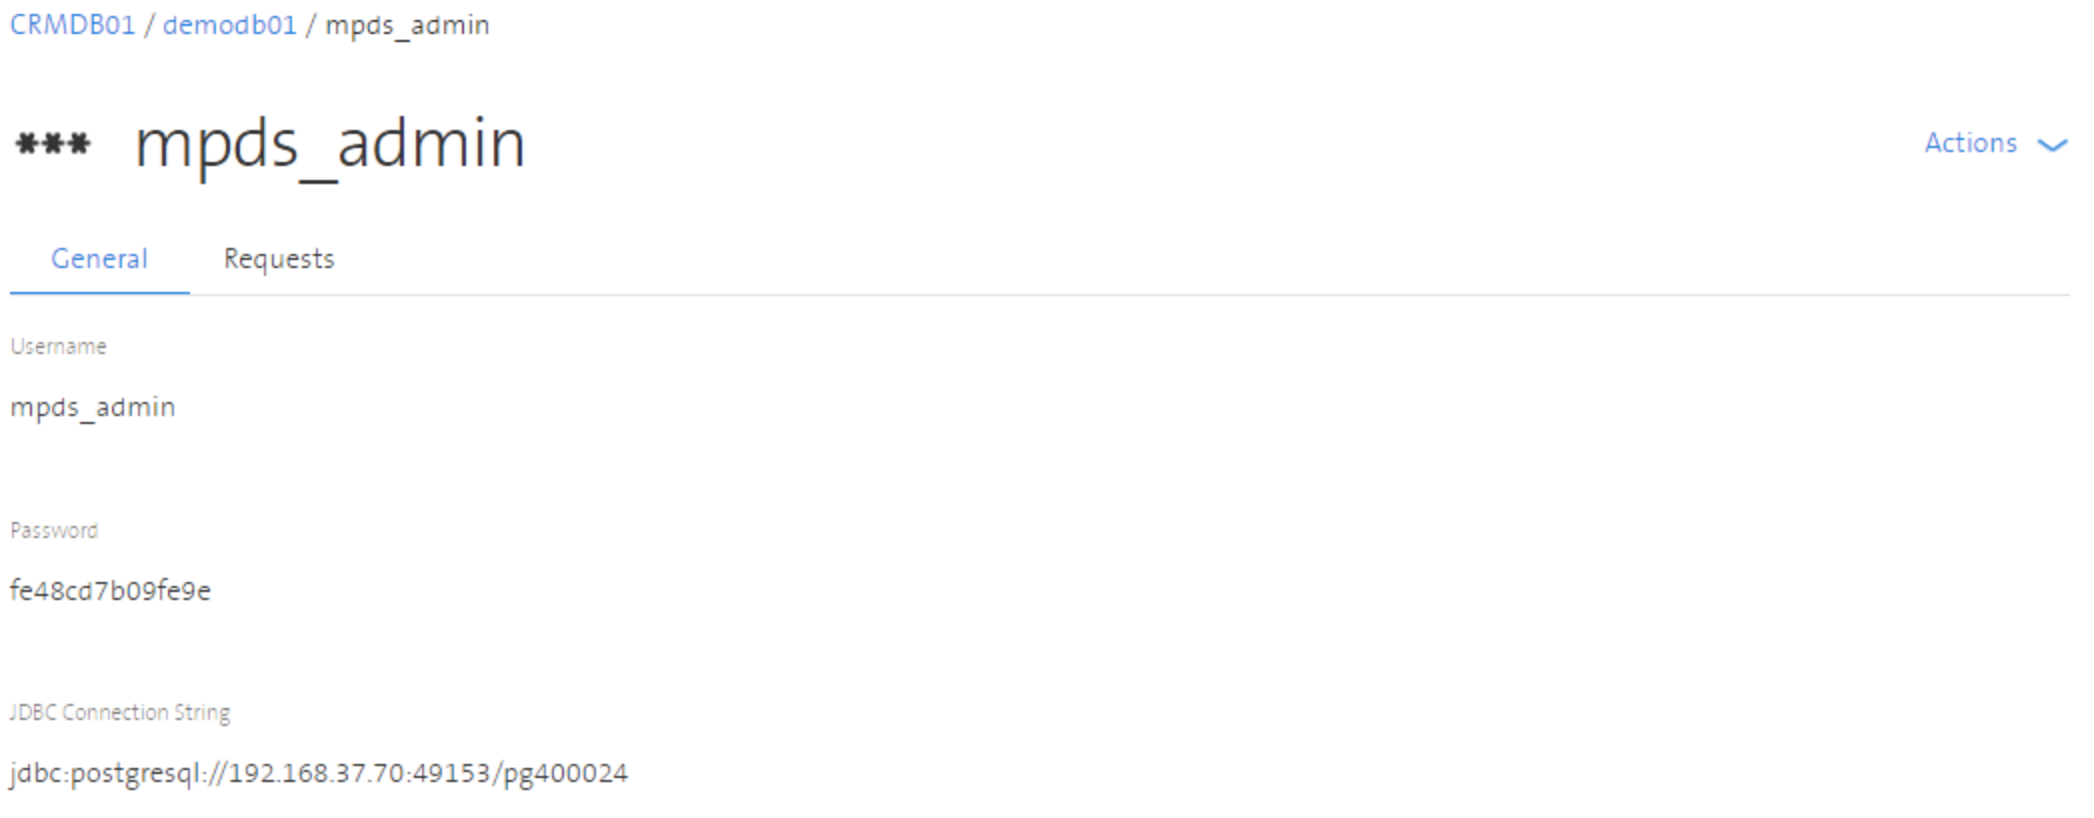
The initial password for the user mpds_admin needs to be changed after the first login and it's only valid for 24 hours. If you don't change the password you will need to recreate the user.
Note: Before a instance can be deleted, the credentials has to be removed first.
IP Ports which will be assigned to MPDS instances start from 49152 up to 65535 (within the same tenant). The first provisioned MPDS instance will get port 49152, second 49153, ... Ports from deleted instances will be reassigned to new instances. On the last picture you can see that instance "demodb01" uses port 49153.