Create Container
API Documentation
The following section describes how to deploy a container step-by-step. See also the API documentation for the detailed specification of the available resource actions.
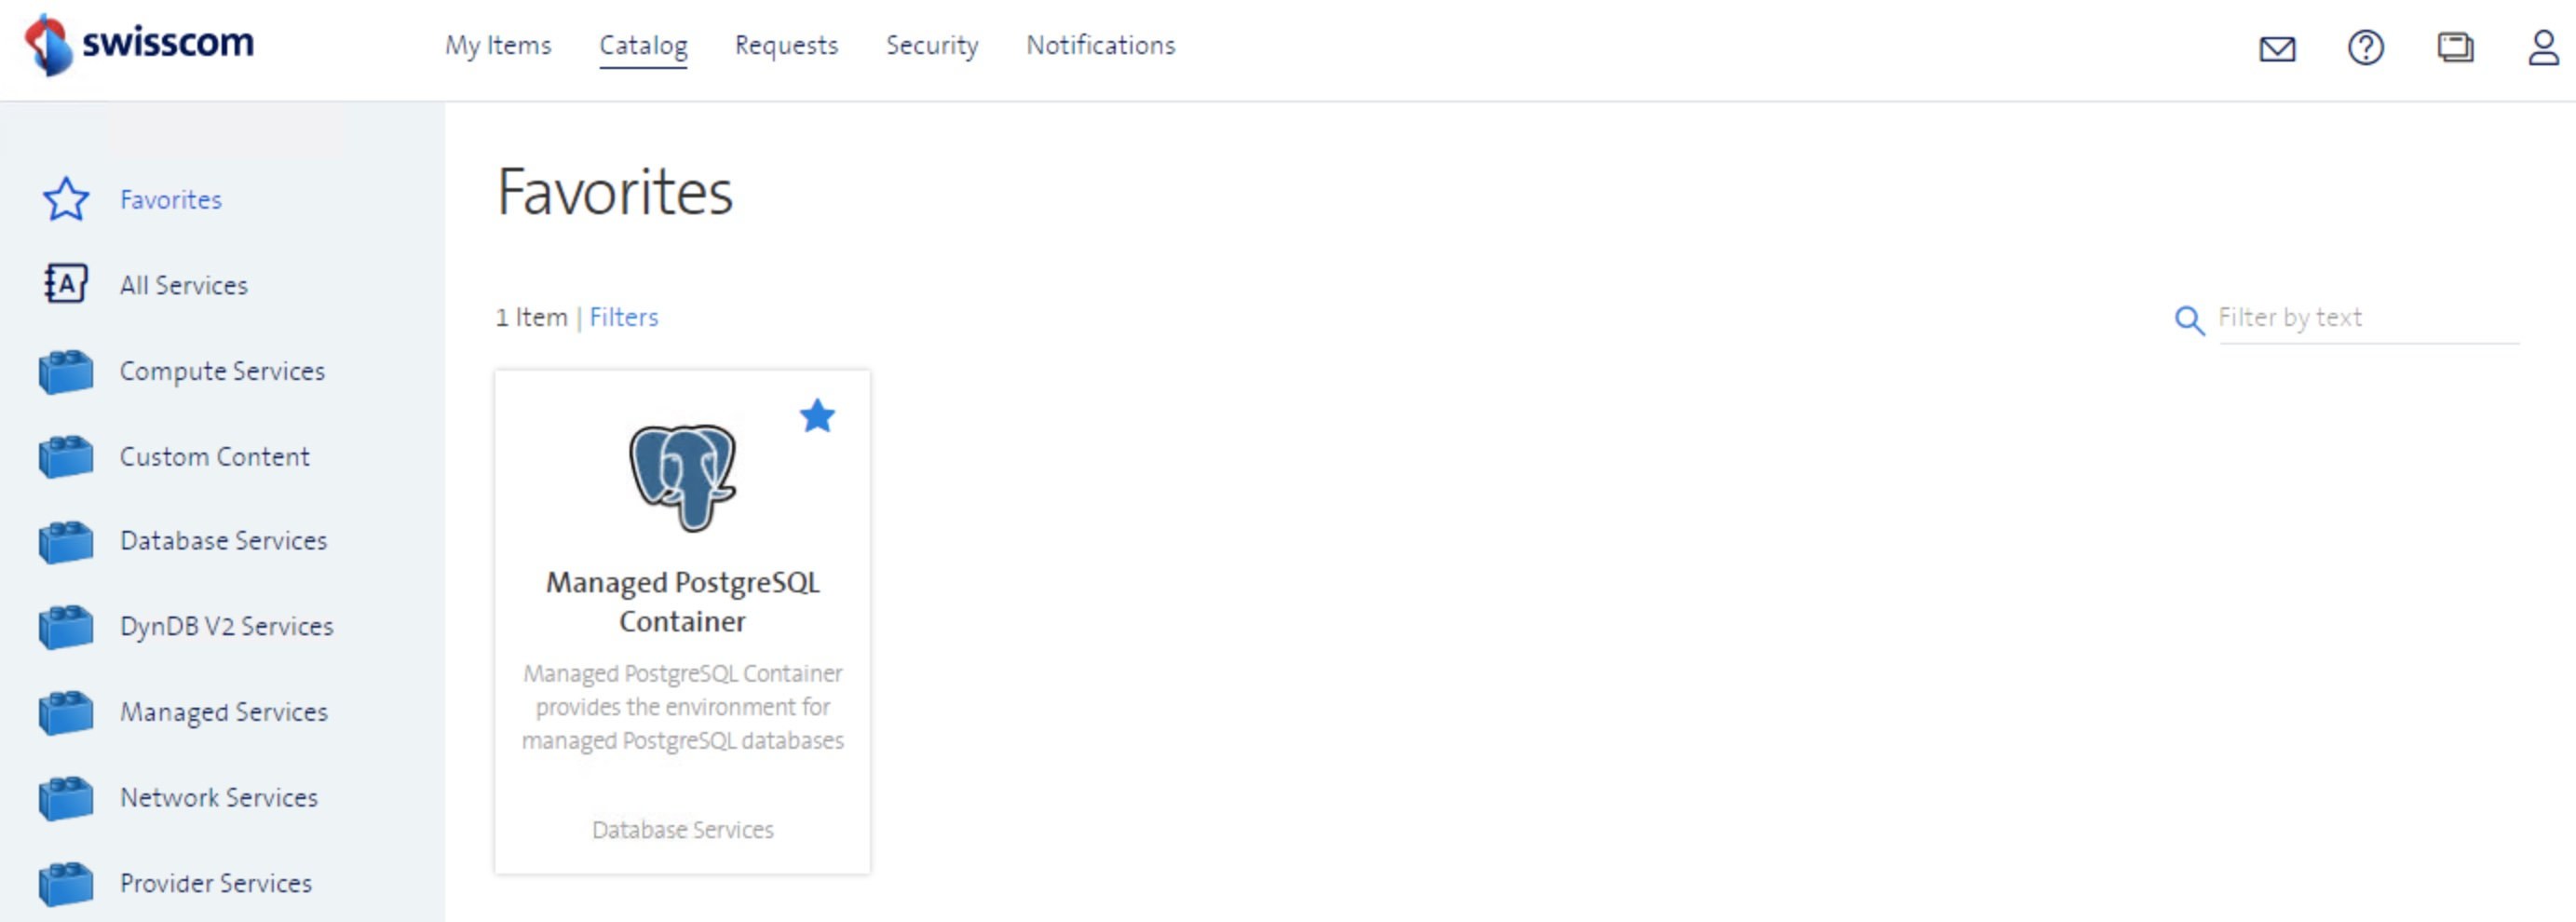
Step 1 - Select Catalog Item
Under "Catalog" menu search for "postgresql" to display the Managed PostgreSQL Container catalog item. Select the item to start the container creation process.
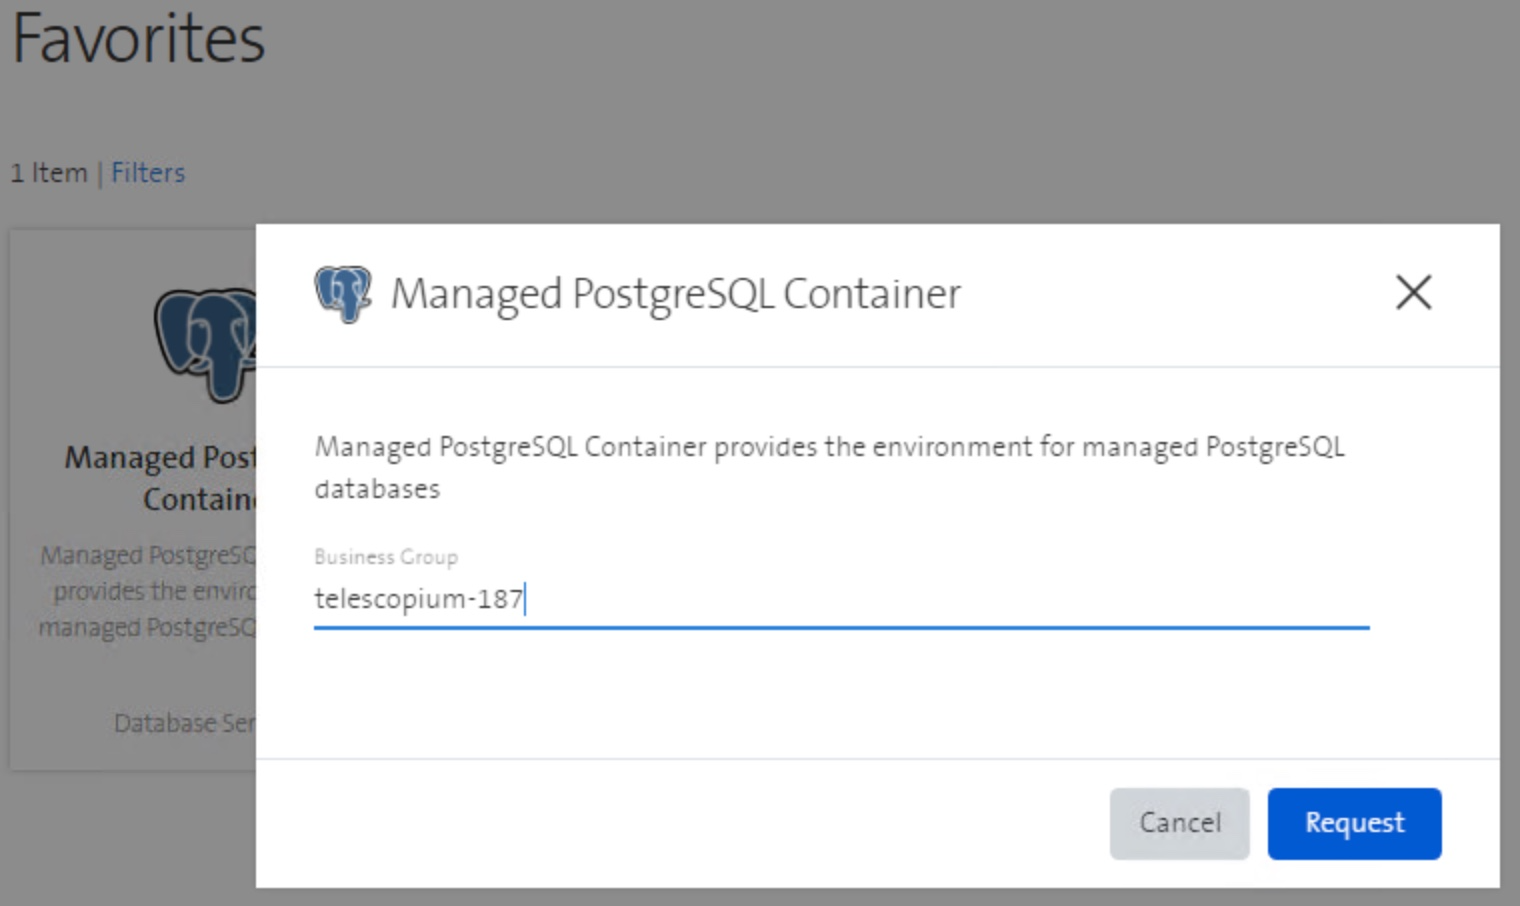
Step 2 - Select Business Group
Select the Business Group where the Database should be created and press Request.
Example screenshot when Business Group name is telescopium-187.
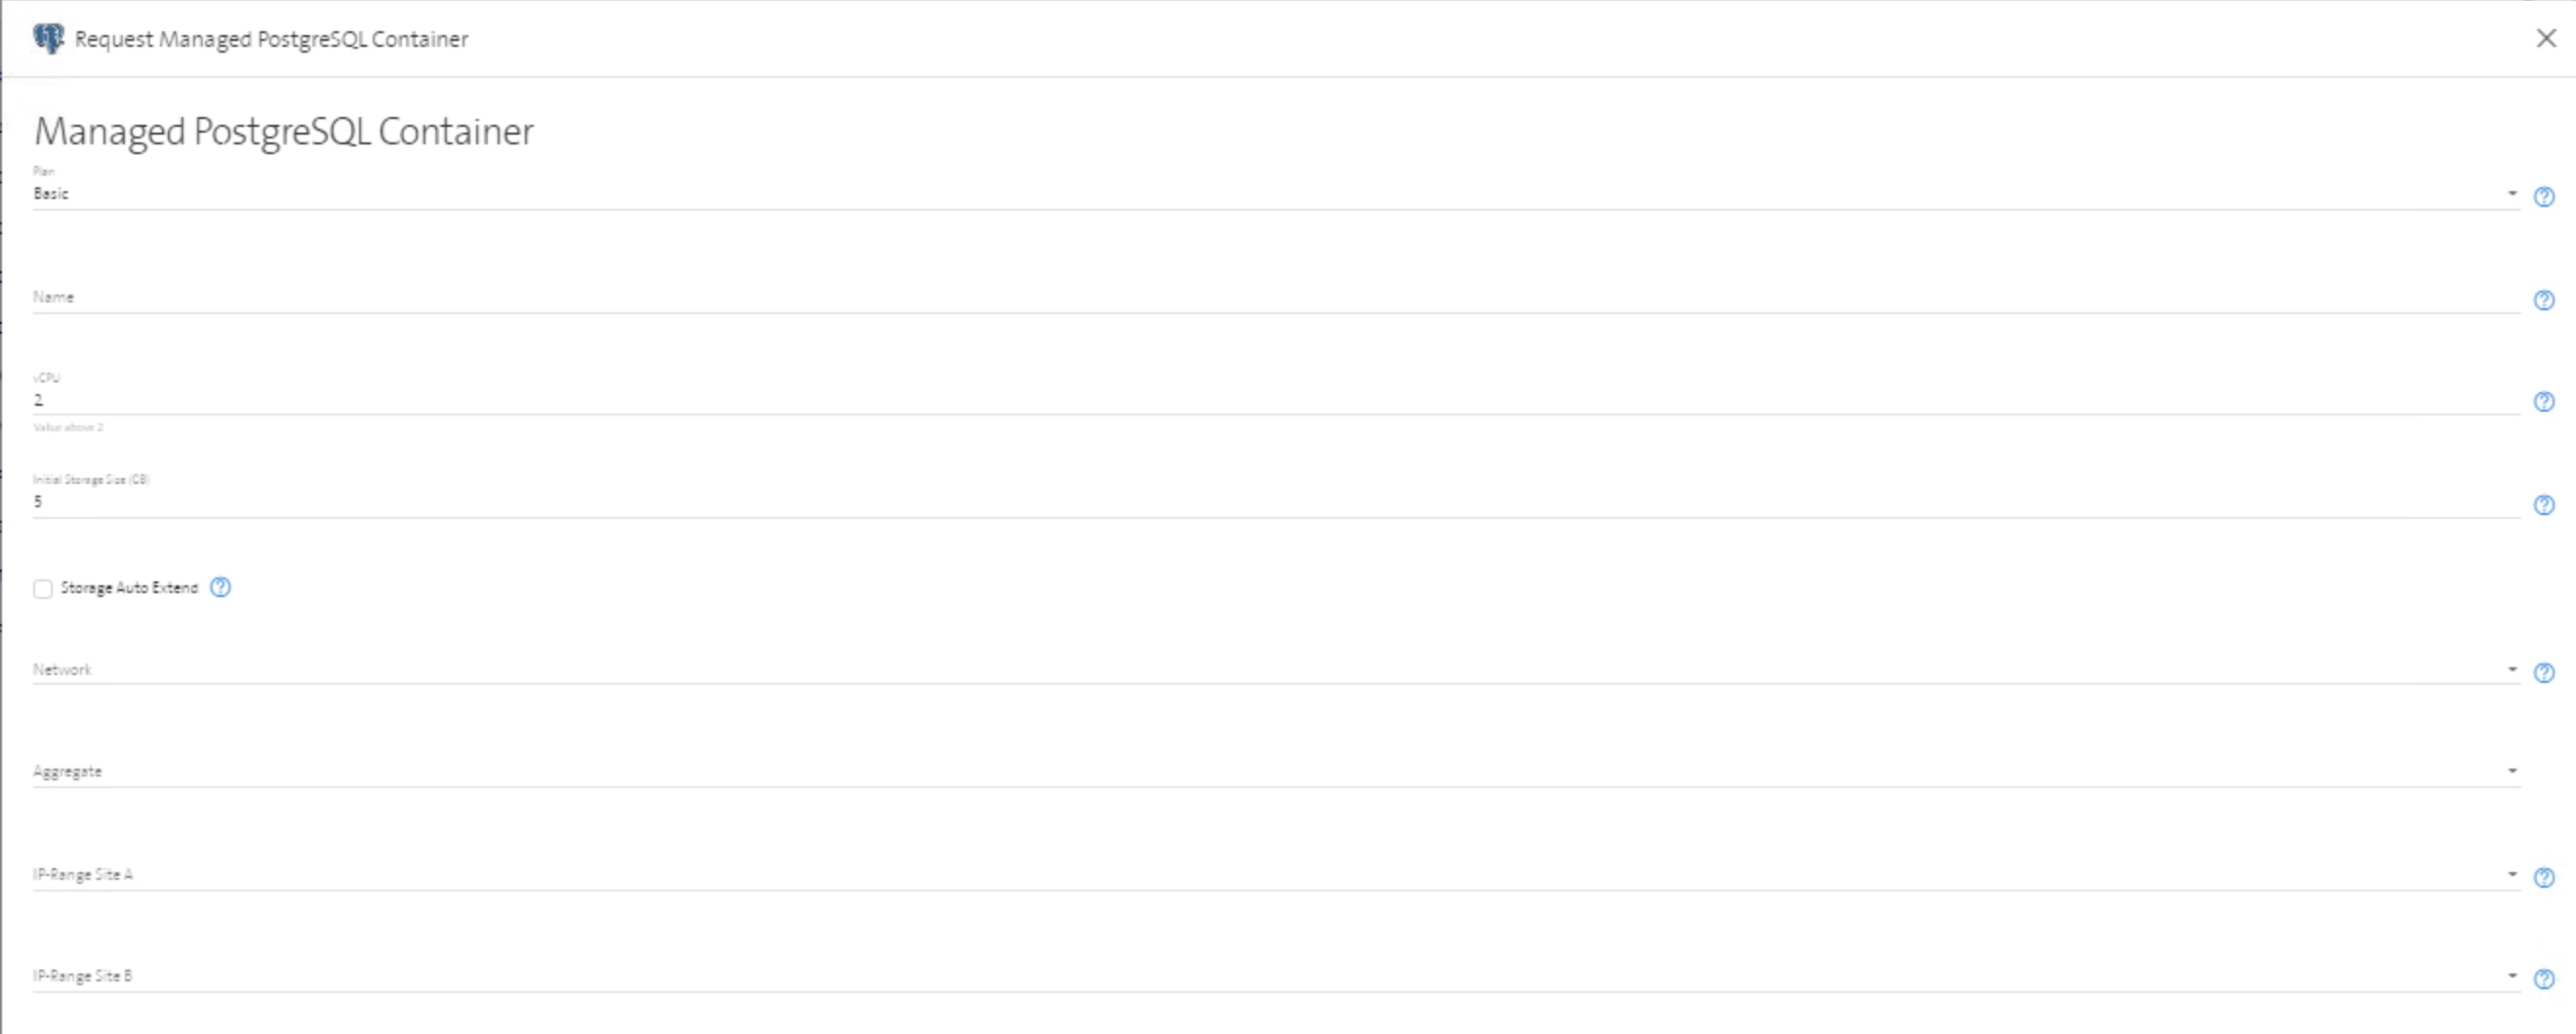
Step 3 - Container Creation Page Overview
The container creation page displays all container deployment parameters.
Tipp: Make sure the required IP ranges for container provisioning are available in advance. You need them as input values in the further container creation process.
Step 4 - Select Plan
Select the Plan according to your disaster recovery availability requirements.
- BASIC: single instance deployment
- ADVANCED: primary/standby database deployment
When ADVANCED plan is selected, the following plan modes are available:
- ASYNC mode (synchronous_commit = off) is the default and uses asynchronous network transport without automatic failover.
- SYNC_MANUAL mode (synchronous_commit = on) enables synchronous network transport without automatic failover in case the Master instance crashes.
- SYNC_AUTO mode (synchronous_commit = on with automatic failover) enables synchronous network transport between the Master and the Standby database including automatic failover in case the Master instance crashes.
See ADVANCED Plan for details.
Note: the ADVANCED plan can also be enabled as day-2 action. An ADVANCED setup can not be changed to BASIC afterwards.
Example screenshot when plan BASIC is selected.

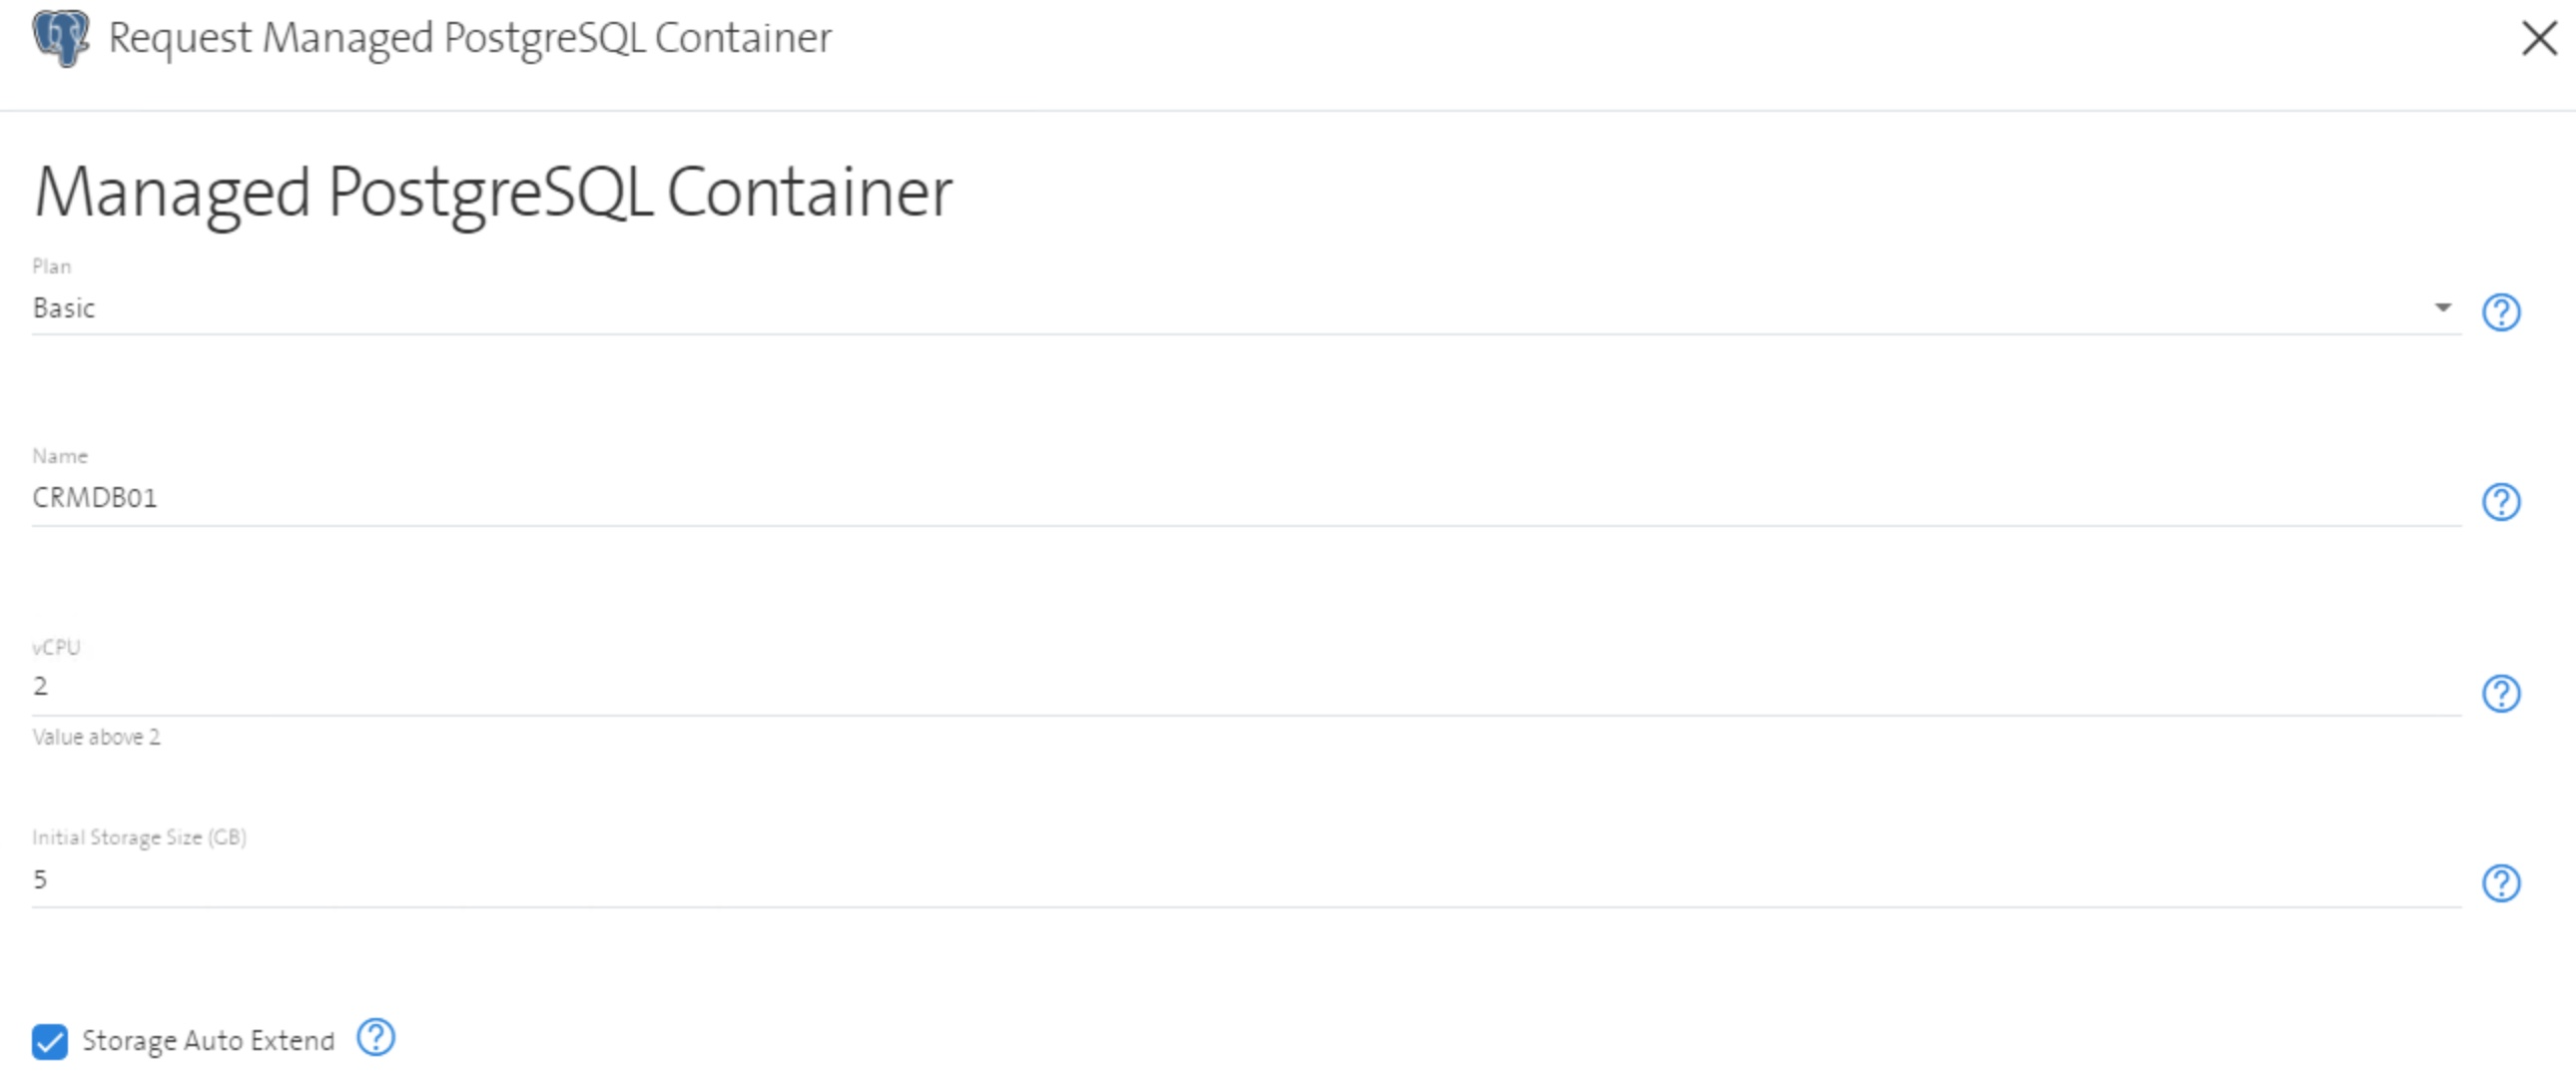
Step 5 - Define Friendly Name
Define the name for your container provisioning. This name is called Friendly Name and is not equal the technical name of the underlying container.
Name Examples:
- CRMDB01
- HR-APP-DB-201
- Geodata-Socks-A
Example screenshot when Name CRMDB01 is set.
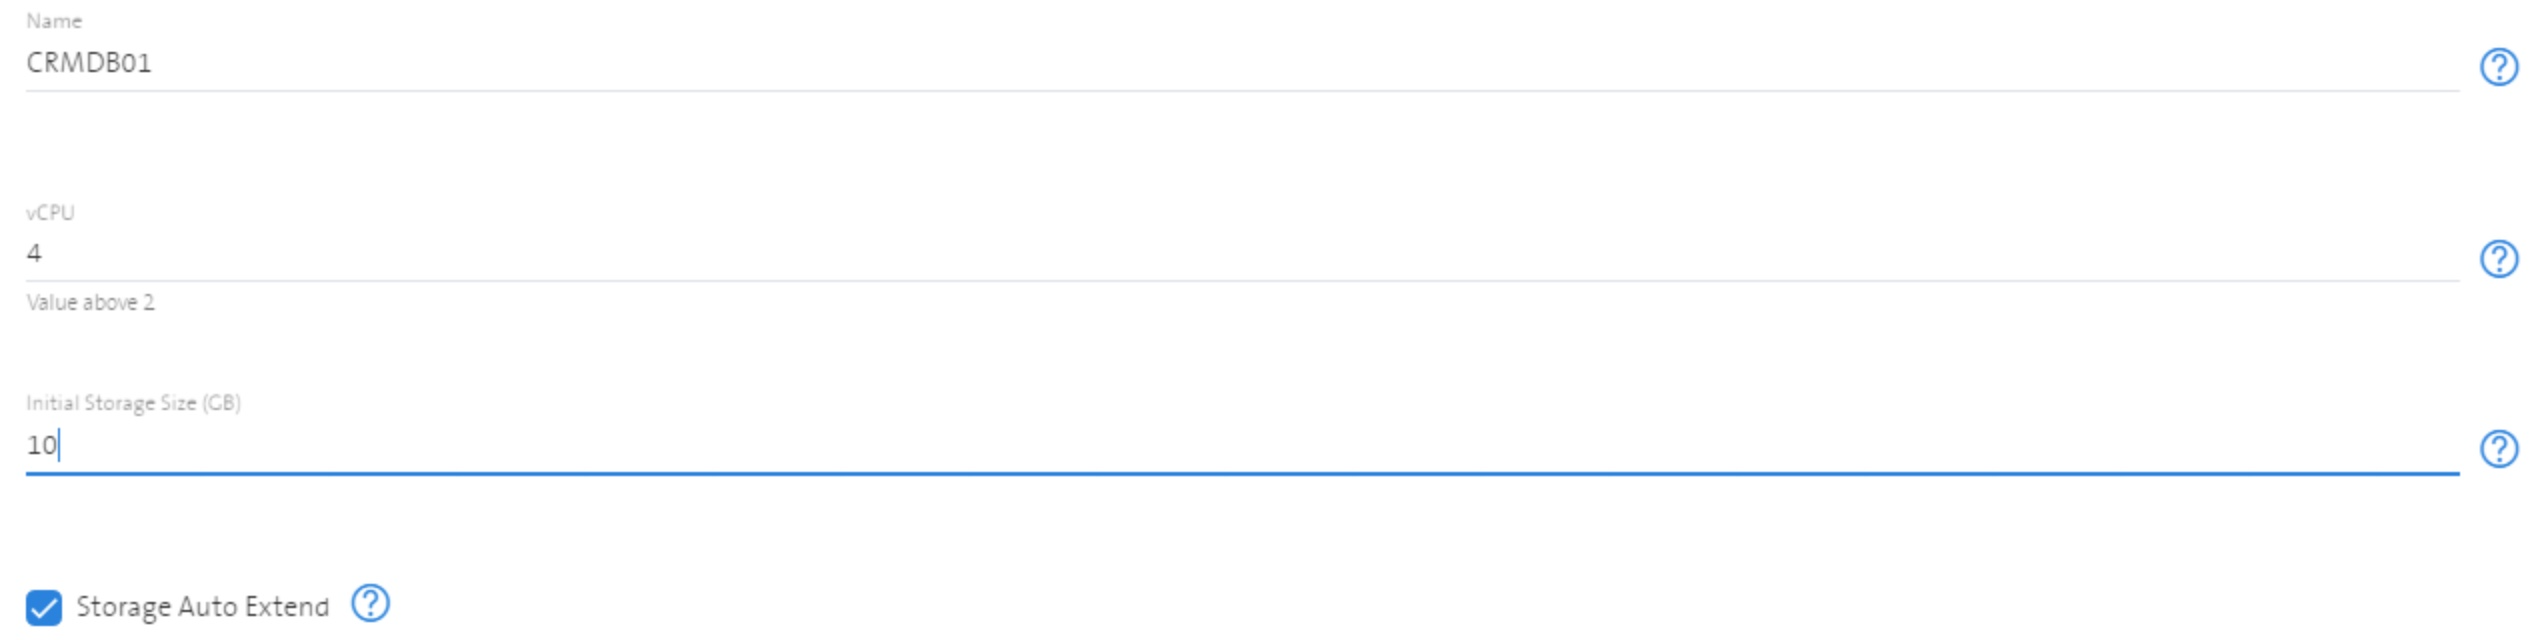
Step 6 - Select Number of vCPUs
Specify the number of vCPUs to be allocated.
- The number of vCPUs can be changed anytime as day-2 action
- For each vCPU we allocate 8 GB RAM (vCPU x 8GB = n GB RAM). 20% of the memory (shared buffer) is fix allocated per instance. Therefore the maximum number of instances is limited to 4. 20% of the memory is reserved for the OS.
- In an ADVANCED setup, both containers have the same number of vCPUs allocated
Example screenshot when vCPU = 4 is selected.
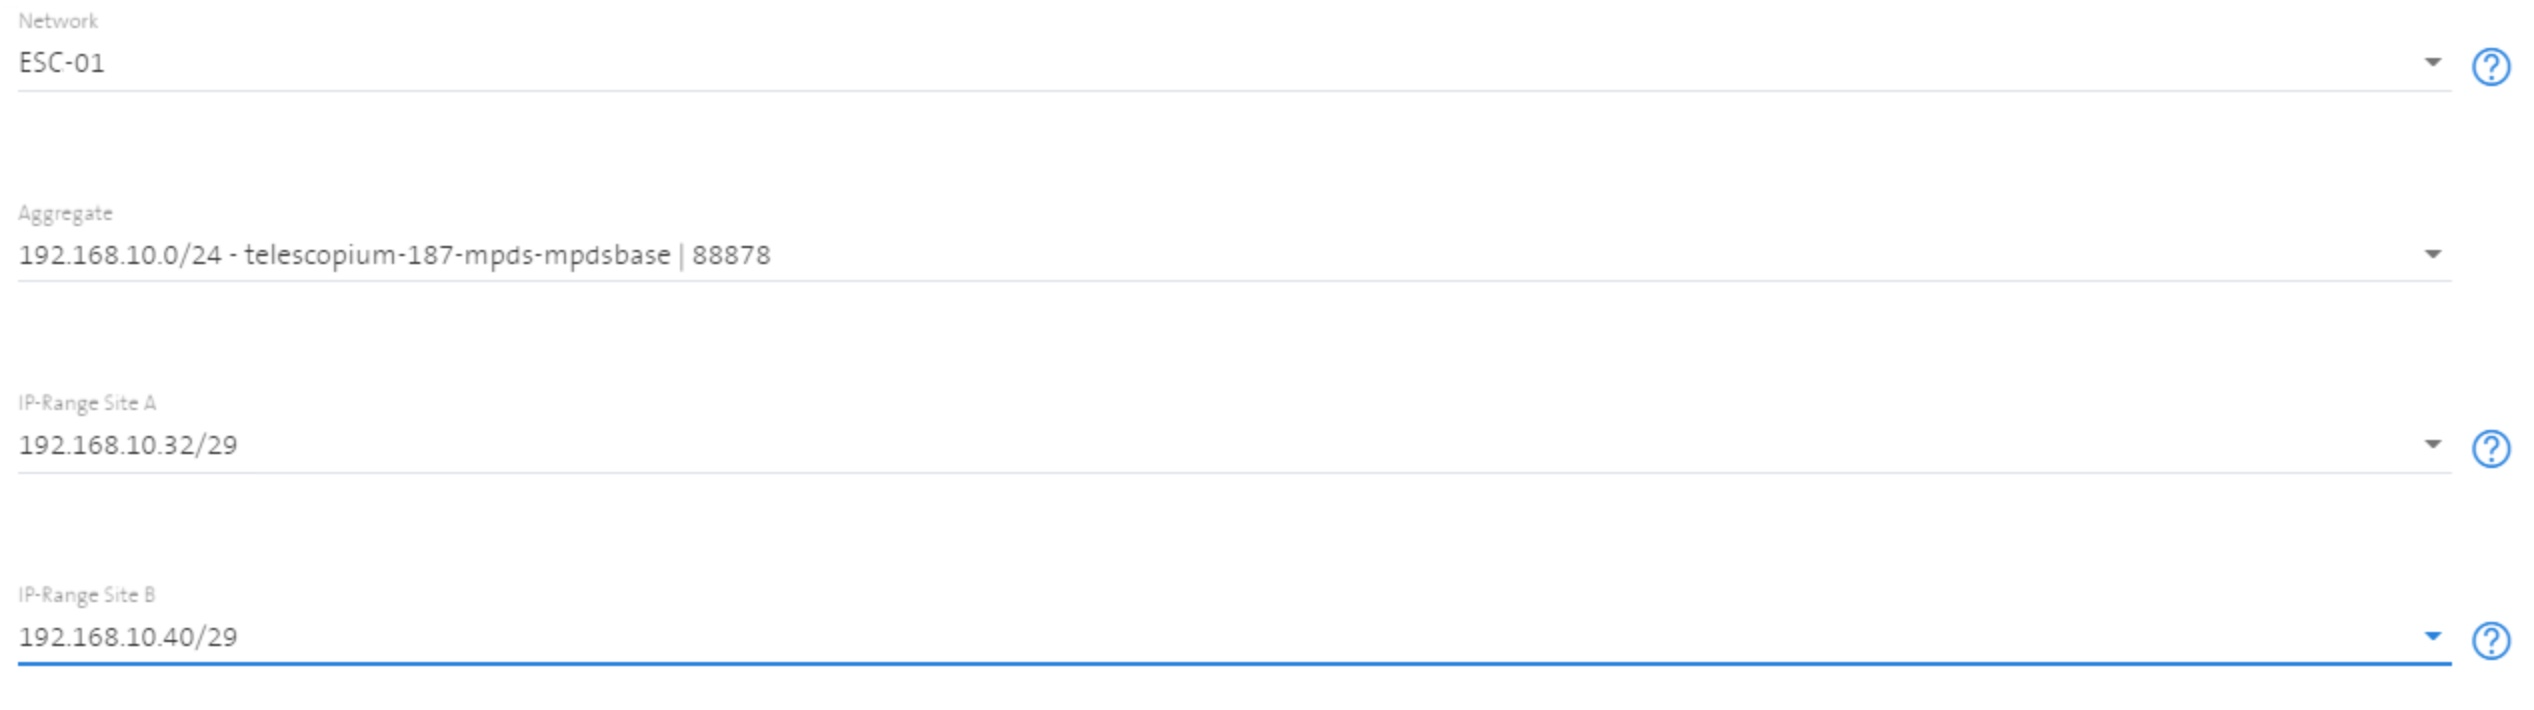
Step 7 - Network Configuration
Aggregate defines your network which contains the sub IP ranges.
Select the network name and the IP ranges for site A and site B. For both deployment types - BASIC and ADVANCED - two /29 networks (2 x 8 IP adresses) have to be specified. The allocation of a 2nd network allows an easy upgrade from BASIC to ADVANCED, or a move of the container to a second data center. The IP adresses are used for network ID, broadcast, virtual routers and for the VM itself.
Example screenshot with aggregate, network name and two selected IP ranges.
Basically, the port is incremented per tenant with every new instance: 49152, 49153, etc.. If an instance is deleted, the port will be reused in the next deployment. An active port is unique within a tenant, i.e. port 49152 exists in the customer A tenant, the customer B tenant, etc.. We use range 49152-65535 to assign ports to the VMs. According to IANA, these are private ports that do not conflict with existing services.
Step 8 - Start Service Request
Review all the values entered and start the container deployment workflow by pressing the Request button. The button can not be selected when not all field values are set properly.

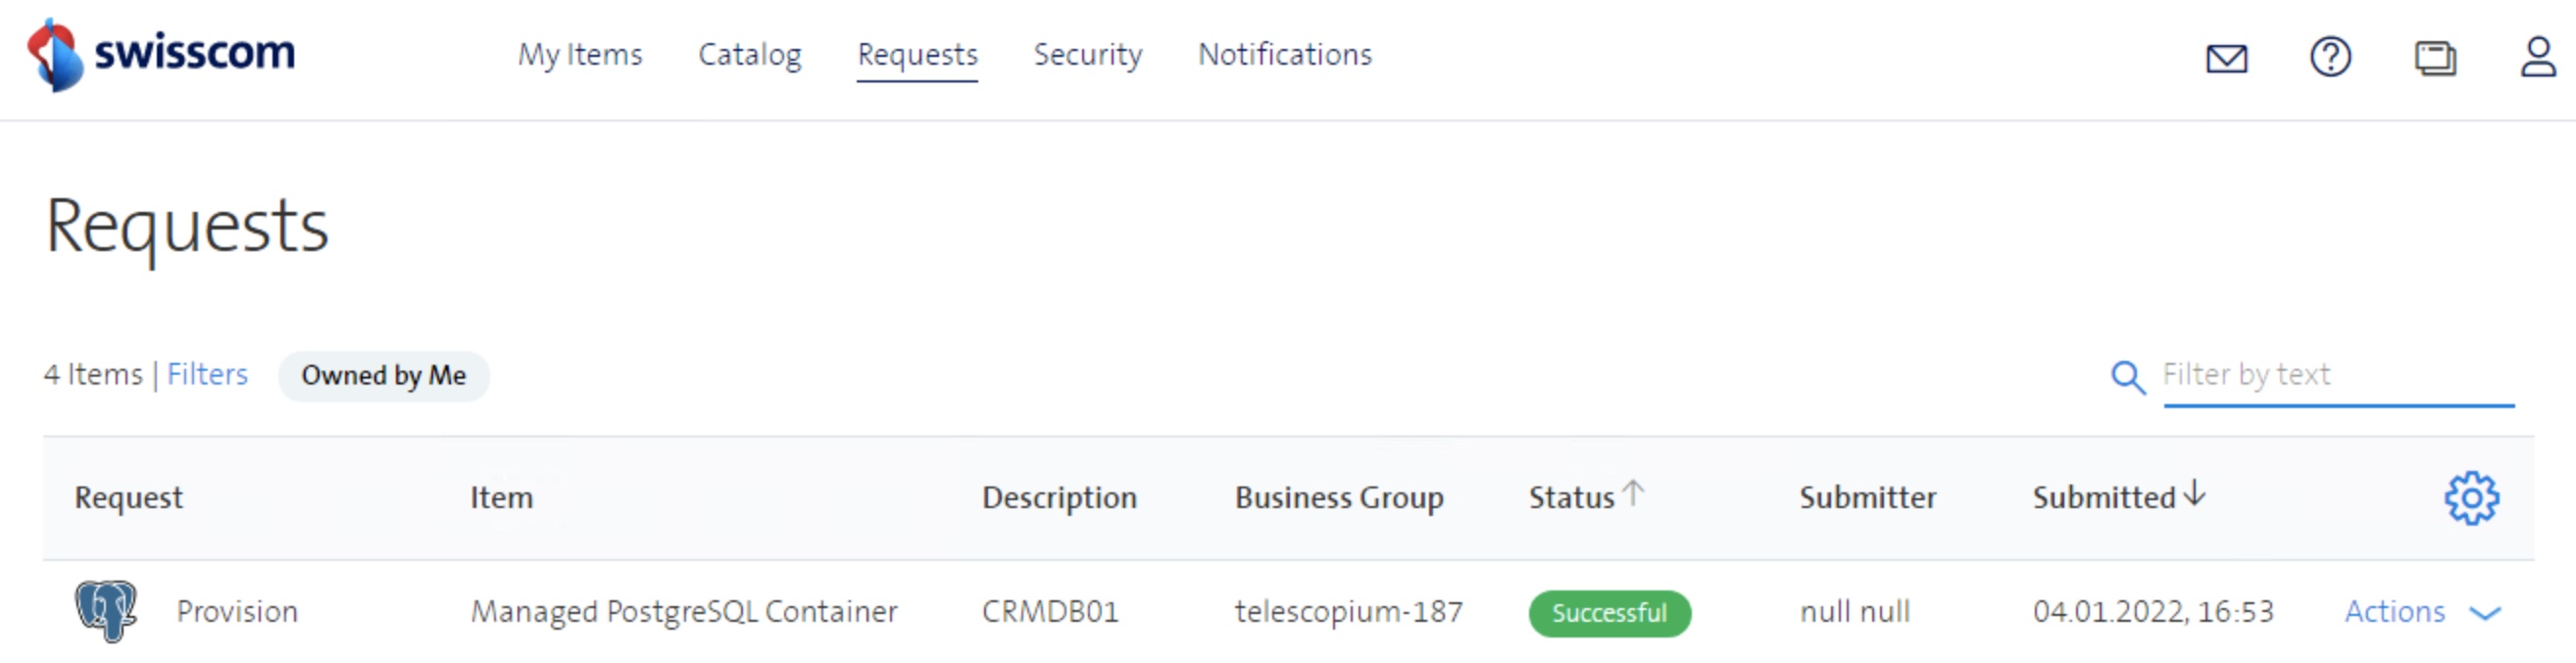
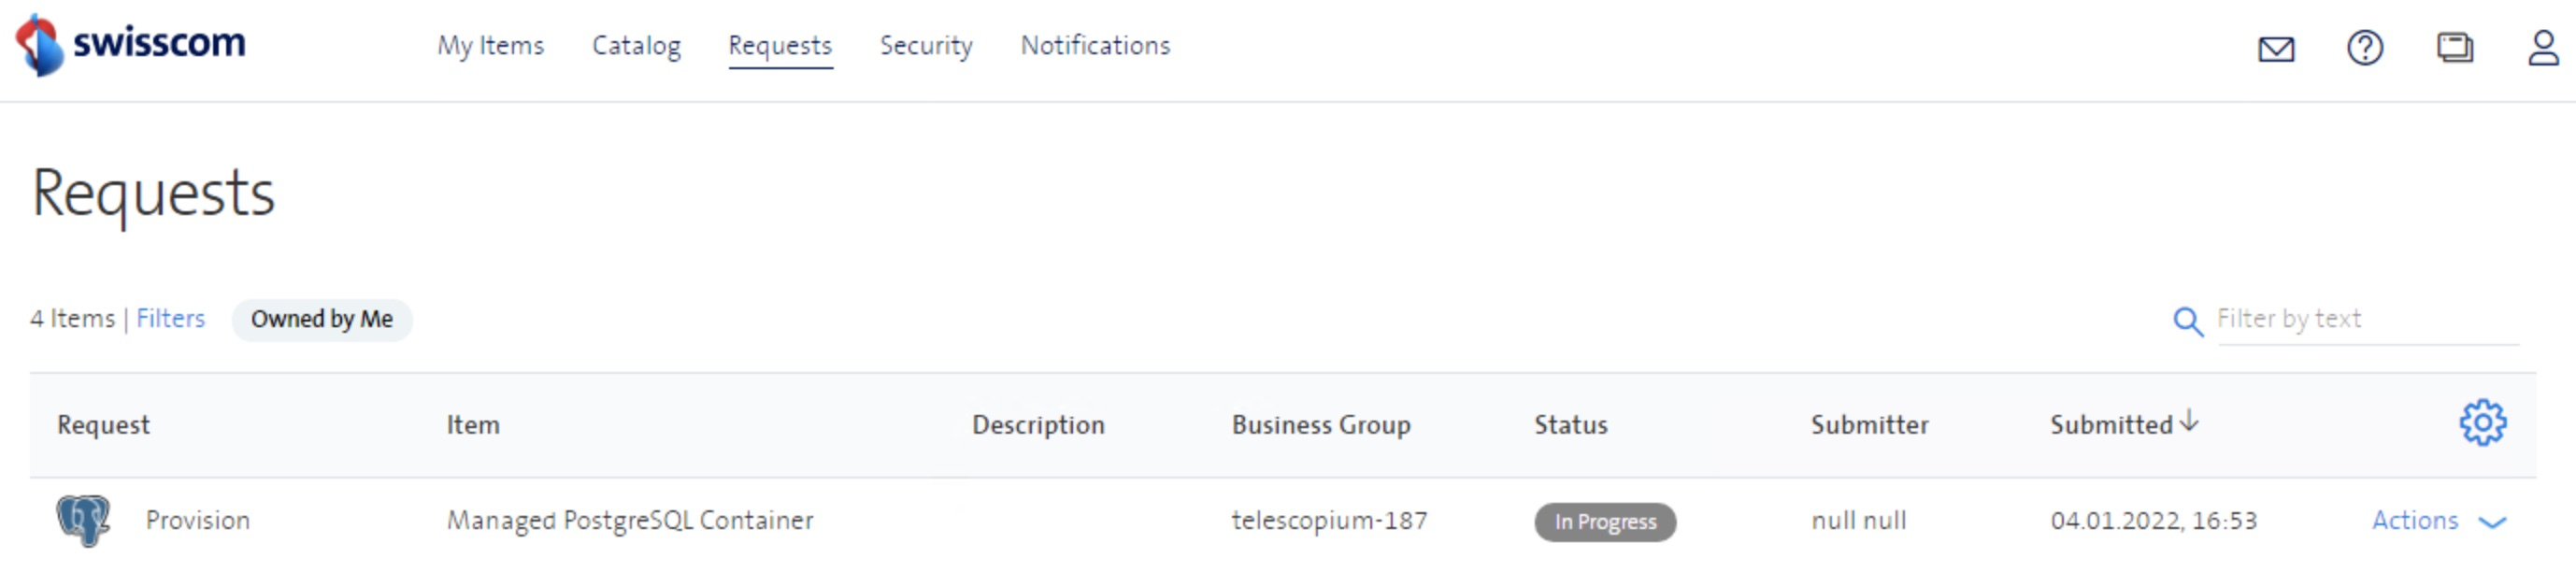
Step 9 - Show Progress of Deployment
Once the deployment is submitted, the progress can be monitored under tab Requests.
Step 10 - Review the Deployment
After the workflow has been executed (status Successful), details about the container can be displayed.
Example screenshot for new created container CRMDB01.