Manage NFS
Add NFS Container
To add a storage container to a File Service Premium instance, navigate to the desired File Service in the Swisscom Portal.
Select the desired instance and click on Actions.
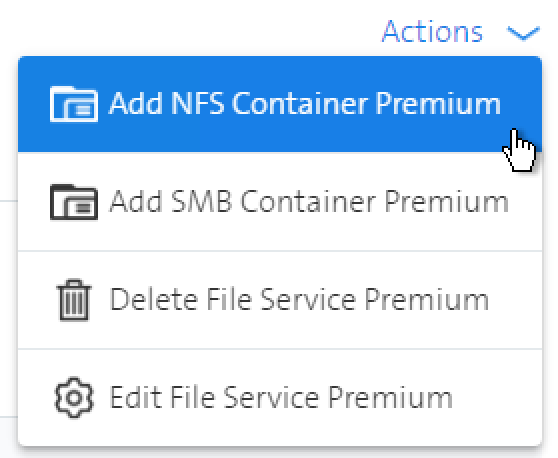
Click on Add NFS Container Premium.
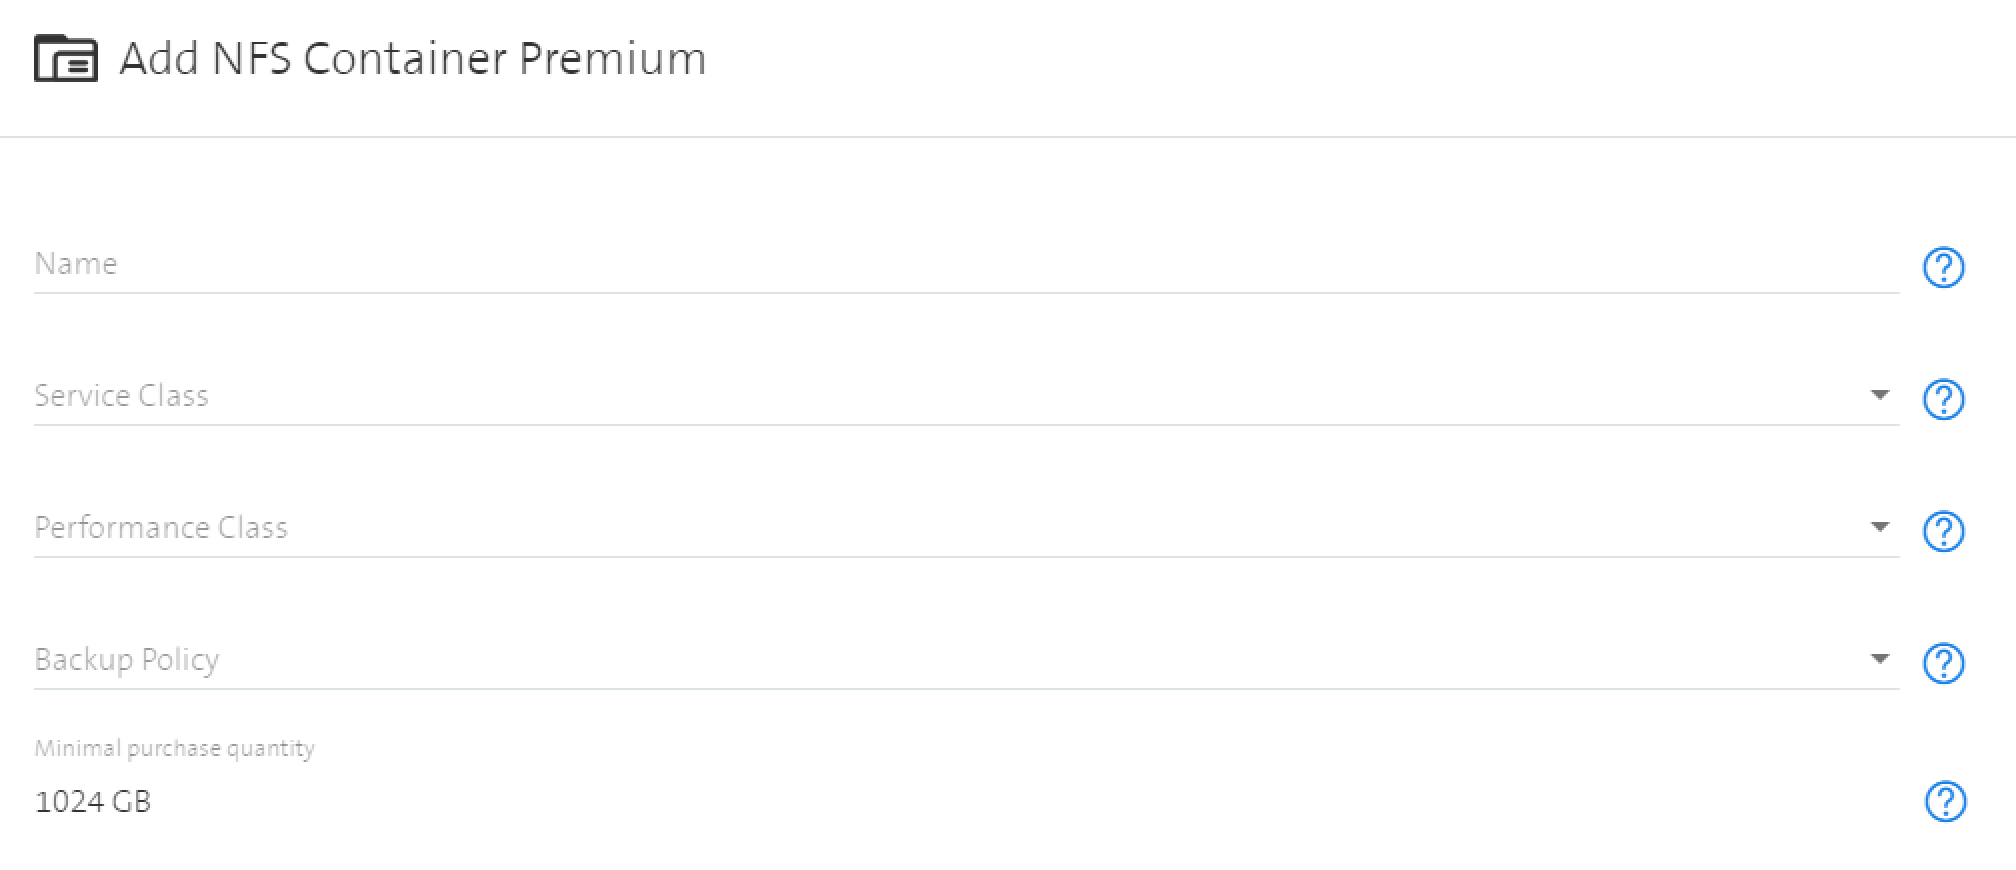
Fill in following fields:
- Name: A name for this container.
- Service Class: Defines the service class for this container. Service level Standard is equal to single-site storage. Service level Advanced is multi-site storage.
- Performance Class: The selected performance class is applied to all shares created under this container.
- Backup Policy: Defines the retention time of backups for this container.
- Minimal Purchase Quantity: The sum of all share sizes under this container must have a total size of at least 1024 GiB, for total sizes not exceeding this minimal purchase quantity, there will be an extra charge.
Click on Add NFS Container Premium to add the storage container to your instance.
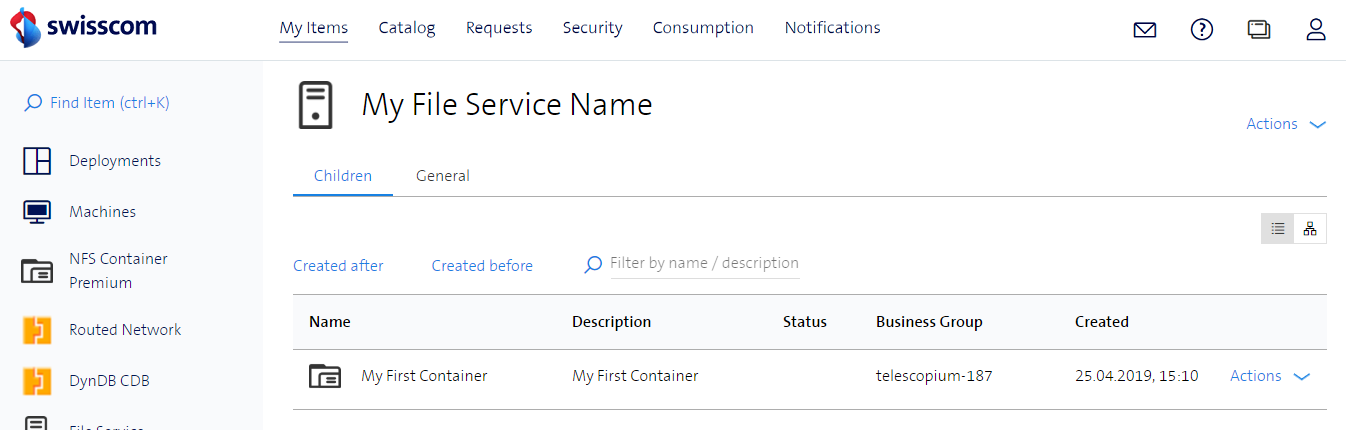
As soon as the storage container is created successfully, it will be shown in the tab Children in your File Service instance.
Add NFS Share
To add a share to a storage container in a File Service instance, navigate to the desired NFS container in the Swisscom Portal.
Click on Actions.
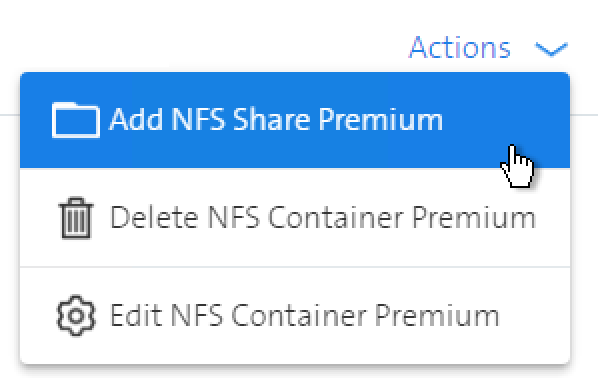
Click on Add NFS Share Premium.
Fill in following fields:
- Name: The name of the share. This will be added as a suffix to the mountpoint. Format: Between 3 and 15 alphanumeric characters (the only special characters allowed are underline (_) and dash (-), except the first character).
Security recommendation: Use random generated names. - Share ACL: Allowed access list (single IP address, IP ranges in CIDR notation, hostname), plus a permission indicator ("~rw" for read-write, "~ro" for read-only), one entry per line. Examples: "172.168.0.1~rw", "vm.storage.local~rw", "1.2.3.4~ro"
Security recommendation: Be extremely careful about the allowed IPs, as it is the only access limitation available with NFS.
Advanced ACL: For advanced ACL please read the Advanced ACL Section below. - Size: Size of the share (1-81920 GiB)
- Name: The name of the share. This will be added as a suffix to the mountpoint. Format: Between 3 and 15 alphanumeric characters (the only special characters allowed are underline (_) and dash (-), except the first character).
Click on Add NFS Share Premium to add the share to your storage container.
As soon as the share is created successfully, it will be shown in the tab Children in your container.
Advanced ACL
In addition to the basic ~ro and ~rw permissions, there are several other, advanced ACL options. Please read this guide before you try to implement "squashing" options. Especially granting the all root squash permission can be very dangerous.
With the basic permissions, a root user of the system will be able to either read (~ro) or (over)write (and delete) (~rw) files with superuser permissions. So it can be possible that a root user from system2 can delete a file on the NFS share created with root user from system1
Let's assume system2 is insecure and many people have root access, therefore above use case should be prevented. In this case, the advanced squashing options can be used (ACL = "system1~rw,system2~rsrw"). The root user ID (0) for the root user will be mapped to the user ID "nobody" (65534) on the NFS server. Any root user on system2 won't be able to modify or delete an existing file from a root user created on system1 anymore. Normal users won't be mapped to other IDs for those options.
The option "~alls" will squash every user to "nobody" on the NFS share. The option "~alrs" will squash every user to "root" on the NFS share. This is very dangerous and should be only used in special cases!
| Acronym | ACL Name | Description |
|---|---|---|
| ro | "read only" | all users can read, root user can read root files (no squash) |
| rw | "read write" | all users can read/write, root user can create files as root (no squash) |
| rsro | "root squash read only" | all users can read, root user cannot read root files -> squashed to "nobody" (user ID 65534) |
| rsrw | "root squash read write" | all users can read/write, root user is squashed to "nobody" (user ID 65534) |
| alls | "all squash" | all users are squashed to "nobody" (user ID 65534) |
| alrs | "all root squash" | all users are root (user ID 0) (dangerous!!) |
ACL examples
| ACL entry | Description |
|---|---|
| 100.100.10.0/24~ro | all servers from this IP range will have read-only access on the NFS share. |
| 100.100.11.24~rw | users from this IP address are allowed to read,write,update and delete files. |
| 100.100.11.30~rsrw | maybe on this system many users have sudo rights. All users have rw permissions, but sudo commands are mapped to "nobody" ID on the NFS share. |
| mywebserver.com~alls | all calls from this server are mapped to "nobody". This can be used to restrict permissions further. |
Important: It is not possible to have a IP address twice or more in the ACL. Doing so will result in unwanted behavior. (Example: 10.10.10.0/24~ro,10.10.10.10~rw -> won't be possible)
Delete NFS Container
To delete the NFS Container, click on the desired item in the Swisscom Portal.
- Select the desired Item and click on Actions
- Click on
Delete ...to delete the desired item