Use SMB
Manage Access Rights
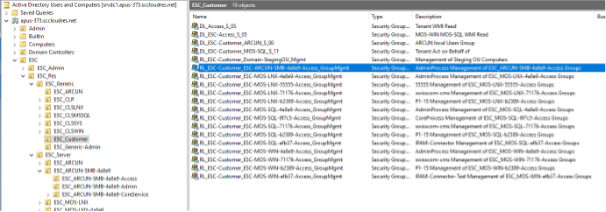
In your business group, each share has three groups. These groups can be used to add Users from your AD to grant them specific rights. Your AD administrator can grant some user rights to modify all the share groups from your business group, after he granted himself write access to the management group:
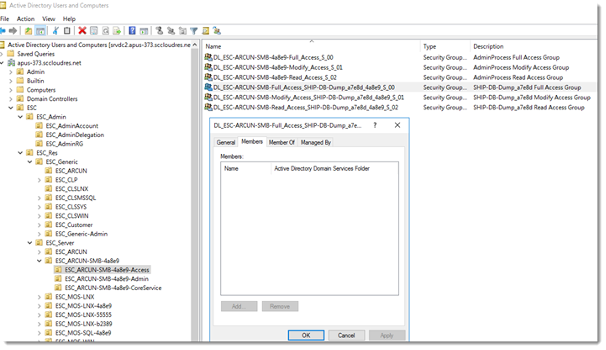
The three groups created in your AD are named as follows:
Fullcontrol Group:
DL_ESC-ARCUN-SMB-Full_Access_<ShareName>_<Uuid>_<BgId>_S_00
Write Group:DL_ESC-ARCUN-SMB-Modify_Access_<ShareName>_<Uuid>_<BgId>_S_01
Read Group:DL_ESC-ARCUN-SMB-Read_Access_<ShareName>_<Uuid>_<BgId>_S_02
Granting the permission to the different access groups will then be enabled:
For being able to mount a SMB share, you need to be in one of those 3 groups.
If you want to add specific NTFS-based access rights, your user needs to be in the Fullcontrol Group of the specific share.
Here are the detailed descriptions what each predefined groups can do with files and folders on the SMB Share:
Read Group
- View and read files and folders
- Run executable files and scripts
Modify Group
- All
Read Grouppermissions AND - Write files and folders
- Change files and folders
- Delete files and folders
- All
Fullcontrol Group
- All
Modify Grouppermissions AND - Change Security permissions on files and folders
- All
Mount SMB Share (Windows)
There are several ways to mount a share on a Windows system.
Via GUI
Open your explorer, click on Computer and select "Map Network Drive"

Select your preferred Drive.
Copy the "Mount Path" of your share you see in the GUI with all backslashes in the field "Folder".
Check "Reconnect at login" if you permanently want to add the Share to the system.
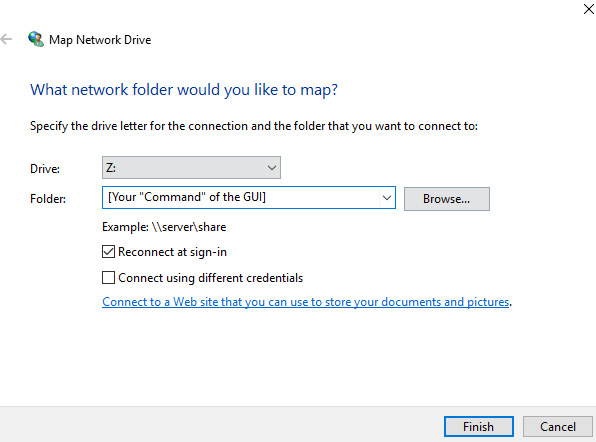
Click Finish.
Command line (Powershell)
Open Powershell.
Type the following, replacing Z: with the Drive letter you want to assign to the Share.
New-SmbMapping -LocalPath 'Z:' -RemotePath '[the "Mount Path" of your share you see in the GUI with all backslashes]'
Command line (CMD)
Click Start and then click Run.
In the Open box, type cmd to open command line window.
Type the following, replacing Z: with the Drive letter you want to assign to the Share.
Net use Z: [the "Mount Path" of your share you see in the GUI with all backslashes] /PERSISTENT:YES
Restore SMB Snapshots (Windows)
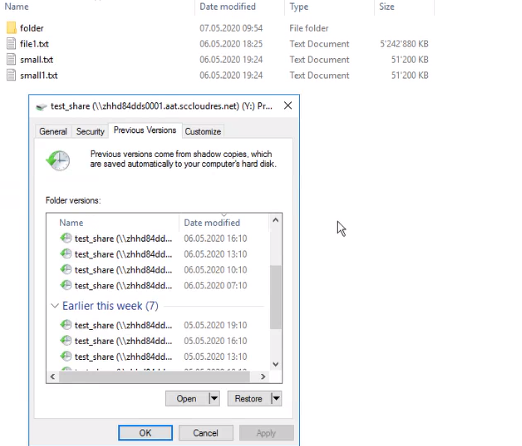
To restore older versions of files and folders, you can navigate in the desired directory or file in the windows explorer.
Right click on the desired item and select Properties.
There, you navigate on Previous Versions.
In the list, you see all older versions of the Item and can select the desired timestamp to get this version of the file or directory.
Additional AD Groups
The following four AD groups additionally exist. Three AD groups are created on Business Group level and can be used to give access to users to all shares of an entire Business Group.
Fullcontrol Group:
DL_ESC-ARCUN-SMB-Full_Access_<BgId>_S_00
Write Group:DL_ESC-ARCUN-SMB-Modify_Access_<BgId>_S_01
Read Group:DL_ESC-ARCUN-SMB-Read_Access_<BgId>_S_02
An additional AD group which grants access to all containers is created for technical purposes.
Customer Group:
DL_ESC-Customer_ARCUN_S_00