Use iSCSI
Connect to an iSCSI LUN (Windows)
Step 1 - Enable MPIO
- Open Server Manager and click on Manage -> Add Roles and Features
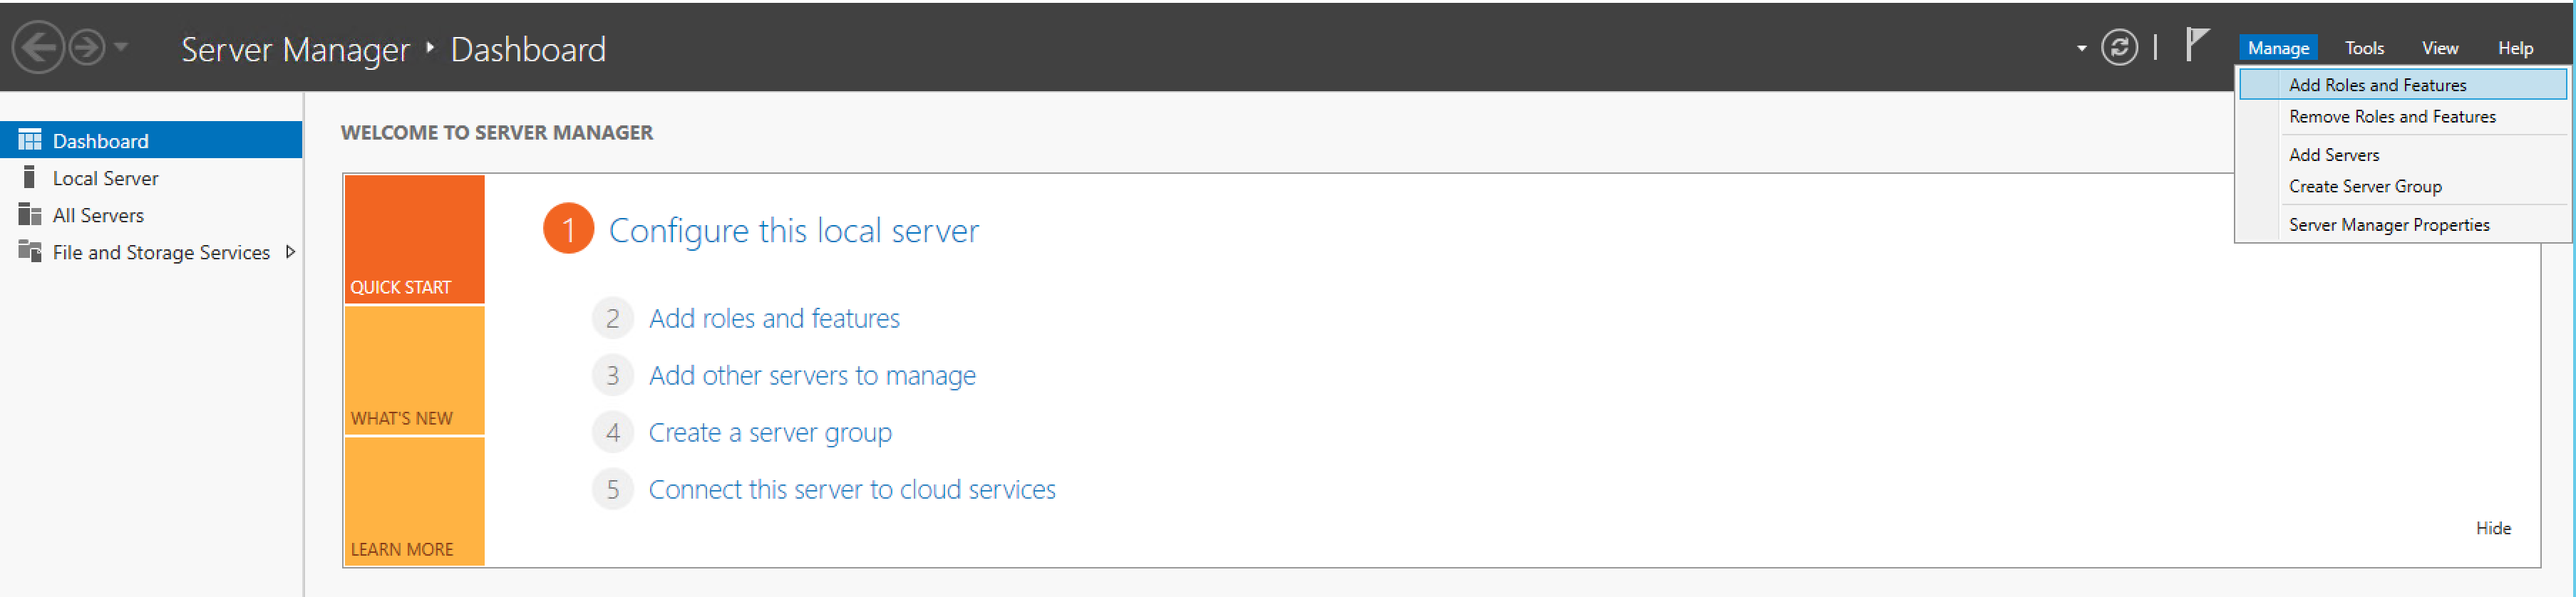
- Click Next 4 times
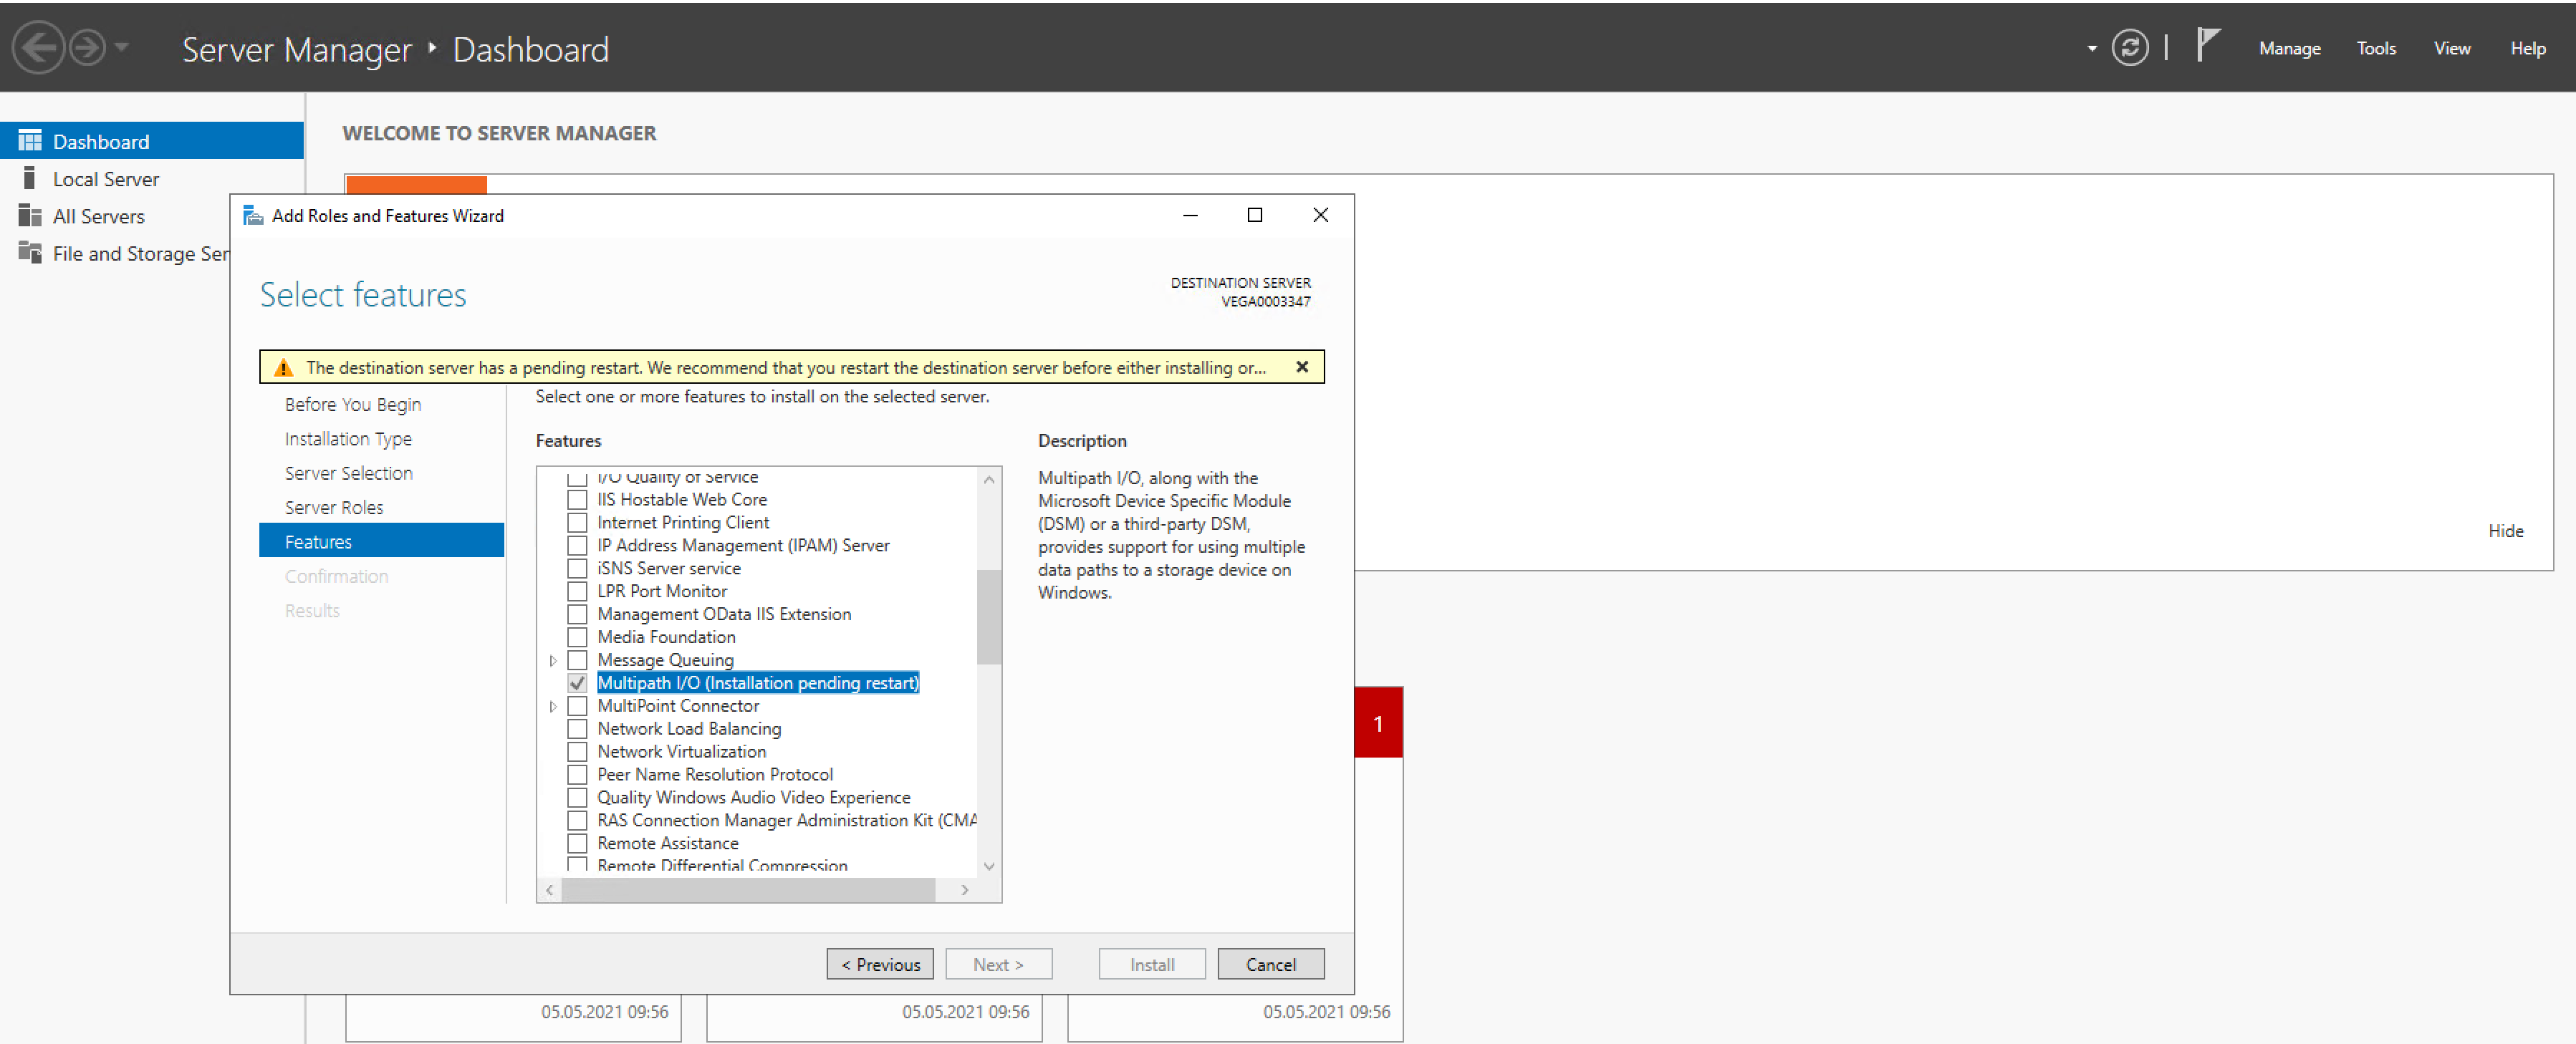
- Enable Multipath I/O and restart your machine
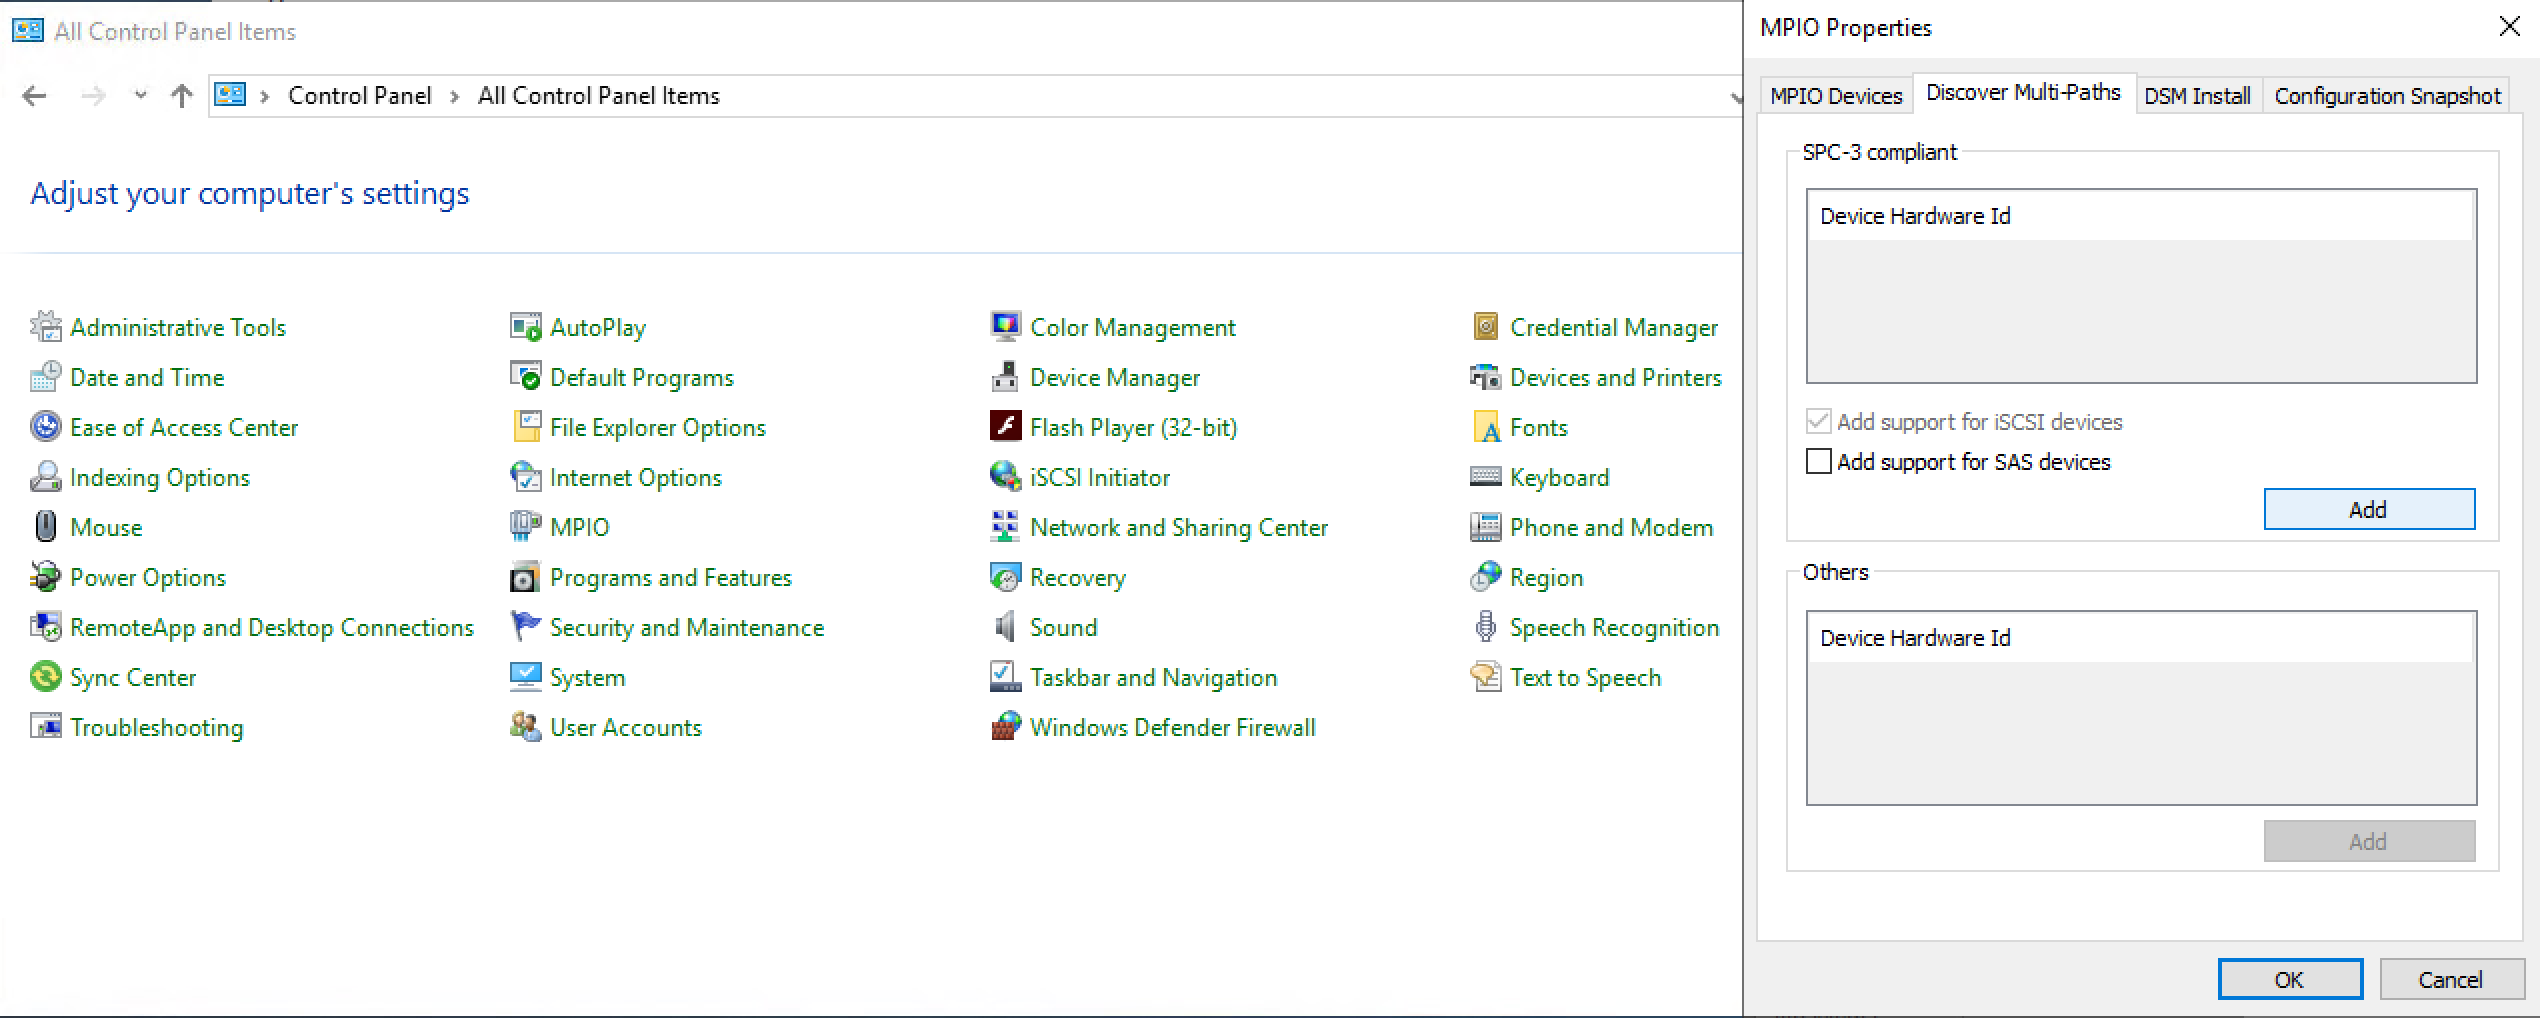
- Go to Control Panel -> MPIO
- Go to the Discover Multi-paths Tab
- Select Add support for iSCSI Devices and click Add
Step 2 - Add Target Portal
- Open the iSCSI Initiator

- Go to Target Portals -> Discover Portal...
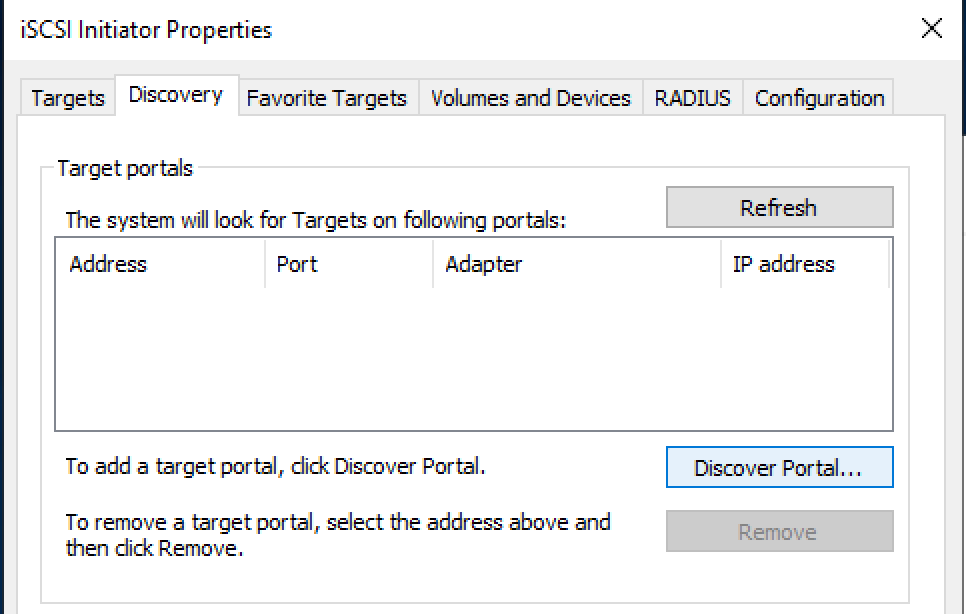
- Add one of the IP addresses of your iSCSI LUN. The port is always 3260.
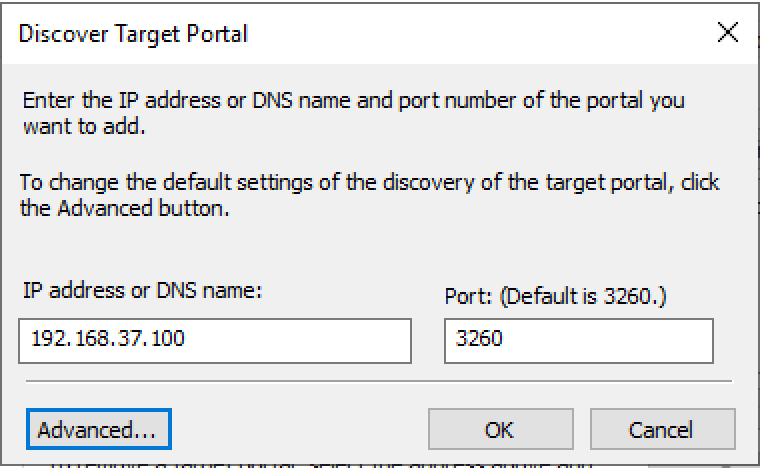
You can find the IP addresses information in the ESC on your iSCSI LUN -> Target IPs
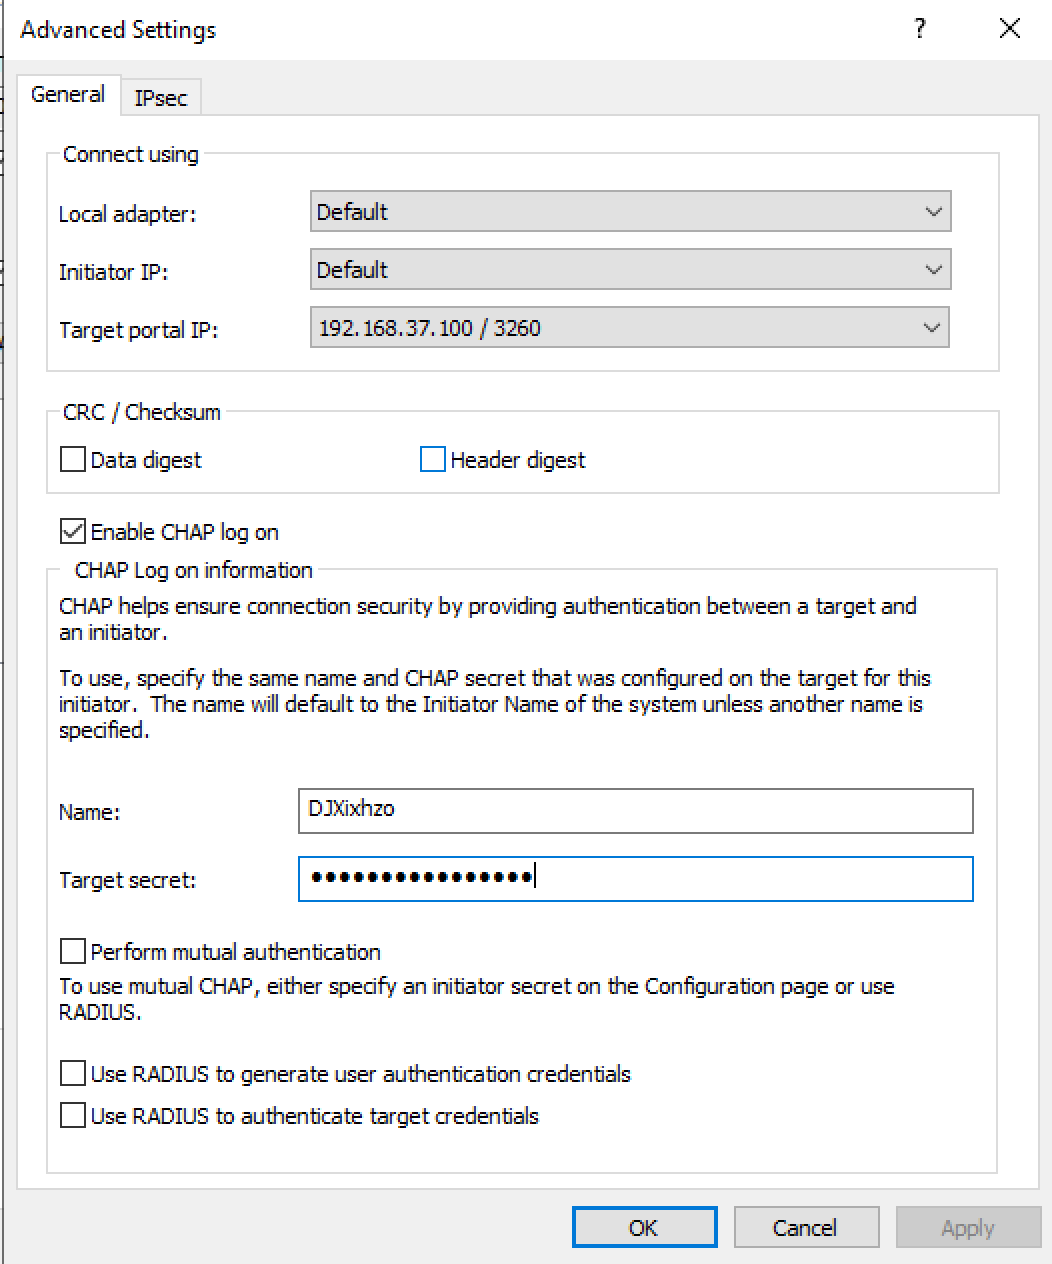
- Click on Advanced
- Set the flag Enable CHAP log on and set the Name and Target secret.
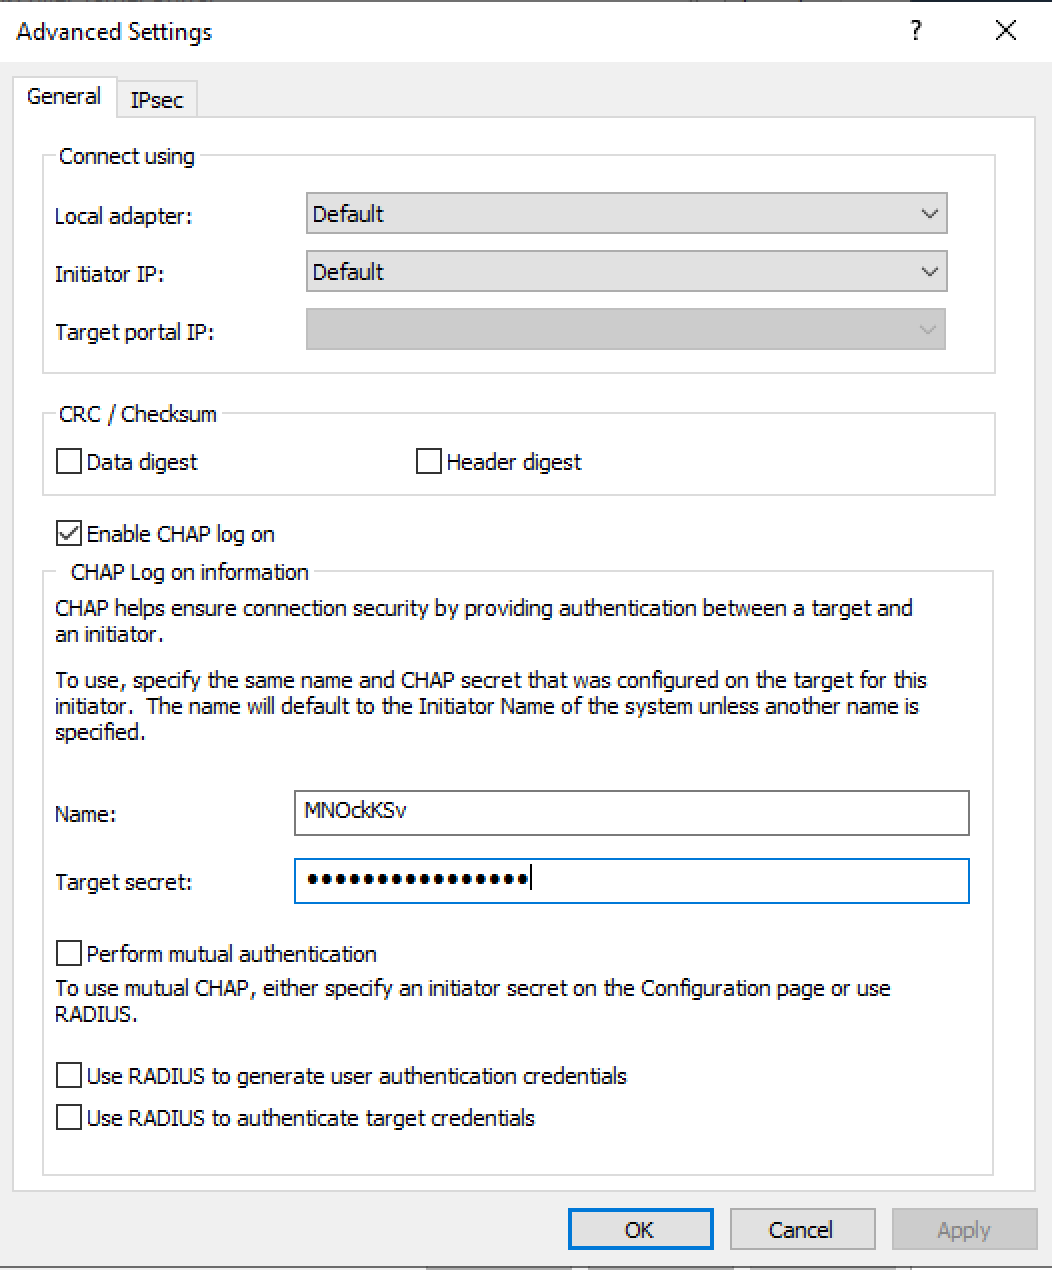
You can find this information on your iSCSI Initiator in the ESC as Target Username and Target Password
- Click on OK twice.
Your iSCSI Target Portal should be successfully added to the list.
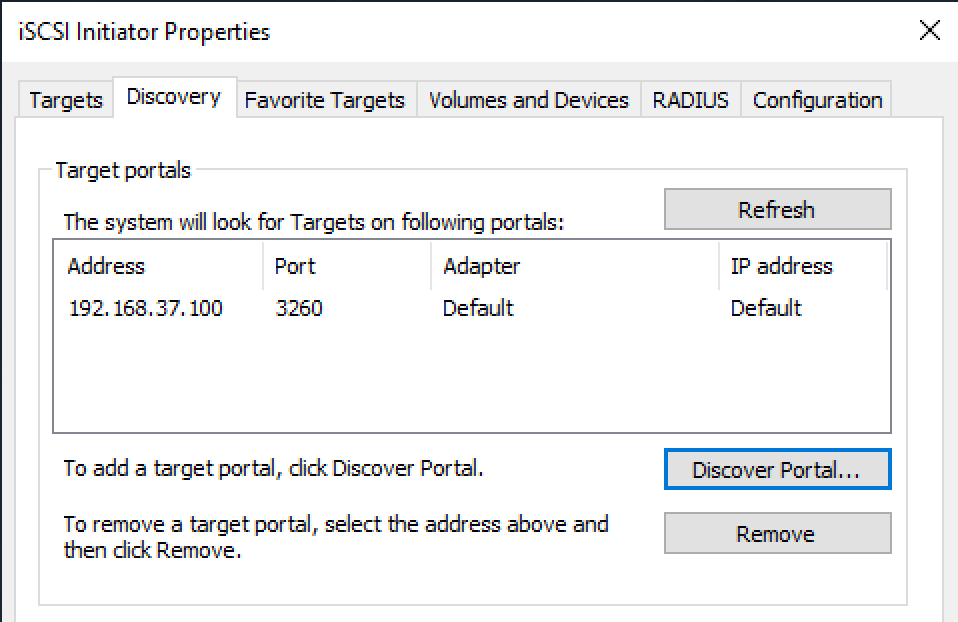
On the Targets tab you should now already see a discovered target.
Step 3 - Connect to the target
- Click on the target in the Targets tab under Discovered targets and click Connect.
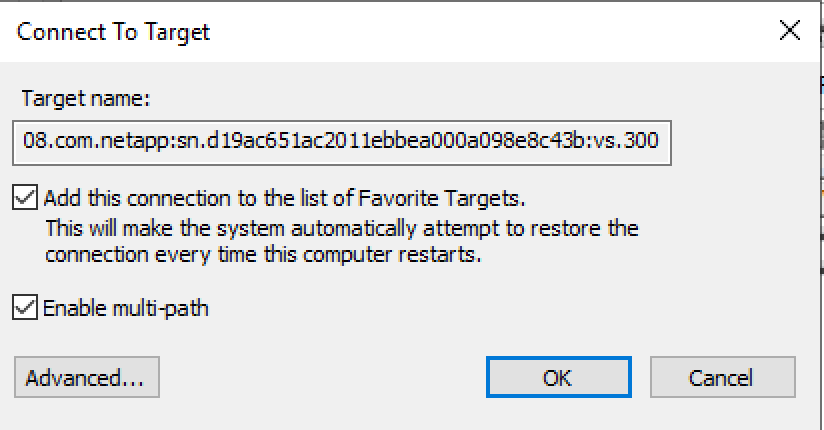
- Set Enable Multi-path and click on Advanced
- Select the first IP in Target portal IP
- Set the same CHAP logon details (password and user name) as in step "Add Target Portal"
- Click on OK twice
- Select the now connected target and click on Properties...
- Click Add Session
- Do steps 2 - 5 but with the second IP
Your iSCSI Target should be connected with two sessions, one for each IP, and you should see the disk in Disk Management.
Step 4 - Mount a disk
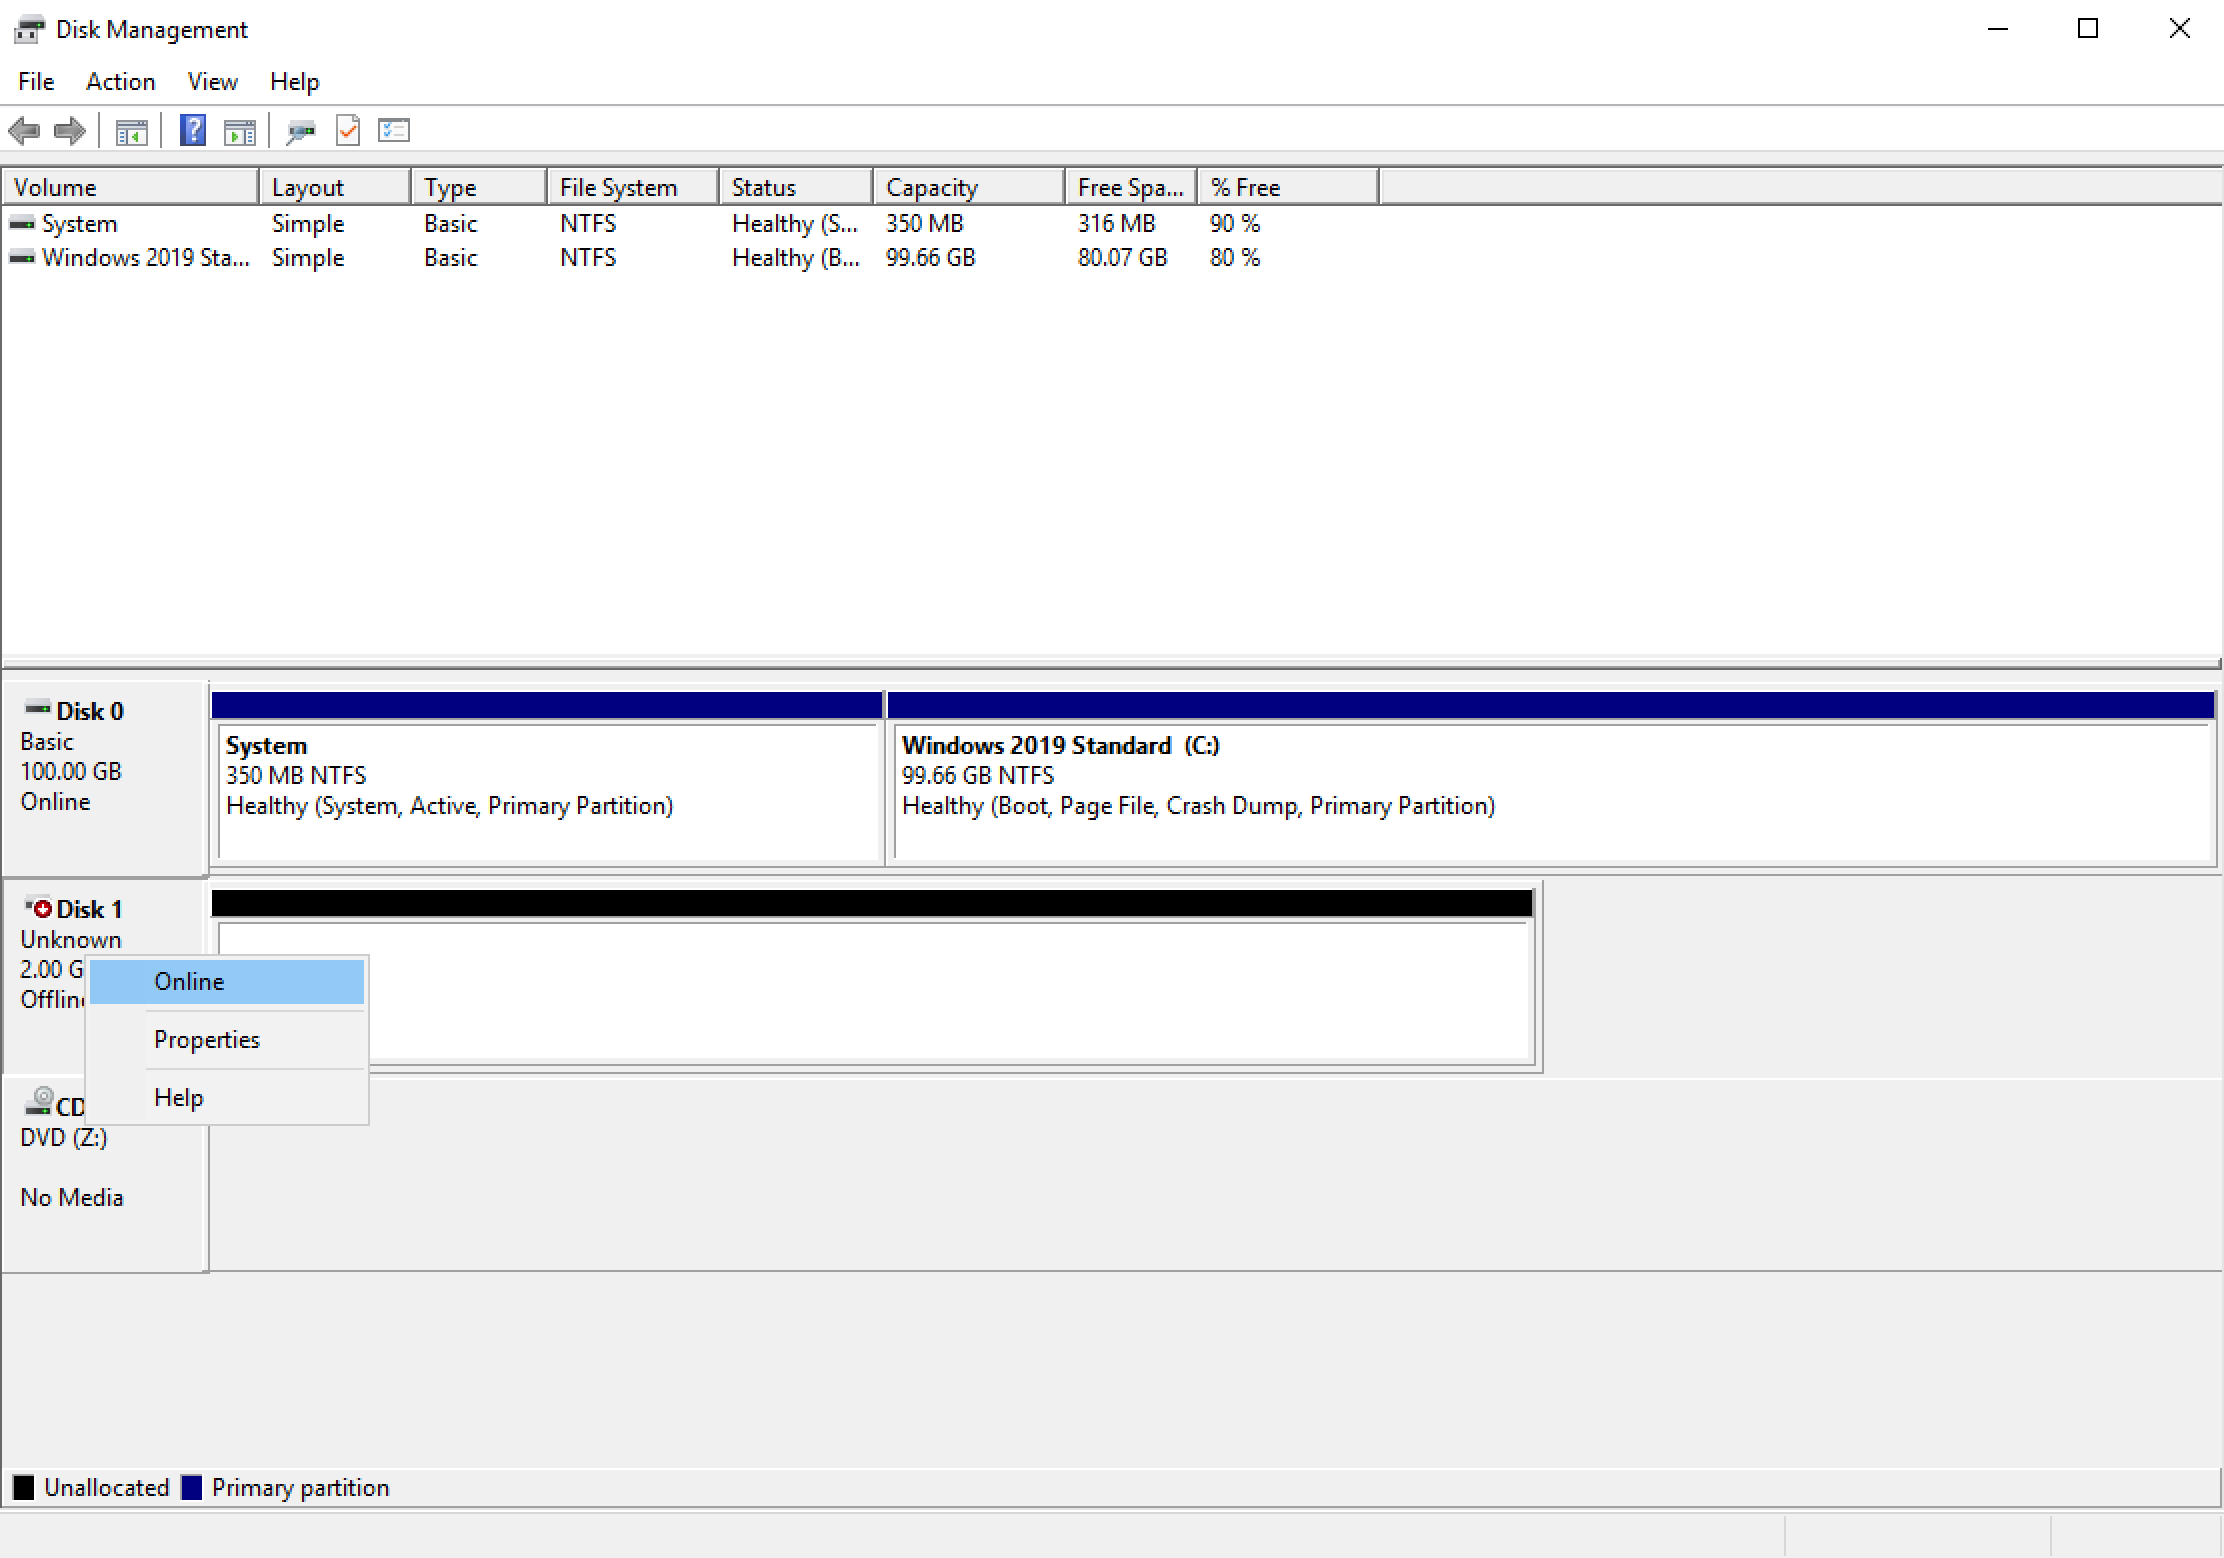
- Go to Windows -> Disk Management
- Look for a new Disk that is marked as "Offline"
- Right-click again on the disk and click "Online"
- Right-click on the disk and click Initialize Disk
Your disk should now be mounted and available for usage.
Connect to an iSCSI LUN (Linux)
Step 1 - Install Tools
Install iSCSI via yum:
sudo yum install -y iscsi-initiator-utilsInstall the Multipath Device Mapper via yum:
sudo yum install device-mapper-multipath -y
Step 2 - Add Configuration
Change the initiator IQN to the Initiator Name from your Initiator created in ESC.
vi /etc/iscsi/initiatorname.iscsi...or, as a best practice, copy the existing value from the file and create a new Initiator for it.
Restart the services like so:
iscsiadm -m node -U all service iscsid restart service iscsi restartUn-comment and update the below marked config elements in
iscsid.conf:vi /etc/iscsi/iscsid.conf# ************* # CHAP Settings # ************* # To enable CHAP authentication set node.session.auth.authmethod # to CHAP. The default is None. node.session.auth.authmethod = CHAP # <-- Uncomment this # To configure which CHAP algorithms to enable set # node.session.auth.chap_algs to a comma seperated list. # The algorithms should be listen with most prefered first. # Valid values are MD5, SHA1, SHA256, and SHA3-256. # The default is MD5. #node.session.auth.chap_algs = SHA3-256,SHA256,SHA1,MD5 # To set a CHAP username and password for initiator # authentication by the target(s), uncomment the following lines: node.session.auth.username = HKRP2G8v # <-- Add "Target username" as shown on LUN in ESC node.session.auth.password = eGuZU8HQT54xFILR # <-- Add "Target password" as shown on LUN in ESC # To set a CHAP username and password for target(s) # authentication by the initiator, uncomment the following lines: node.session.auth.username_in = aIWAmnUC # <-- Add "Initiator username" as shown on LUN in ESC node.session.auth.password_in = px56Pjq2maKzfCeU # <-- Add "Initiator password" as shown on LUN in ESC # To enable CHAP authentication for a discovery session to the target # set discovery.sendtargets.auth.authmethod to CHAP. The default is None. discovery.sendtargets.auth.authmethod = CHAP # <-- Uncomment this # To set a discovery session CHAP username and password for the initiator # authentication by the target(s), uncomment the following lines: discovery.sendtargets.auth.username = HKRP2G8v # <-- Add "Target username" as shown on LUN in ESC discovery.sendtargets.auth.password = eGuZU8HQT54xFILR # <-- Add "Target password" as shown on LUN in ESC # To set a discovery session CHAP username and password for target(s) # authentication by the initiator, uncomment the following lines: discovery.sendtargets.auth.username_in = aIWAmnUC # <-- Add "Initiator username" as shown on LUN in ESC discovery.sendtargets.auth.password_in = px56Pjq2maKzfCeU # <-- Add "Initiator password" as shown on LUN in ESC
Step 3 - Discover the iSCSI Targets
Discover the iSCSI Targets like so:
iscsiadm -m discovery -t sendtargets -p 192.168.37.164:3260 # Use the first IP of your LUN
Step 4 - Connect to the Target
Log-in to the iSCSI Target:
iscsiadm -m node --login
Step 5 - Enable / Setup Multipath
Set failback immediate to the Mulitpath Config by adding
failback immediatein the defaults:cat /etc/multipath.conf# device-mapper-multipath configuration file # For a complete list of the default configuration values, run either: # # multipath -t # or # # multipathd show config # For a list of configuration options with descriptions, see the # multipath.conf man page. defaults { user_friendly_names yes find_multipaths yes enable_foreign "^$" failback immediate # <-- Add this line } blacklist_exceptions { property "(SCSI_IDENT_|ID_WWN)" } blacklist { }Enable & Start Multipath:
# Enable
mpathconf --enable --with_multipathd y
# Show & Verify
multipath -t
# Start Service
systemctl start multipathd.service
Step 6 - Mount LUN
Create Partition
# Verify if it exists in the available block devices lsblk multipath -ll # Create a new Partition mkfs.ext4 /dev/dm-11 # Replace dm-11Mount Disk
# Mount Disk
mount /dev/dm-11 /mnt # Replace dm-11
# Verify if disk exists
df -h
Restore Backup
For a restore of a backup an incident ticket must be opened. The following information is mandatory:
- LUN Name
- Date of the backup
- Initiator Name